With each new release of an Elements product, Adobe takes into account new trends in the market such as all the different devices available now for taking both still photos and videos. Adobe also has surveyed their clientele to see what people would like to see contained in new versions of Photoshop and Premiere Elements. They have used this information in creating Photoshop Elements 10 and Premiere Elements 10.
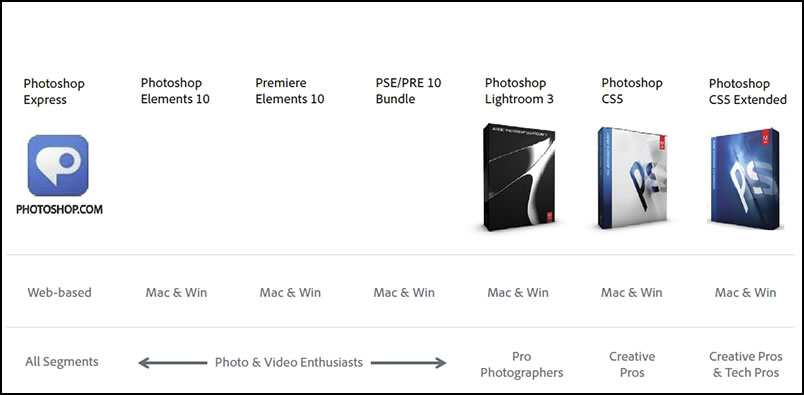
Before I start the review on Premiere Elements 10, I want to present a few screens courtesy of Adobe about the Photoshop and Premiere family of products.
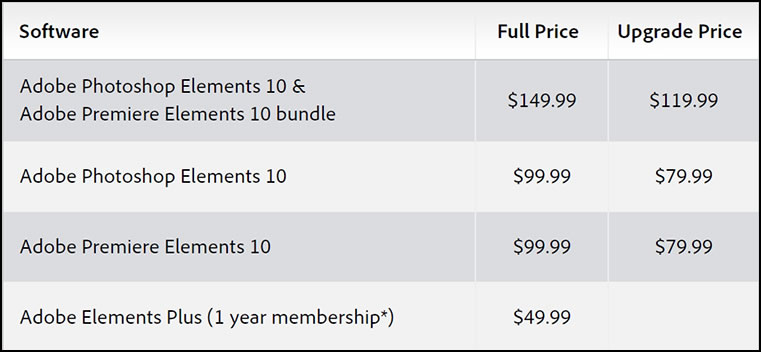
In celebration of Elements' 10th year anniversary, Adobe is offering an upgrade price on all Elements 10.
Last year around this time I reviewed Premiere Elements 9. I now have Premiere Elements 10. In this review I will focus on what is new and improved in Premiere Elements 10. Some of the features in Photoshop Elements and Premiere Elements are the same, especially if the refer to they Organize screen and the various panels associated with it. However, since each review is about one product, I will discuss the features in both reviews even if some of it is repetitive.
Photoshop Elements and Premiere Elements are software for, as Adobe calls them, the Family Memory Keepers who take photos and videos, want them to look their best, and tell a great story. I have found, also, that many people purchase these products as strict still image and video editing software because they are easy to use and present a full complement of tools. Both these products are intertwined but can be purchased separately. They share a common organizer and other features.

With Premiere Elements 10, you can employ the support for 64-bit Windows 7 if you have it. This enhances the speed and stability of editing large video files.
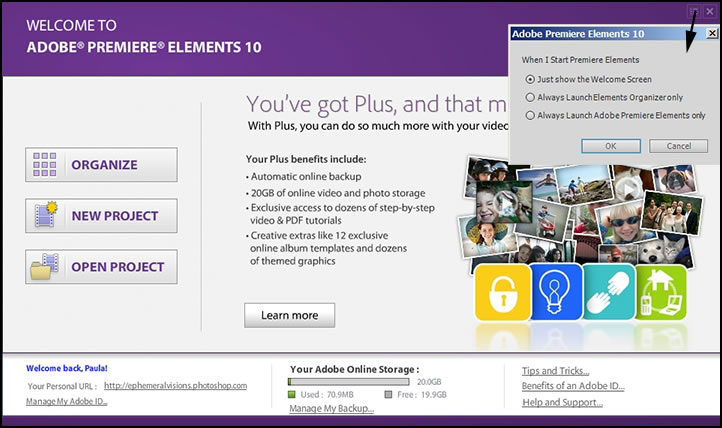
Below is a screen capture of the Welcome Screen. As with Photoshop elements, depending how I enter the program, the choices will vary.
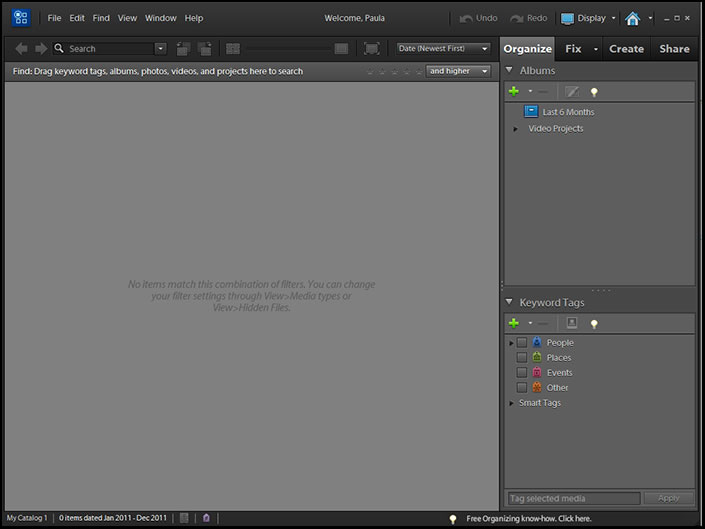
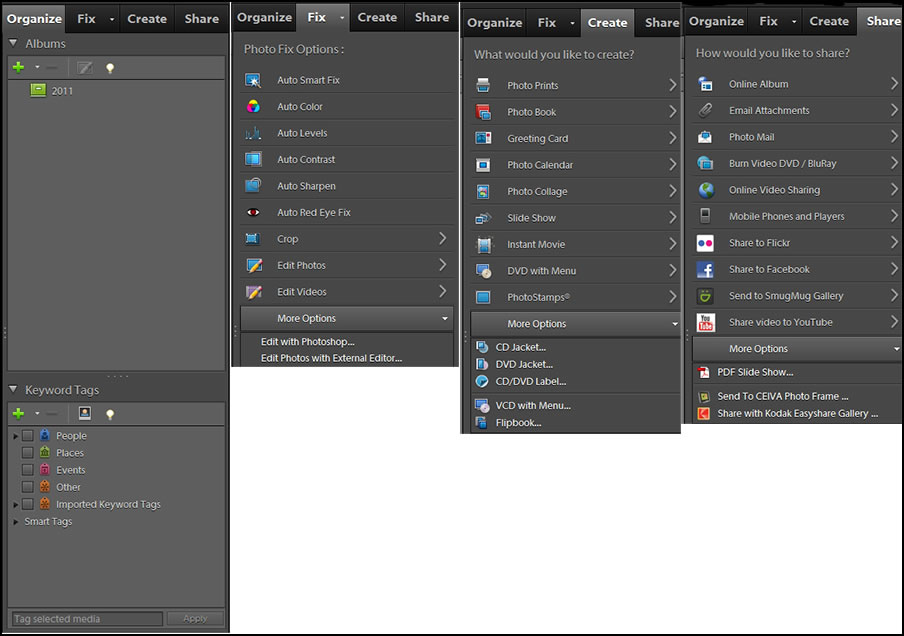
First I will enter Adobe Premiere Elements 10 through Organize. Since Photoshop Elements and Premiere Elements share an Organize panel, both panels are the same. You choose what you want to edit by choosing Edit Videos or Edit Photos. Then, either Premiere Elements or Photoshop Elements will open if you have both on your machine. Most of the commands under the Fix panel are auto fixes and refer to photos. So you need to open the Edit Videos command.
Here are the individual panels that compose this screen.
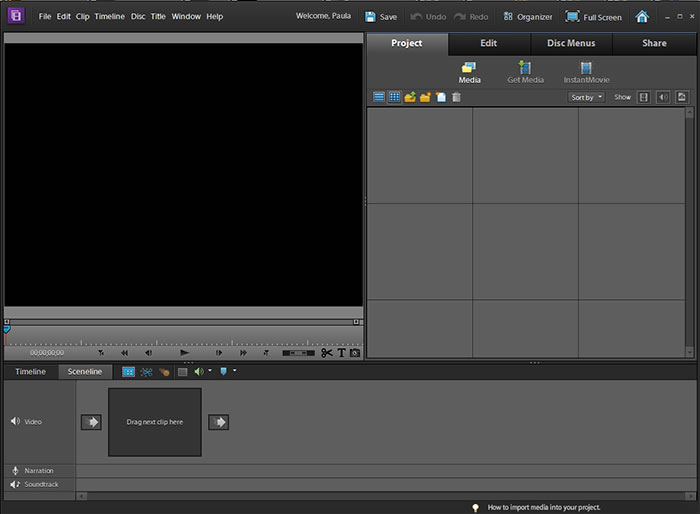
Now if I access the program through creating a new project or opening an old one directly, I see different screens. These different screens can appear confusing until you recognize their relationship to each other.
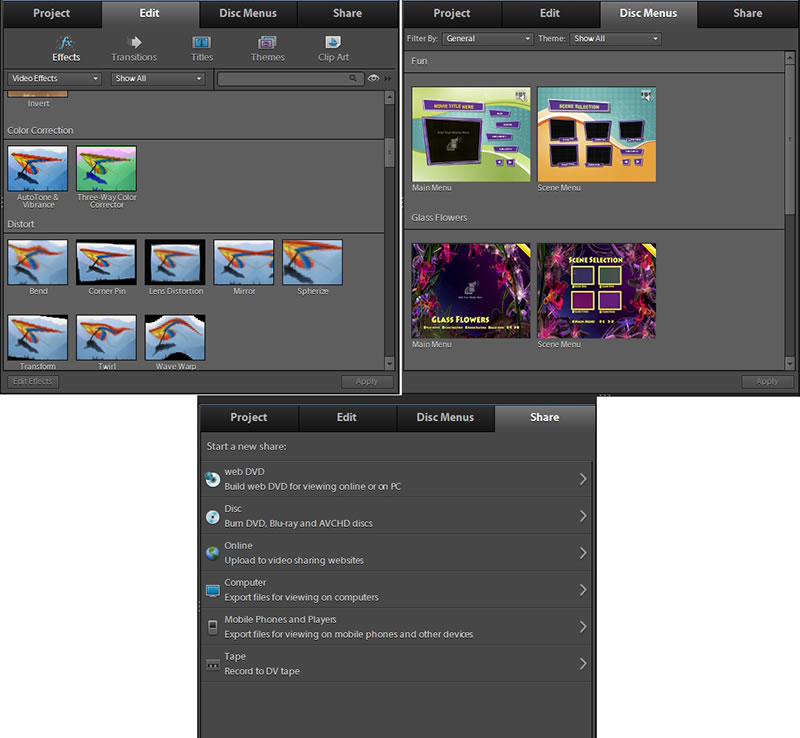
Below are screen captures of the Edit, DiscMenus, and Share panels. Notice on the Edit panel, the number of choices for different Effects.
Adobe Premiere Elements 10 has many new features. I will list and discuss them.
New in Organizing
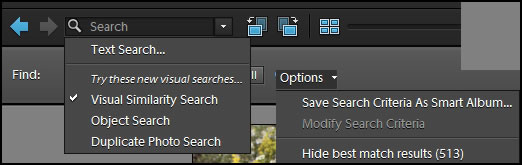
Quickly find photos of specific things—Want to find shots that include your surfboard, your Grandma's house, or the Eiffel Tower? Let Object Search automatically find your photos based on what's in them.
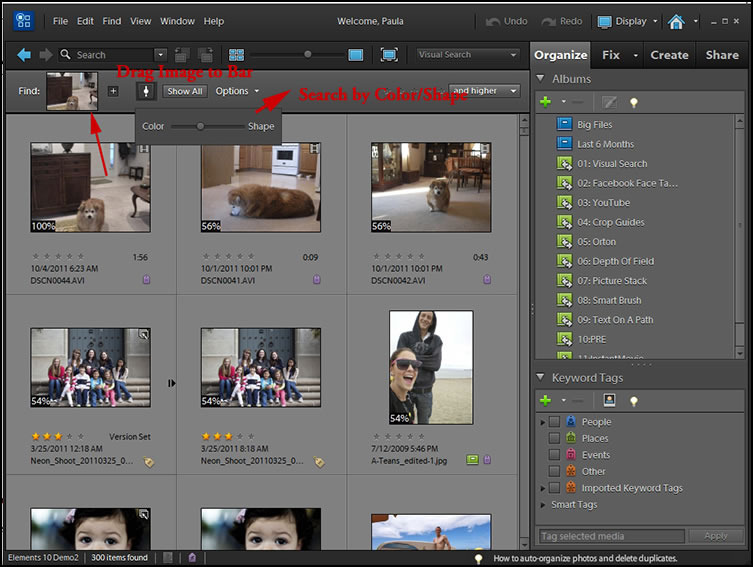
If you have many albums or even one loaded with images, it is very easy to find similar photos or videos. The program will even rank them as to how close they are to the original. Just drag the image up to the toolbar and choose your parameters for recognition. You can, also, refine the search and add more images. Never lose a photo again. You can, then, stack them. This stacking feature has been around for a while.
With the ability to find similar photos or videos, you can delete those that you don't plan to use. This is a continuation of the new searching ability in Photoshop or Premiere Elements 10.
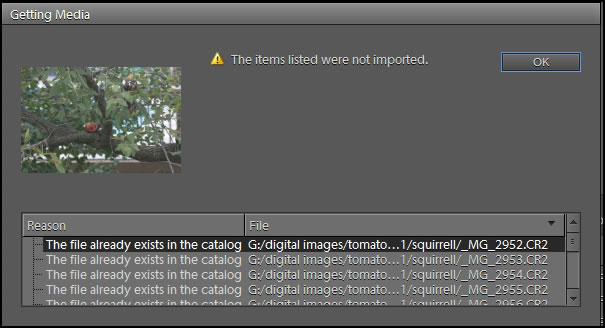
In addition, as a note, when I started a new album entitled 2011, I brought in a number of folders. It seems I had duplicated some of the raw images I was bringing in. The program detected those that I had duplicated.
Below is a screen capture showing how searches can be refined and made more specific.
Tag faster using your Facebook Friends list—Use your Facebook Friends list to quickly tag faces in your photos and easily share them on Facebook.
New and enhanced features have been added to increase your scope for making entertaining and polished movies.
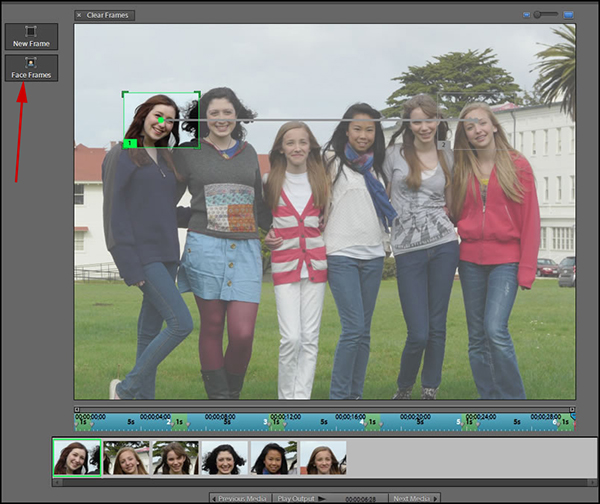
Turn photos into entertaining movies—Easily bring your photos to life using customized pan and zoom motions that add drama or fun to fit your story. Automated options can even do the work of finding faces and panning and zooming to them.
When you use the Pan and Zoom tool, with just a click of the Face Frames icon, you can create a series of shots which create a series of frames automatically of the faces as if you zoomed into the subjects for closeups with a video camera. As you run the "animation" you have just created, closeups of the faces will appear.The face of the shortest person did not show up fully. (This video that I used is courtesy of Adobe.)
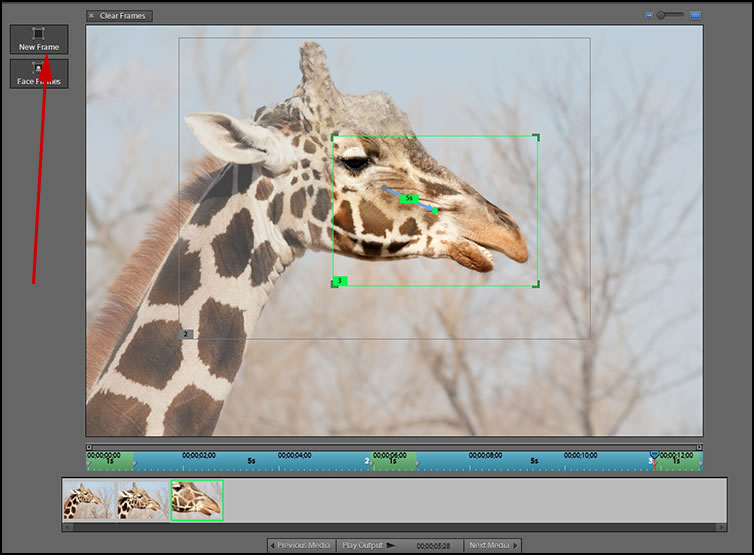
However, when I used the New Frame button instead of the Face Frames one, I was able to place the frames and get excellent results. For best results, you want to use an image that is not too small so that the "zoom-ins" look good. The image below was about 7 MB.
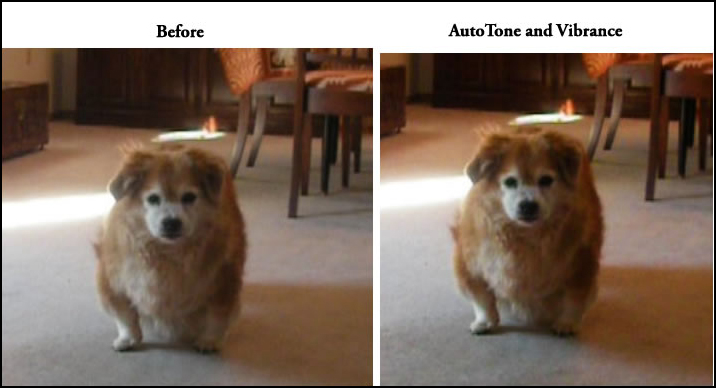
Easily enhance footage color—Footage color a little flat? Automatically boost tone and vibrance without affecting skin tones, or use sliders to adjust color with complete control.
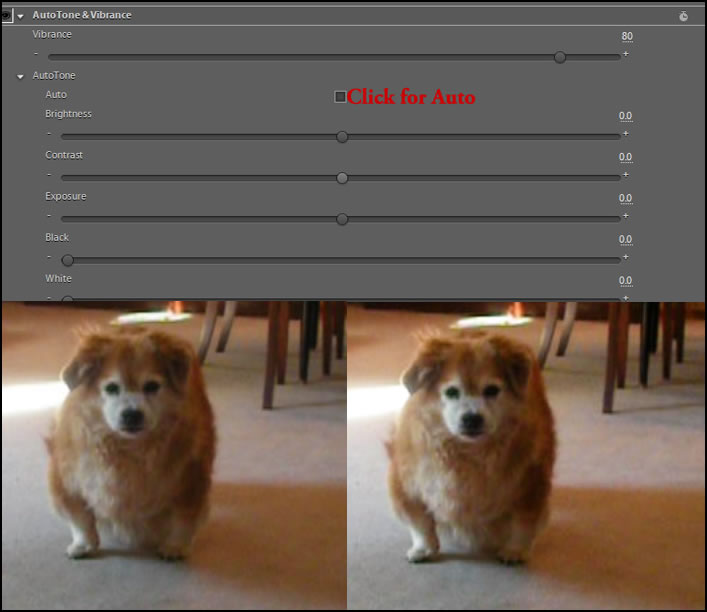
There are two new Effects to control the color and tone of your video. I was very impressed with both especially when I used the built in controls. Below the image was enhanced just by clicking on the AutoTone and Vibrance Effect. You can do it automatically or adjust these Effects.
As stated, you don't have to use the automatic control for AutoTone and Vibrance. Once you have clicked Apply, click on Edit Effects. I made some subtle changes to the image below.
Make subtle color corrections—Independently adjust colors in specific areas, such as highlights, shadows, and midtones for perfect color throughout your movie.
Using the Three Way Color Corrector, you can make changes to the highlights, mid range, and shadow tonalities by first clicking on Apply and, then, on Edit Effects.
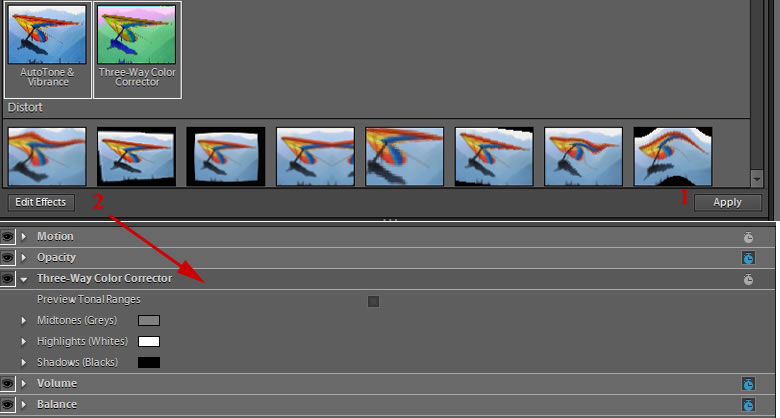
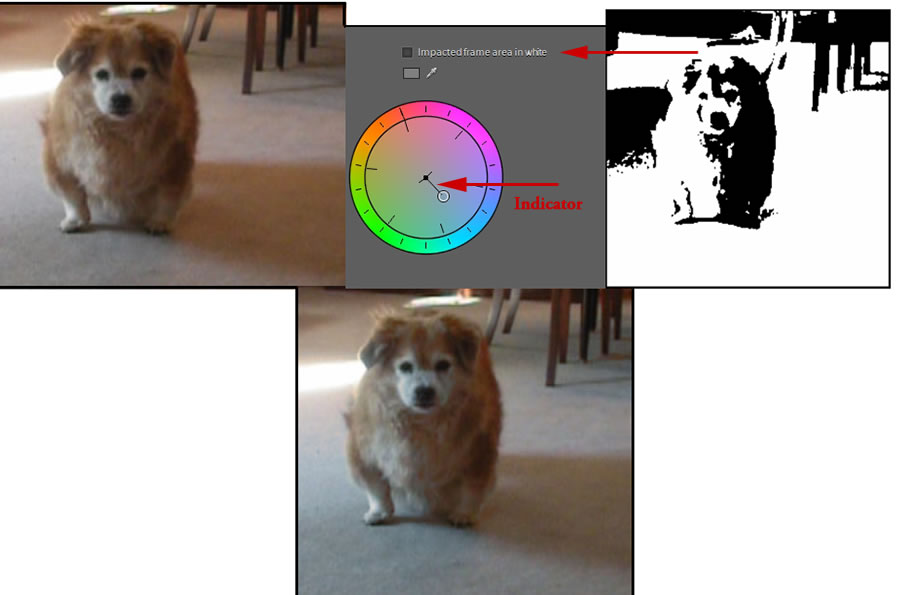
You have a lot of controls available when you use Three Way color correction. First you choose whether you want to change the tones in highlights, midtones, or shadows.

Then using the color wheel, you choose the basic change. By adjusting the length of the indicator, you can adjust the intensity. You can, also, use the slider underneath the individual color wheels. These changes will show up throughout the clip. The screen capture on the far right shows the area impacted by the change. This and AutoTone and Vibrance Effect are excellent tools and great additions to Premiere Elements 10. Both these Effects can enhance a lot of footage.
If you are using a Mac, you can now enhance your audio—Use SmartSound to add a variety of musical soundtracks that automatically adjust to perfectly match the length of your movie. Now available on Mac.
Sharing, also, has some new additions.
Get HD quality movies on standard DVDs—Burn Blu-ray quality HD movies to affordable DVD discs using standard burners. And Export in AVCHD format—Share movies in high-quality AVCHD format.
Adobe was aware that many users did not want to spend the money on Blu-ray discs nor have Blu-ray burners, so they created a way to burn high quality files on regular discs. I did not do a comparison between burning footage on a Blu-ray burner and on a regular DVD burner.
In addition to the new features, more themes, how-tos, and album templates have been added to Premiere Elements 10. Even more are available if you purchase the Plus version. You might have noticed that for a yearly fee of $49.99, you can purchase Plus later or save when you purchase it at the same time as either Photoshop or Premiere Elements 10.
Below are some of the benefits available if you purchase the addition of Plus.
• Protect precious memories with 20GB of storage for automatic online backup—enough to protect up to 15,000 photos or four hours of DVD-quality video6
• Boost your creativity with access to exclusive libraries of how-tos, artworks, and templates
• Learn new tricks with ongoing delivery of easy-to-use how-tos
Adobe Photoshop Elements 10 Plus, US$139.99. (Available on Adobe.com, U.S. only). Save US$10 off the first year of Plus, if purchased with the software.
My personal favorite additions are the new Color Correction Effects as well as the zoom capabilities for creating footage from stills. Remember, you can upgrade your copy of Adobe Premiere Elements this year on Elements' tenth anniversary. For more information go to Premiere Elements 10. And for more products, go to the Adobe website.