Creating a Mustache in Poser 5 or 6
In the April 2005 Curious Lab's newsletter, they printed my tutorial on Making Beards. It goes through the step by step process. See Making a Beard. on the Curious Labs' site. The tutorial can also be found on this web site. All the steps that are necessary are contained in that tutorial. This tutorial will show how to create a handlebar mustache on James. Since the concept and basic steps are the same, I will outline them here until I start styling the mustache at which point I will go into greater detail. If any of the steps are confusing, look at the Beard Tutorial.
This tutorial can be done using either Poser 5 or Poser 6.
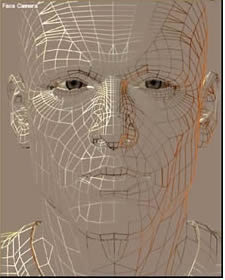
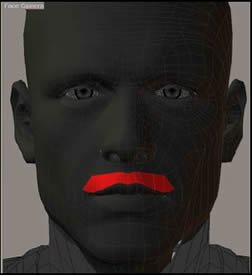
1 - Select James's face in Lt. Wireframe mode.
2 - Choose the face camera and magnify it as much as possible.
3 - With the Group Editor open, select the head of the person.
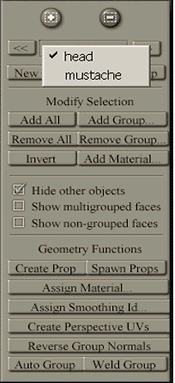
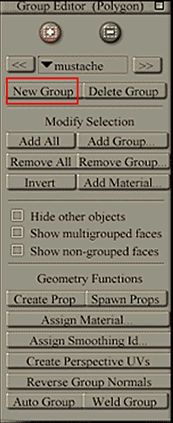
4 - Then select New Group and name it Mustache.
5 - You will now delineate the Mustache. Here is where it gets a little hard because as you try to delineate the polygons, the teeth and tongue polygons will appear and seem to cover the exterior ones you want to select. Just try to ignore them. Once you select the first mustache polygon, the rest are easy to choose.
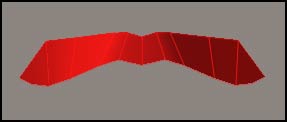
After you finish selecting the polygons for the mustache, if you select hide in the Group Editor, the mustache will look like this.
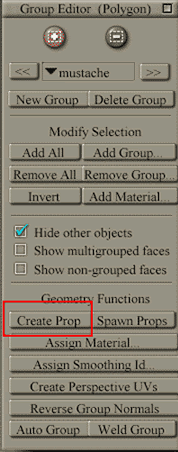
6 - After you have selected the polygons, save them as a prop and call it "mustache" again or anything else.
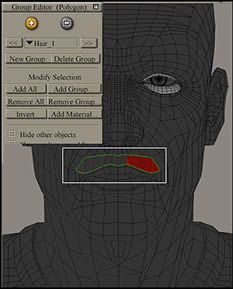
7 - Move to the Hair Room.
8 - Click on New Group and call it Hair_1 which is the default.
9 - Click on Edit Growth Group if the Group Editor is closed. It should still be open, however.
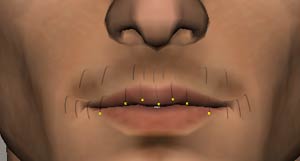
10 - With Hair_1 selected, marquee over the polygons that form the mustache.
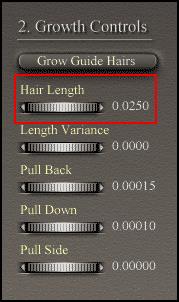
11 - Go to Growth Controls and set up the Grow Guide Hairs for 0.0250.
12 - When you set the Grow Guide Hairs to a new length, they should appear on the face. If they don't, click Grow Guide Hairs. It is easier to see and work on the face now if you switch from Lt. Wireframe to Smooth Shaded
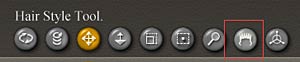
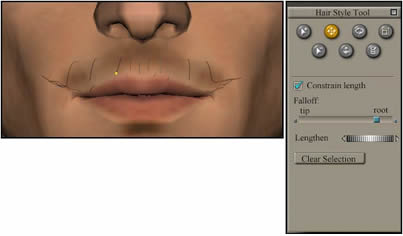
13 - Open the Hair Style Tools. Click on the head shaped icon.
Now comes the fun part - Styling the Mustache. How I style it is just a guide. These are the tools I have used in this tutorial.
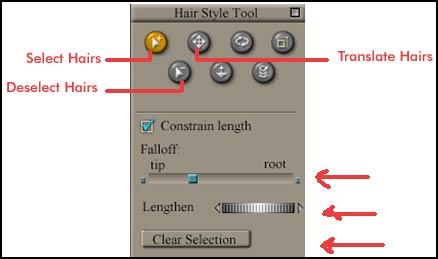
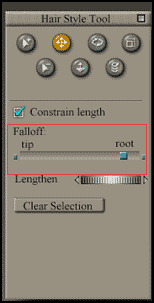
The little square under Falloff is vey important. It determines how the hair bends when bent using the Translate Tool. It bends on a continuum. At the two extrmeities, it either bends from the root of the guide hair strand or from the tip. I have included a small screen capture with many of the illustrations to show what I found was most effective for my styling of the mustache. The Constrain length is also important. When checked it keeps a strand from growing and, thus, changing as it is manipulated. Make sure that you always remember to Clear Selections when you are finished with one step and are going to start another using different strands of hair. The Lengthen dial moves toward the right to lengthen and toward the left to shorten.
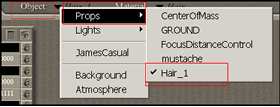
This is just an aside: You have to be able to select hair to work with it. Sometimes when you bring a figure into the Hair Room, it will show that a hair group has not been selected.

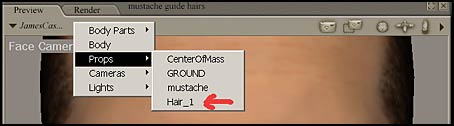
To rectify the situation if you know that the figure does have hair, find the Arrow Head icon in the upper left hand corner of the stage.
![]()
Then, click on it and another menu will open that lists body, body parts, lights, props, etc. Click on Props to open another menue. Here choose Hair_1 since we left the default name intact. The hair has been activated so you can use the Hair Style Tools.
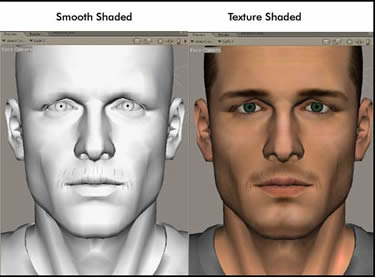
For the rest of the tutorial, you can work with your figure best, I believe, in either Smooth Shaded or Texture Shaded mode. Display>Document Style>............
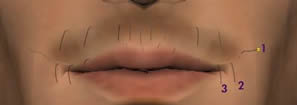
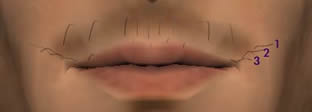
14 - Select the bottom hairs using the Select Hairs Tool leaving three on each side not selected. If they were selected inadvertently, remove them with the Deselect Hairs Tool. Now Shorten the selected hairs by turning the Dial to the left.
15 - Turn the side hairs up in the order shown. Do this on each side.
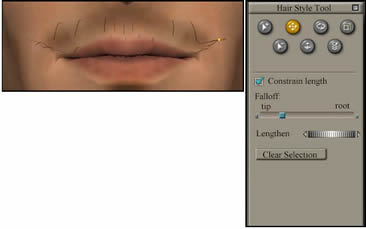
Keep the setting for the Falloff the same as the screen capture below.
16 - Line up the bottom hairs according to the picture to get the same effect as the tutorial or another way if you choose.
17 - Select the outside top hair on both sides of the upper lip and make them as long as in the picture

18 - Take the Translate Hair Tool and with the Falloff set as in the picture pull the tool up and a little toward the outside.
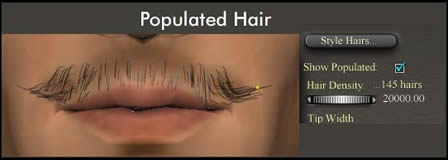
The best way to see how the mustache will eventually look is to make a random decision as to population density and check the box from time to time. Don't leave Show Populated checked when you go back to work. It can lead to confusion although I toggle Show Populated on and off frequently.
19 - Spread the upper hairs toward the outside and lengthen them a little if necessary. You are almost finished.
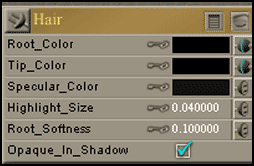
20 - Go to the Material Room and click on Object>Props>Hair_1.
21 - Set the colors as follows for a dark mustache without specular highlights. Also check Opaque_in_Shadow to give the hair roots more density.
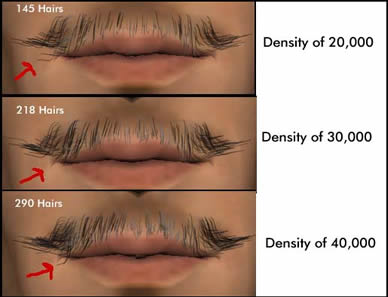
22 - The last choice one has to make is how to populate the mustache. In Poser 5, you choose the number of hairs. In Poser 6, you choose a density and that determines the number of hairs.
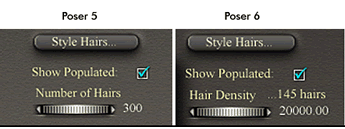
Also, the density does not just determine how full the hair looks, it also determines where some of the strands are placed. Look at the samples below.
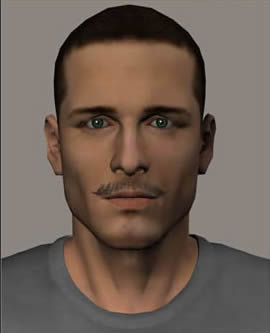
And finally the completed face using a medium default Firefly render.