Review of Adobe InDesign CS3
I'm beginning this review a little differently. Until recently, I had used InDesign for the occasional flyer. I had never created a document that required page numbers and and involved formatting. I needed to create a booklet, and I, also, started working with a friend on a new newspaper. He had used Adobe PageMaker for many years to publish numerous other newspapers.
We both experienced some interesting situations. We found that some basic aspects of InDesign were not easy to learn once you went beyond the pasting in of graphics and the putting in of headings. While the page numbering system has a fly out from the Page panel,
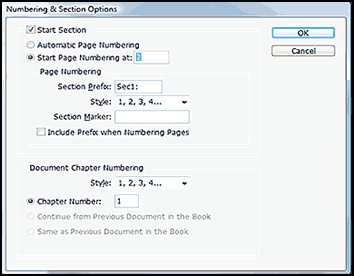
one has to know how to add markers to the master pages so that the numbers will progress accordingly.
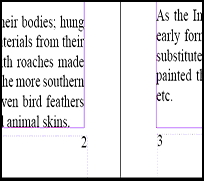
With that said, the harder aspects of InDesign are much easier to learn. For example, InDesign CS3 has a new method for creating booklets. All one does after creating the pages is to go to File>Print Booklet. And InDesign CS3 does all the work for you. I (or should I say InDesign) created a perfect 27 page booklet with all the pages in the proper order for folding or copying on a copier so that the pages could be printed two-sided.
Now, if I don't know how to do something in InDesign CS3, I can usually rely on the Help menu or, as a last resort, use one of the outside books I purchased. But much is self explanatory.
The basic tools in InDesign CS3 are very customizable. For example, the UI of InDesign CS3 is similar to Photoshop CS3, Illustrator CS3 as well as Flash CS3. Panels can now be docked for easy accessibility. They can be expanded or contracted to show just the icon of the panel or the name as well. The panels can be grouped together or docked singly.
The menus can be customized and then saved as special menus, so if you don't use certain of the functions on the panels, you can eliminate them when you create new ones. You can also custom color certain parts of them so that they stand out.
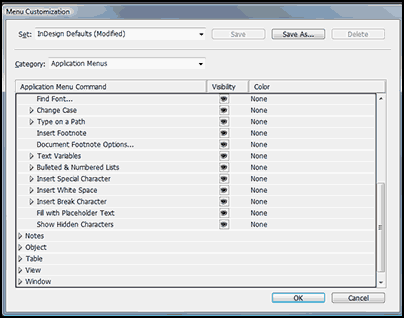
You can save these changes as a customized workspace and be able to call it up at will.
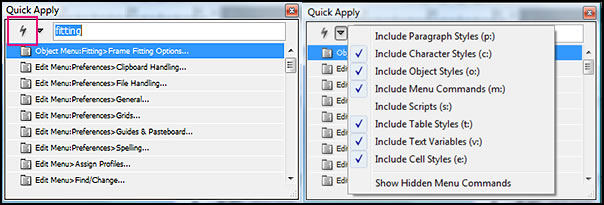
The Control Panel has been enhanced in CS3 to add more settings such as the ability to work with text wrap from it, object effects, the Quick Apply which now works similar to a Search Engine. Using Quick Apply, you type in a word and functions appear that apply to that word. For example, if I click with my direct select tool on a frame and type in the word "fitting," the first choices to appear will have to do with fitting content and frames. If I don't click on the frame, then the following will be highlighted: "Object Menu:. fitting> frame fitting options....." These are just a few of the new additions to the context sensitive Control panel.
InDesign CS3 has added a number of great productivity enhancements. No longer does one have to place files one at a time. One can choose a number of files and then place them wherever they belong.
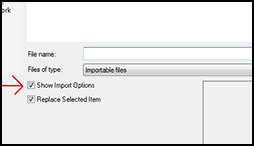
You can place another InDesign document in a new InDesign document and choose which parts are to be included. A very important box to be checked is the options box on the Place command.
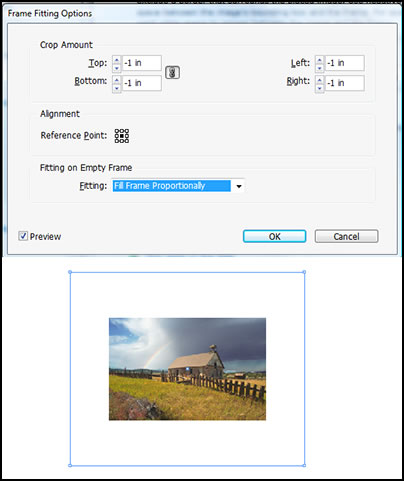
InDesign CS3 comes replete with multiple options for fitting content to frames. One can decide before the graphic is placed how it will fit by associating a fitting option to a placeholder so that whenever new content is placed in that particular frame, it will appear in the same position.
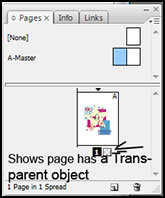
The Page panel now shows images of content of the individual pages to help in identification.
I want to spend some time on the the Pages and Links panel even though many of the options are not new to InDesign CS3. These two panels are very handy. Pages can be manipulated, scrolled through, moved, deleted, etc. through the use of the Pages panel.

If you use the Extra large thumbnails for the size of the pages, it is easy to see the images on the pages and then scroll through the pages using the Pages panel.
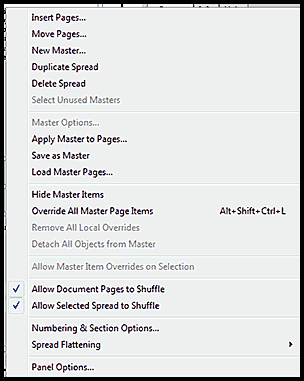
One can click on the "sort of" box like lines on the top right of the panel and access many commands that control how the pages perform.
The Links panel is another panel that is very handy to use. When one creates a piece of artwork, a link is immediately set up between the original piece of work and the work imported or placed on the InDesign page.

If you click on the pencil in the lower right hand corner of the panel, it will take you to a screen which will give you a choice of programs in which to edit the image.
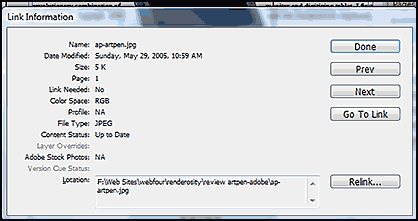
In addition, the Links panel contains information about the image.
One can take a regular InDesign CS3 file and export it to other media such as Dreamweaver, Cross-media Export>XHTML Dreamweaver. To have it appear correctly, it must have proper CSS framework which can be done through creating appropriate style sheets for Dreamweaver. Styles can be mapped to external style sheets. I found this to be disappointing. I would have assumed that it would have carried over some type of formatting although maybe that is not possible. For a casual user, this feature cannot really be used. I tried, as an experiment, to export a five page paper with columns. It came over without columns and the title a third of the way down the page. Unless one is exporting the same type of document on a continual basis, to set up external style sheets every time, I believe, diminishes the use of this feature.
One can, also, automatically generate layouts from XML by using XML Rules. For more information see this website and others.
To work with newspapers, Adobe has added a feature in Units and Measurements in Preferences so that measurements can be calculated from the left corner of a spread, for example, and not necessarily a page or a spine.
Working with styles has been improved in a number of ways in InDesign CS3. One is the ability to add styles to a table and to table cells. One no longer has to manually format tables and cells. One can format a table as one wishes and save that formatting as a style. Also through Nesting style looping, one can apply a sequence of styles within a paragraph with one click. To do this one has to understand working with defining paragraph and character styles.
Using Vista Ultimate 32-bit, InDesign CS3 rarely closed properly when the "X" on the top right was used to close the program. It did not seem to hurt the program nor create a problem. It never stopped working nor did it crash.

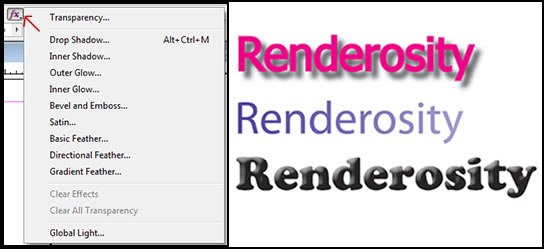
The ease in handling and accessing special effects are really nice in InDesign. What is also very useful is that these same effects can be accessed in other programs in the Adobe Design Premium suite. They can be accessed from the top toolbar Objects>Effects or from FX on the Context Sensitive Control panel at the top of the screen. Below I used: Drop Shadow, Gradient Feather, and Bevel and Emboss in their default settings.
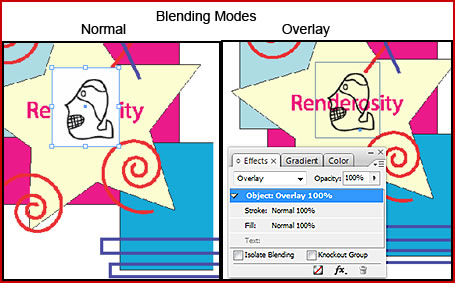
Using different Blending modes on the Effects panels adds a lot to what one is able to accomplish artistically within InDesign itself. Notice how I have taken a black and white image and using the blending mode of Overlay have made all the white areas transparent. These are the same Blending Modes that are found in Photoshop.
Text wrap can now be artistically done in InDesign CS3. It no longer has to be boring.
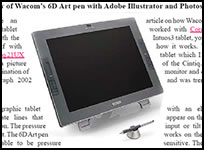
Using the new tools available, I have been able to create a frame that follows the shape of my object. There is also a text-wrap panel to set the distances from the object and other measurements
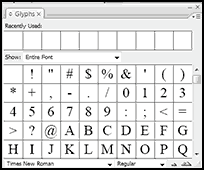
While InDesign CS2 had a Glyphs panel, there was not a space to show recently used Glyphs.
InDesign CS3 has added supports for long documents such as the setting up of Text Variables for long documents. There are default variables that are set up normally with all new documents. These can be modified.
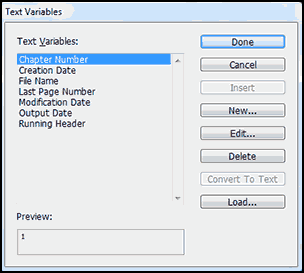
Below are just a few of the choices available when you choose Chapter Number.
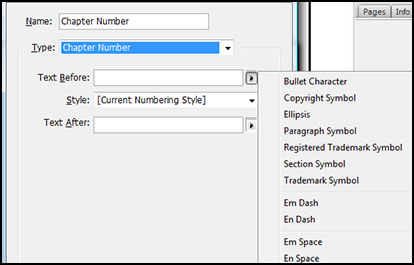
Advanced bulleted and numbered lists have been enhanced in InDesign CS3 with features such as converting lists to text, creating multi-level lists and more.
The Find/Change options have increased to include GREP, Glyphs, and Objects.
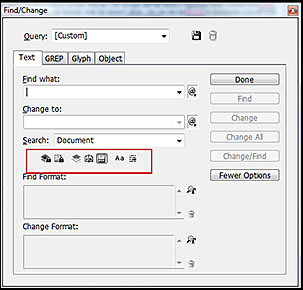
One can also include hidden layers, locked layers, footnotes, master pages, etc. by clicking on one of the images enclosed by the red box.
The scope of InDesign has increased with this latest version both in the ability to create artistically within the program and in the creation of long documents. Not having used it for a while, I found that initially some of the simplest things seemed obtuse while some of the more involved steps were easier to do. Because I was working with someone who was using CS2 I was going back and forth between the two versions. While I, of course, could do many of the same things in CS2, I found that I kept gravitating to CS3 because so much was just that much easier to accomplish and it had just that much more to offer.
In this review there was not enough space to describe all the excellent characteristics of InDesign CS3 so I basically limited it to the new features with a sprinkling of the old. If you are doing any type of layout work, it is a must for your tool box not only because as a standalone it is an excellent program, but because it interacts beautifully with other Adobe products.
For a free trial download click here.
The requirements for InDesign CS3 are:
Windows
- Intel® Pentium® 4, Intel Centrino®, Intel Xeon®, or Intel Core™ Duo (or compatible) processor
- Microsoft® Windows® XP with Service Pack 2 or Windows Vista™ Home Premium, Business, Ultimate, or Enterprise (certified support for 32-bit editions)
- 256MB of RAM (512MB recommended) for Windows XP; 512MB (1GB recommended) for Windows Vista
- 1.8GB of available hard-disk space (additional free space required during installation)
- 1,024x768 monitor resolution with 16-bit video card
- DVD-ROM drive
- QuickTime 7 software required for multimedia features
- Internet or phone connection required for product activation
- Broadband Internet connection required for Adobe® Stock Photos and other services
Macintosh
- PowerPC® G4 or G5 or multicore Intel processor
- Mac OS X v.10.4.8
- 256MB of RAM (512MB recommended) for PowerPC based system; 512MB (1GB recommended) for Intel based system
- 1.6GB of available hard-disk space (additional free space required during installation)
- 1,024x768 monitor resolution with 16-bit video card
- DVD-ROM drive
- QuickTime 7 software required for multimedia features
- Internet or phone connection required for product activation
- Broadband Internet connection required for Adobe Stock Photos and other services
The cost of InDesign CS3 is: Full from US $699.00 and an upgrade from US 199.00.
For more information on all Adobe products go to the Adobe website.