Using Multi-Pass Rendered Images in Photoshop
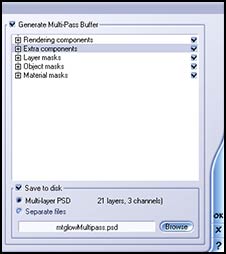
When I render an image in Vue 5 Infinite, I always select the multi-pass option. I end up with two files. A BMP file which is one layer and is the image file and a PSD file which is the multi-pass file which consists of many layers and channels.
Everyone has their own style of working. I find that I like to work from the BMP file which I immediately turn into a PSD file and use the multi-pass file for selections and to create layers in what I will call my Image file. (To reiterate, the Image file starts out as the BMP file.)
First, I look at the Image file and the multi-pass file. I used to work directly from the multi-pass file, but then found that my results were more controlled if I took a longer route. Also, even though I could manipulate the lighting using the various layers in the multi-pass file, I, again, got better results using the image file as my base. However, there is no one correct way and often the picture dictates the best method.
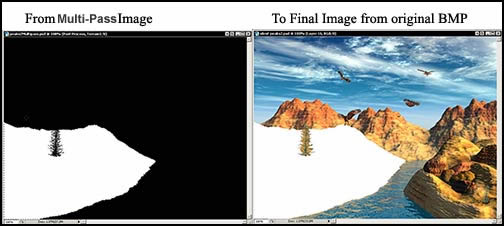
Below is the original image, initially as a BMP file. It is the same dimensions as the multi-pass file.

Step 1 -Look over all the areas and decide what you want to change. I broke it down into:
- left front terrain
- right front terrain
- water
- back mountain range (later I separated the mountains)
- sky or atmosphere
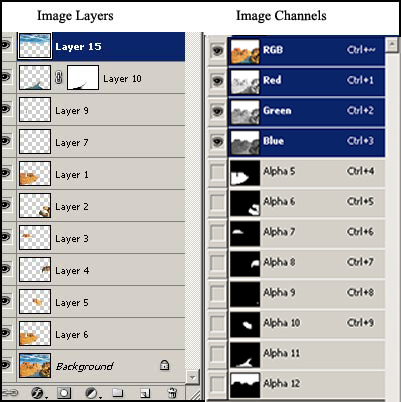
Step 2 - Familiarize yourself with the multi-pass channels since you will use them as selections for your Image file. (Ordinarily, this list would be one long column in Photoshop.) Notice that each object is in a separate Alpha channel and can be used to create a selection.
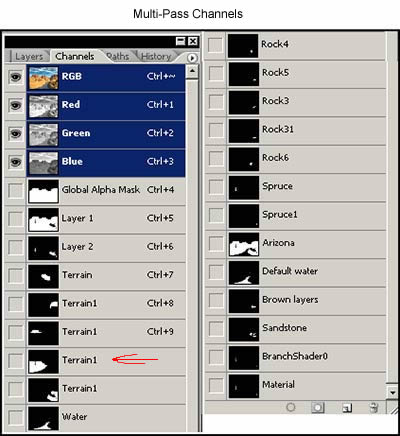
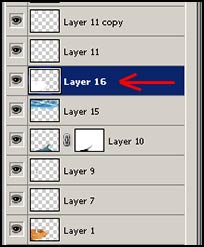
Step 3 - Go to the multi-pass Alpha channels and look at the name for the left front terrain (your left as you are facing the computer screen). Notice there is the same name for many of the Alpha channels. This is not a problem because you can select what you want visually. Highlight "Terrain1" that has the red arrow. It will open as the image below on the left.
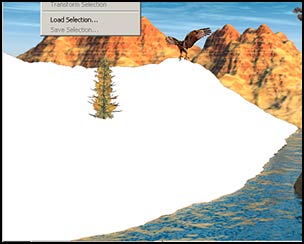
Step 4 - With that channel open, go to Select>Load Selection. Make sure that marching ants surround the white area. If the area is solid, you can click on the area with the Magic Wand. Here the pine tree branches would cause areas to be left out if I had selected it with the Magic Wand.
Step 5 - Go to Edit>Copy. With the Image (not the multi-pass open) do an Edit>Paste. The white selection should be on its own layer. Line it up with the left front terrain of the image file.
Step 6 - With the "white terrain" still on its own layer, do a Select>Load Selection
Step 7 - Do a Select>Save Selection.
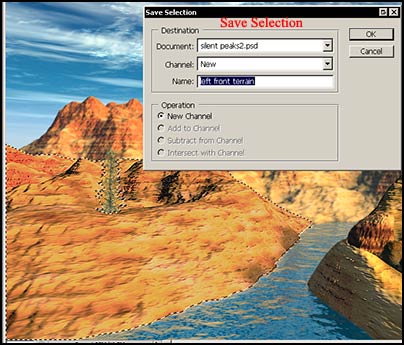
Step 8 - Now you can delete the layer with the white terrain because the terrain selection is saved.
As a note. Sometimes there are faster ways of accomplishing a goal. I have found that when I am creating for myself, often going about it a longer way gives me time to think and plan. I have also found that, initially, a longer way can lead to a greater understanding of what one is doing. Once a concept is understood and becomes second nature, then, corners can be "cut."
The following are the layers and Alpha channels I created from my "Original Image."
The end result looked like this.
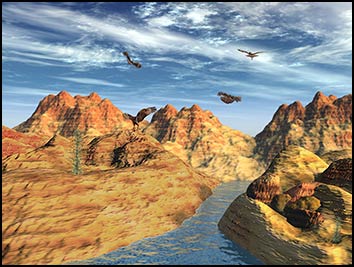
Below are the three files used and/or created. The difference are much more apparent in the larger versions.
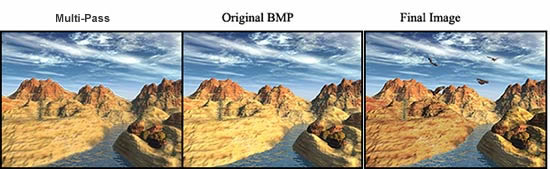
I use variations of this method on all my files created when I render in Vue 5 Infinite and it is applicable to any 3D program that can create an image file and a multi-pass file upon rendering.
![]()