Greenbriar Studio's CR2 Loader and Morph Tools for Cinema 4D 9
This is more of a presentation of Greenbriar Studio's CR2 Loader 1.6 and Morph Tools than an evaluation since I do not work with rigging figures in Poser or in Cinema 4D. When I started this project, I just wanted to see how Poser figures would load into Cinema 4D R9.52. Instead I ended up working with the CR2 Loader, Morph Tools and Conformer Software. I had a number of questions along the way, and David Matthews of Greenbriar Studio was immediately responsive and a pleasure to work with.
The CR2 loader will import PZZ, CR2, CRZ, HR2, HRZ, PP2, PPZ files from Poser 5 and 6 into Cinema 4D. There are different versions of the Loader depending on the Release of Cinema 4D. I am importing the Poser files into Cinema 4D R9.52. Below is the description from the Greenbriar Studio Cinema 4D Tools PDF. It can be found on page 3.
"This plugin creates a welded single mesh with no normal problems. Keeps all Poser named parts and
surfaces. Imports ALL morphs. Can join multi part morphs into body level morphs. Imports all material
colors, texture, trans and bump maps and settings, applying them correctly for Cinema 4D. When CR2
loader finds a texture map in use, settings are made for mode, Projection, setting the created UV Map
and loading the image. Imports the Poser skeleton and joint positions. Correctly parents all bones and
then ‘fixes’ and enables them. Loads multiple figures from a file and will also load props, each as a
separate object. Loads external props, props with morphs and inline geometry props. Loads Poser PZ3,
PZZ, CR2, CRZ, HR2, HRZ, PP2, PPZ files. Creates a plain or shaded set of weight maps as a start on
weight map creation. It also scales, moves, rotates and parents props and secondary figures that were in
the CR2 file."
When you initially open the Poser file to bring into Cinema 4D R9.5 (you are not using an import command but an open command), a series of screen choices appear. There are three facts you need to know: 1) Morph type must be set to TAGS so as not to overload Cinema 4D. This is especially true if you plan to use the Greenbriar Morph tools later. 2) You need to type in the exe file name for the version of Poser you are using under current Poser path. 3) You want to create a scratch or temp directory. To do this create any directory and put in any file you like as small as you can to just set up a path to the directory. Then all temp files will go to this directory. This might sound weird, but it is the way it is done. All settings can be saved. Then, the loader will ask to be directed to various Runtime texture files so it helps to know where files are stored.
I just worked with the settings above and did not experiment with weighting.
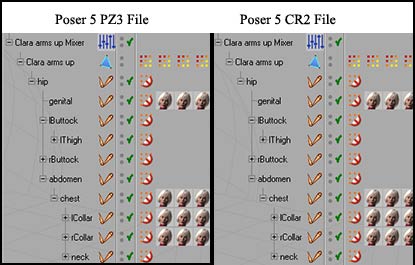
Not all files are created equally. I experimented with 4 different files. I loaded a PZ3 from Poser 5 and Poser 6 and a CR2 from Poser 5 and Poser 6. The CR2 files I created from the PZ3 files by adding them to the Poser libraries. Thus, I kept files relatively constant. Notice with Poser 5, the CR2 files and the PZ3 files break down the same in the Object Manager of Cinema 4D R9.52.
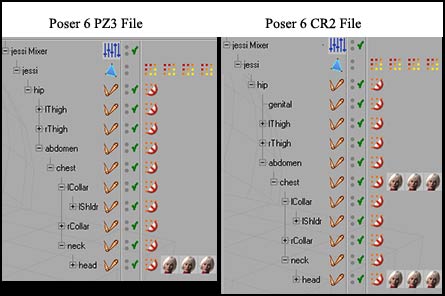
However, that is not the case with Poser 6. Here there is a definite difference between the CR2 file and the PZ3 file.
The CR2 Loader is mainly for CR2 files although it does work with Poser 5 PZ3 file formats. I did not test other formats than the CR2 and PZ3.
One of the very unique aspects of this Loader is that it can bring in boning ready to use.
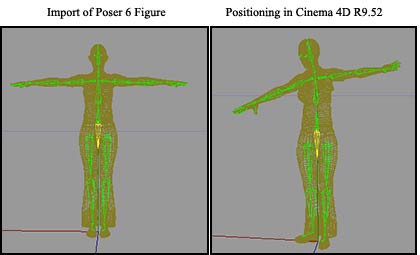
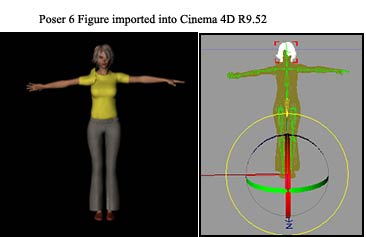
I could not bring in any type of dynamic hair with the CR2 Loader. However, I could bring in transmapped hair very well. The left screen capture shows Jessi from Poser 6 rendered in Cinema 4D R9.52 and the screen capture on the right is a preview in the same program.
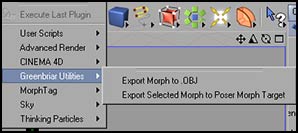
The CR2 Loader is tied into Greenbriar's Morph Tag System which I will also describe. On the PC, the options are found under the Plugin tools for both the Plugin CR2 Loader (Greenbriar Utilities).
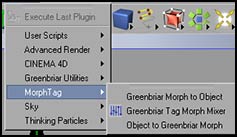
And for the Morph Tag System (Morph Tag).
Once you check Morph Type "TAG" in the loader, it checks the system and, if the Morph Tag System is installed, it loads the morphs as tags attached to the appropriate bone or the figure itself for body level morphs. If the Morph Tag System is not installed or if polys are selected instead of TAG, the program will become overloaded. I made that mistake, so it is useful to have both the Morph Tag System as well as the CR2 Loader.
When you click on the Morph Mixer Object, you automatically load the settings that were a part of the original Poser file (the blue lines with the sort of up and down arrows).
Also, the Animation Loader has been built into the Morph Mixer, so a Record Key and an Animation Key are part of the Morph Mixer interface. The Import Animation Button will connect to various Loaders so one can load animation in Cinema 4D. The Record Key creates a Key at the current time for each morph with a non-zero setting. MIMIC, Poser Pose, and animation and .bvh data can be imported. For more detailed information on Morph Mixer and the Morph System, click on the underlined Morph Mixer which will take you to a Greenbriar Studio Cinema 4D Tools information page.
There are two basic plugins and their components that I am discussing in this part of the article - the CR2 Loader that has integrated with it Greenbriar Morph Utilities and the Morph Tag System.
With the CR2Loader/Greenbriar Morph Utilities, one can export a morph to an OBJ. There are four possible modes to this and they make use of not only the Greenbriar Morph Tag System, but also the MOCCA Polygon System (if you have that module in Cinema 4D). Two of the modes are demonstrated here. The Tag to OBJ and the Body Part to OBJ. Look at the two commands below.
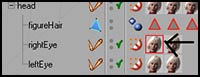
The Tag to OBJ generated one OBJ. In this case, rightEye.NewRightEye.obj
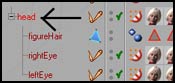
The Body Part to OBJ, in this instance the head, generated about 170 OBJ files such as: head.Blink_Left.obj, head.Angry_1.obj, head.Blink.obj, etc.
The other two modes are: choosing a Tag that is attached to the main figure object (a body level morph) and the export of morphs as OBJs that are polygon children of the main figure. The output here is a Poser readable morph OBJ file.
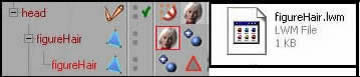
When I used the Export Selected Morph to Poser Morph Target, I ended up with an (LWM) file. It is not for use with Poser, but is a LW Morph file to be used with LightWave and the appropriate ToolBox application. It is in the C4D tools so as to be able to move a morph set to the appropriate Greenbriar ToolBox application. ToolBox I, II, and III are another set of tools by Greenbriar Studio not to be confused by the tools I am discussing.
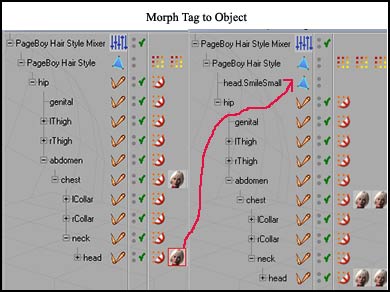
One can also select a morph tag, using the Morph Tag folder Plugins, and create an object from that tag.
The same way one can take an object and create a Morph Tag from it if it meets the requirements.
The last tool used was the Conformer. I added another "Jessi" to a scene and conformed Jessi #2 to Jessi #1.
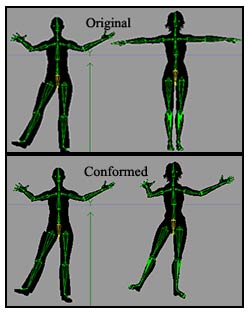
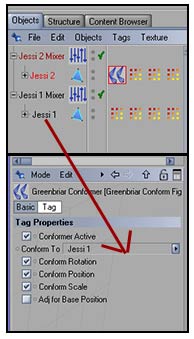
First I attached the Greenbriar Conform Figures tag to Jessi #2.

Second, I selected the Conforming tag which opened up the dialog box in the lower half of the screen capture, and, then, I dragged Jessi #1 into the space indicated by the red arrow. It is that simple.
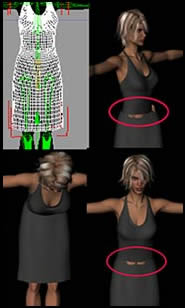
I also put a dress on the Poser figure, Jessi, and Brought her into Cinema 4D via the CR2 Loader. I activated the conformer, as below.
However, when I repositioned her, the dress ripped.
"Cinema 4D tools are compiled for R8.x and 9 (two versions) - PC and OSX only on Mac."
Cr2 Loader costs $125
Tag Morph Tools costs $125
Conformer costs $35
To learn more about these tools and see other tool sets go to the Greenbriar Studios home page. http://www.greenbriarstudio.com/3D.