How to Turn a Color Image into Black and White
There are many ways to turn a color image into black and white. I experimented with many of them and found that this workflow worked the best for me. I am using Photoshop CS3. I basically used the Image>Adjustment>Black and White command. But I did not just turn the whole image into black and white at one time. It is important to know that this image still remains an RGB image even though it looks to be grayscale.
Note: At the end of the tutorial, I will also show the appropriate panels to use in Adobe Photoshop Elements 6.
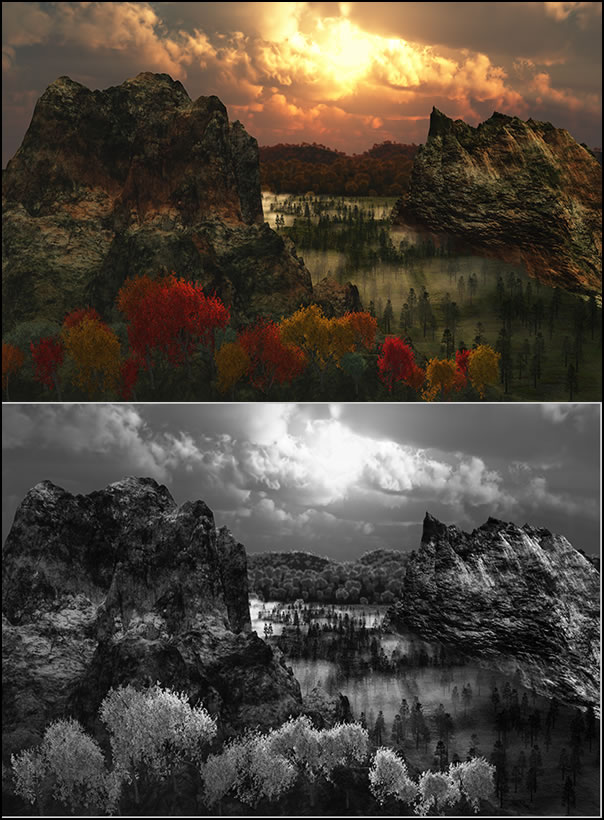
The image I will be using to demonstrate is one I created in e-on software's Vue 6 Infinite. For those who don't know, it is a 3D landscape creation program.
First I will show the original image and, then, the black and white final image created with Photoshop CS3 Black and White Conversion.
Second, I will show examples of other conversion techniques.
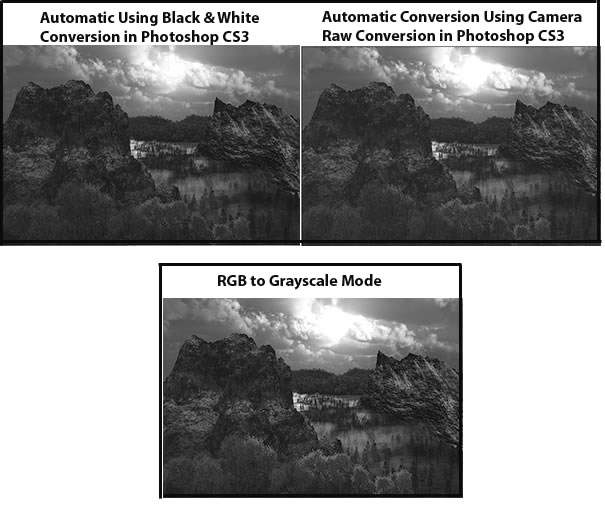
Notice, in any straight conversion the whole image blends, that is because while colors look different, their tonal values might be the same. If you have Photoshop CS3 or any program that has a conversion utility and works with layers, you can directly apply my methods. If your program cannot do this, then what you can do is work with the color image creating selections and modifying those through the brightness curve, levels, and hue and saturation. Once that is done, change the image to grayscale. Keep it in layers because you might have to make adjustment. The basic principles are the same. It is much easier using the Black and White Conversion in Photoshop CS3.
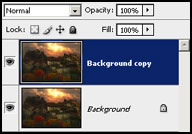
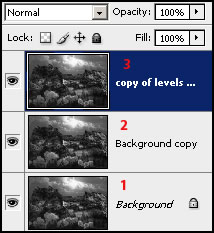
Step 1 - Using the color image, duplicate the background layer.
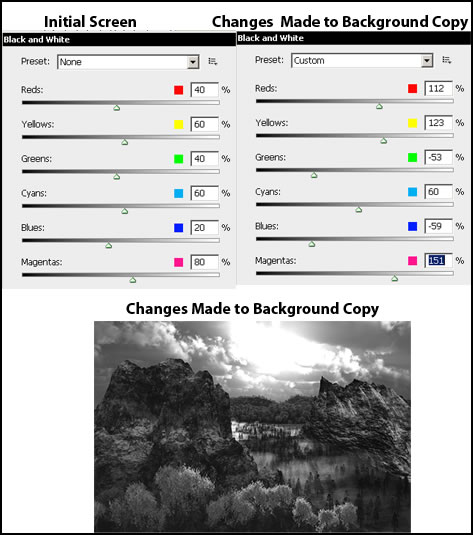
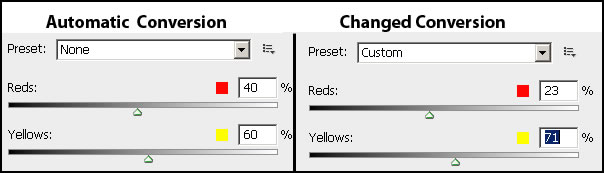
Step 2 - Using the background copy, go to Image>Adjustment>Black and White. You will see the following screen. Changes are made, initially, automatically. Presets are set to None. Now move the sliders to make global changes.
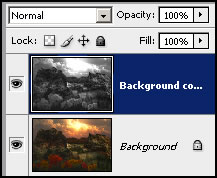
The image now has two layers - a color layer and a basic converted color layer (which looks black and white).
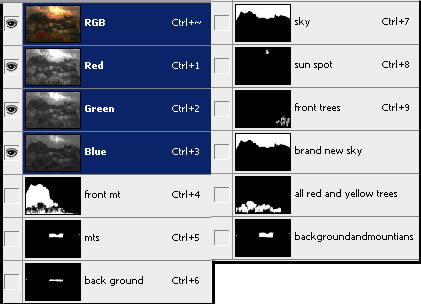
Before I began the conversion process, I made selections of the background and saved them as channels. Create your selection and save it by going to Select>Save Selection. Since I had made some in the original image when I was creating it in color, not all will be used here. For the purposes of the tutorial, I have taken the screen capture of the channels panel and divided it in half.
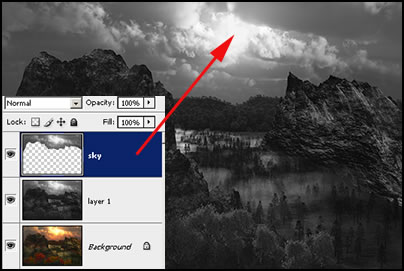
Step 3 - Now the fun begins. First look at the washed out sky. That is not acceptable, so we will change that using the colored layer (Background Layer).
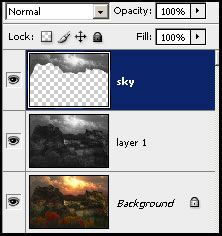
On the Background Layer of the image, I will go to Select>Load Selection>brand new sky. This will load my sky selection. Then, I will copy and paste it to a new layer.
It is still "colored". It will stay that way until I activate the conversion. Remember, go to Image>Adjustment>Black and White.
To see the Background layer, close the open eyes on the left, by clicking on them.
The sky layer was all washed out because I had concentrated on working with the tonal images in the foreground. Since I was working globally, by lightening those, I lightened the sky too much.
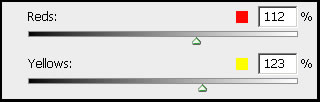
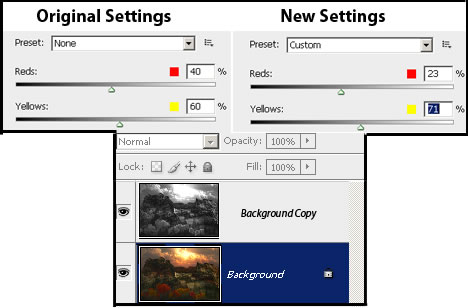
To reiterate, to correct the sky, I selected the sky in the Background Layer (colored layer) and copied and pasted it to a new layer. I made the conversion from that original layer so the numbers for the red and yellow will not be the same as the above. Remember, the ones above are from the globally converted layer (Background Copy).
Below are the original numbers.
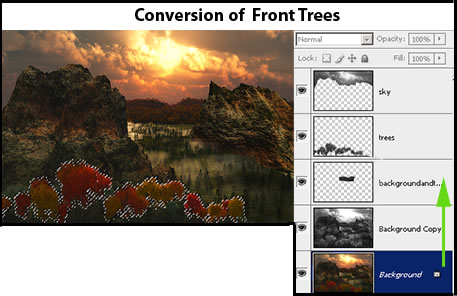
Step 4 - Next I wanted to change the tonal range of the front trees. I had already made a selection of them, so I did Select>Load Selection> all red and yellow trees. I, then, copied and pasted that selection above the background layer.
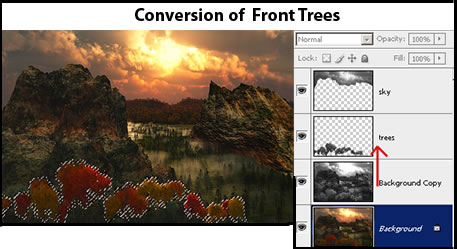
Once it was there, it will still look "colored" until I do the black and white conversion to that layer.
I did the same thing to the Background Trees because I wanted to change their tone. I think you get the idea. Keep building up layers as you work until you are satisfied with the basic tonal range.
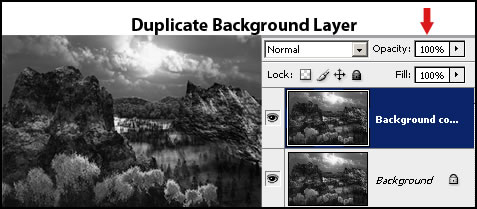
Step 5 - Now flatten the image and duplicate the background layer. I do this for two reasons. If I make a mistake, I can easily delete the layer, but more important, I can change the opacity when I am finished which allows the final layer to be modified further when the image is flattened.
Step 6 - Now I will treat the image as I do all my black and white images. First, I want to make sure that there are pure blacks in it as well as pure white. It will be hard to see the differences on the screen. To see if I have blacks and whites in the image, I go to Image>Adjustments>Levels. I, then, hold down the Alt key while clicking either the black or white arrowheads just below the Level's Histogram. If I don't have any blacks, I'll move the arrow to the right. If I don't have any whites, I'll move the arrow to the left. If the blacks are too much, I can lighten the whole image a little. And keep doing this until I am satisfied.
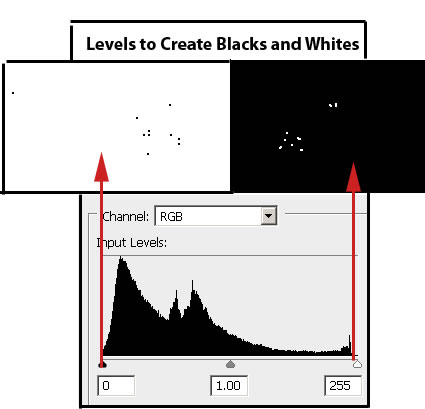
Then, I will look at the image and move the gray arrowhead to the left (lighter) or to the right (darker).
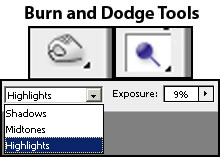
Step 7 - Now I will use the Burn and Dodge tools. Always start out with a very low number for the Exposure and choose the range for either Shadows, Midtones, or Highlights. You can be creative and choose Highlights when working in Midtones, etc.
Final Steps - When you are finished, if you are happy with the layer that you are working on, just flatten the two layers. If you think it might be too dark, for example, modify it's opacity until you are satisfied how the image looks. You will still be keeping the changes, just modifying their strength. Then flatten the layers.
Added Notes: You can make as many layers as you like and work with each until you are satisfied either flattening as you go or waiting until the end. For example. On my 1st duplicate layer (2), I can establish my blacks. I can then duplicate it (3) and establish my whites. I could also change the opacities of layers 2 or 3. Once satisfied with this, I will flatten the layers and start dodging and burning. I will also create layers for this as well. These are just examples of how you can work. There are other methods to accomplish the same goal without using so many layers. I like to use layers so I can modify opacities. Sometimes I use other Blending Modes than Normal.
When I was all finished converting the color image to black and white, I was still in RGB mode. If I wanted to, I could changed the mode to Grayscale - Image>Mode>Grayscale - and it would look the same.
Since some people use Adobe Photoshop Elements, I will show you how to use the features in Elements 6 to accomplish the same goal. They are a little different, but the same basic concepts can apply. The basic Conversion screen looks like this:
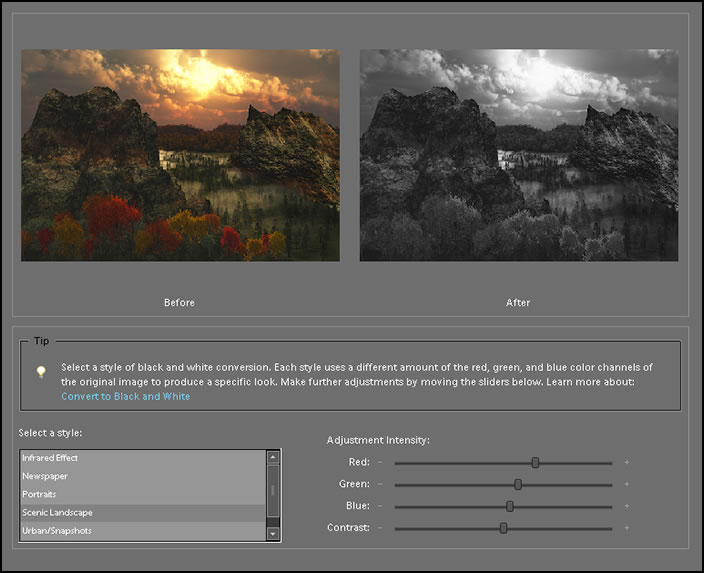
Since it does not have the same basic controls found in Photoshop, you must remember that CMY and RGB colors are complementary. For example, if I increase the red, I am decreasing the cyan.
Cyan.......................Red
Magenta...............Green
Yellow....................Blue
So use the controls with that in mind and proceed as described for Photoshop CS3.