I will be using the Tiffen Dfx v3 Photoshop plug-in in Adobe Photoshop CS5, Adobe Photoshop Lightroom 3.5, and Adobe Photoshop Elements 10. There are a lot of new features in version 3. The name Tiffen evokes the image of the glass filters first for black and white photography and then for color photography that many of us relied on for years. A few years ago, Tiffen introduced a filter set for the computer. Now they, also, have a set for the iPad which I will be reviewing in a separate review at a later date.
The Tiffen set of filters in the Dfx v3 Plug-in is comprised of 125 different filters. These, in turn, have many customizable presets attached to them as well as the ability to change the parameters of the individual filters. The number of parameters is dependent on the filter. The highlights from the Tiffen website are:
- "125 individual filters
- Thousands of customizable presets
- Simulation of Tiffen glass camera filters, specialized lenses, optical lab processes, film grain, exacting color correction as well as natural light and photographic effects
- Rosco and GamColor Gel libraries
- Rosco and Gam Gobo libraries for lighting effects
- Paint system that includes Black/White, Blur, Clone, Color, Eraser, Mosaic, Red-Eye, Repair and Scatter brushes
- Layering system for multiple filter application
- Sophisticated but easy to use masking tools
- Variation generator for effect parameters
- 8 or 16 bit image processing
- Exchangeable Image File Format (Exif)
- Multi-processor acceleration"
On the basic level, the filters can be used globally by choosing a preset. On a more advanced level, one can use the filters and change the parameters attached to each one. If you want to use a more advanced system, you can stack them. In addition, with all of them you can create masks and, thus, selections so that only parts of your image are affected or changed.
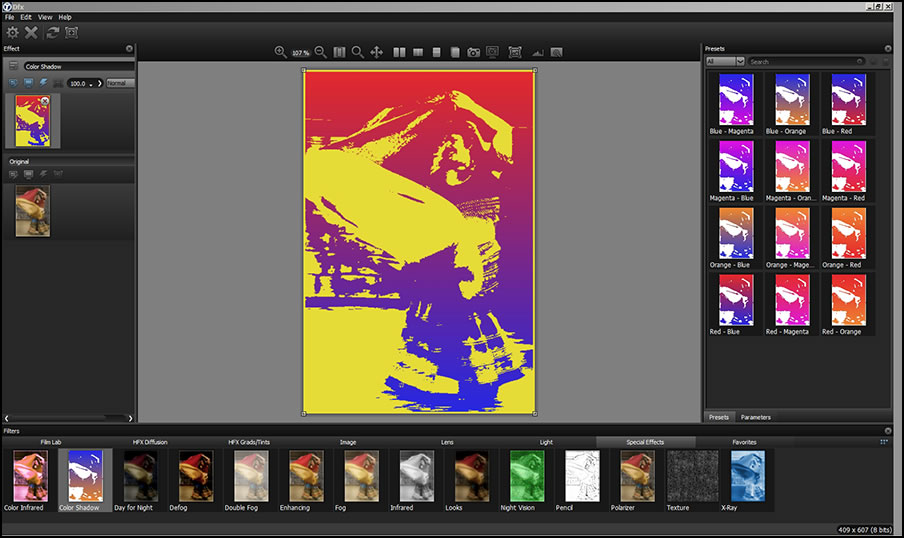
There are many configurations you can work with. Below is the default configuration. If you make a lot of changes, you can always go back and reset it to the default layout.
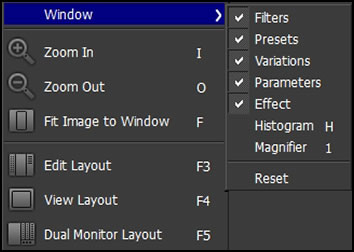
These show the commands found in the upper left hand corner of the interface.

View>Window allows you to set up the interface as you wish. As a note, most of the icons are in grey and blend with the background. There are some very powerful commands accessed by these icons. Get to know the choices by hovering over them with your mouse.
The screen below is an important screen if you don't want to use a straight preset. You can use a preset as a layer or adjust one and save it by right clicking on it and renaming it. You can store your favorites under Favorite and your own creations or modifications under Custom in the Preset drop down menu. It is helpful to read the guide that is accessible from the help menu.
There are a number of unique new specific purpose plug-ins in version 3. I will give visual examples of many of them.
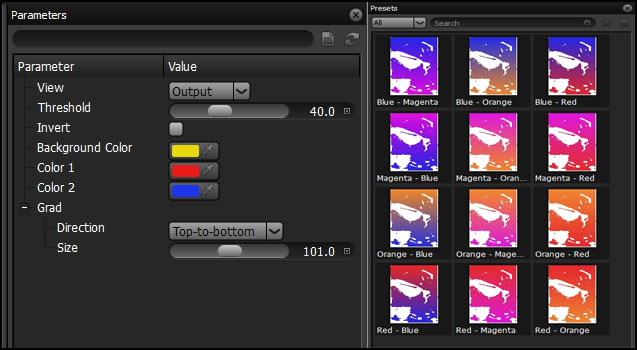
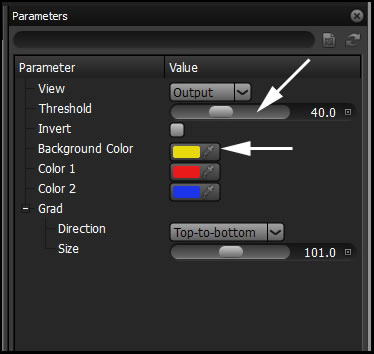
Color Shadow
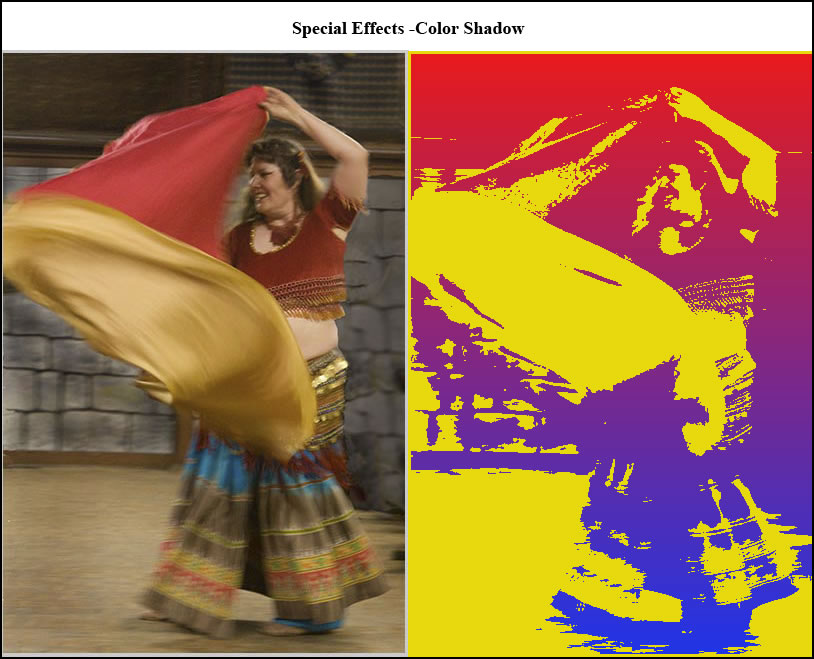
I changed the parameters for threshold and the white color to yellow. It was amazing to see how the image changed.
DeBand acts as a "smoother" and smooths out banding in a sky, for example. The next few new filters act to correct images that have "issues."
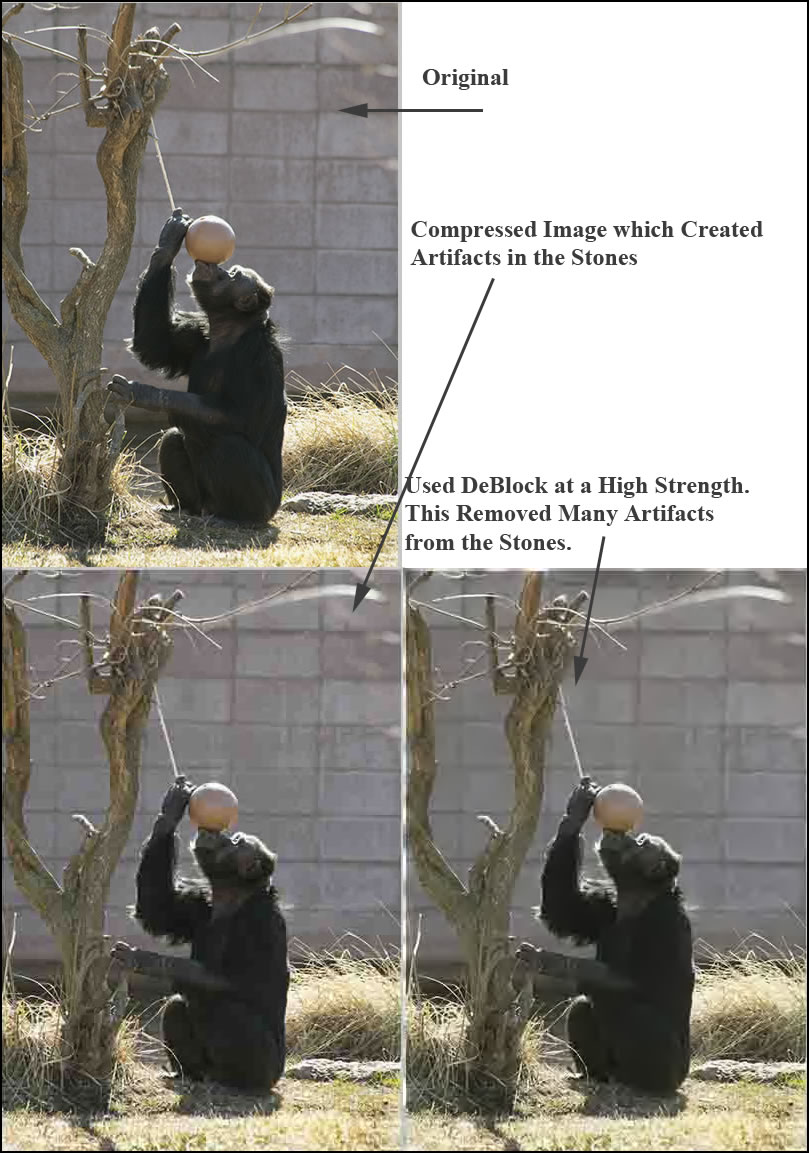
DeBlock works with images that have artifacts from being overly compressed. I compressed this image to create the artifacts and, then, removed them with DeBlock.
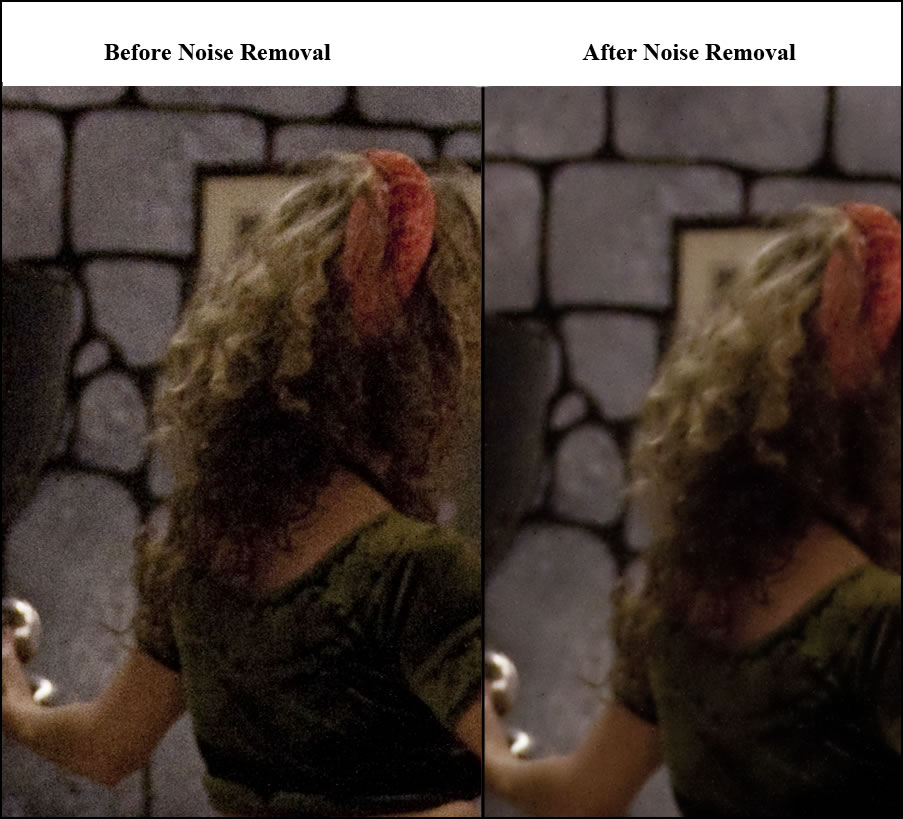
DeNoise removes the noise from an image. The parameters have to do with the strength of the noise removal.
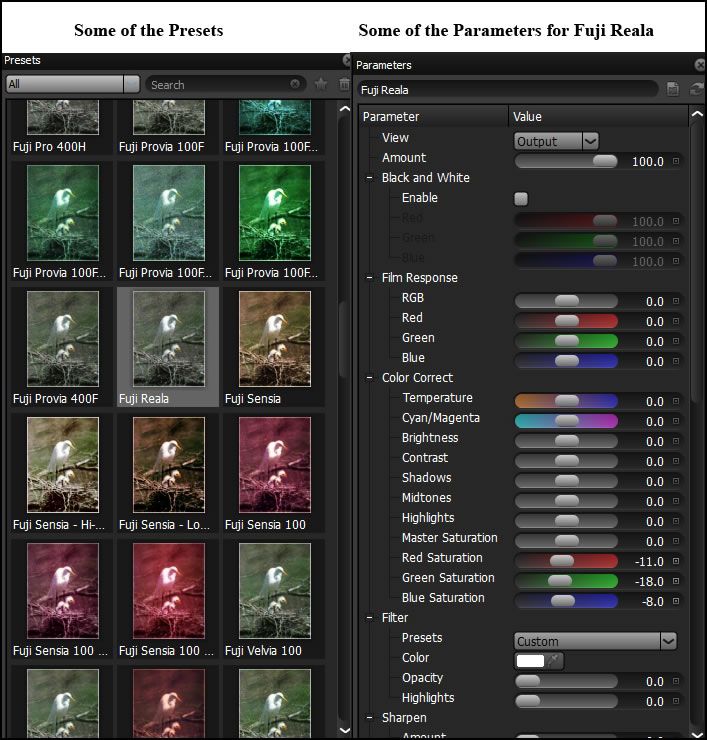
There are new film stocks that simulate 113 different color and black and white films under differing conditions.
There are a number of filters that change how light is represented. Some of the new ones are described as follows:
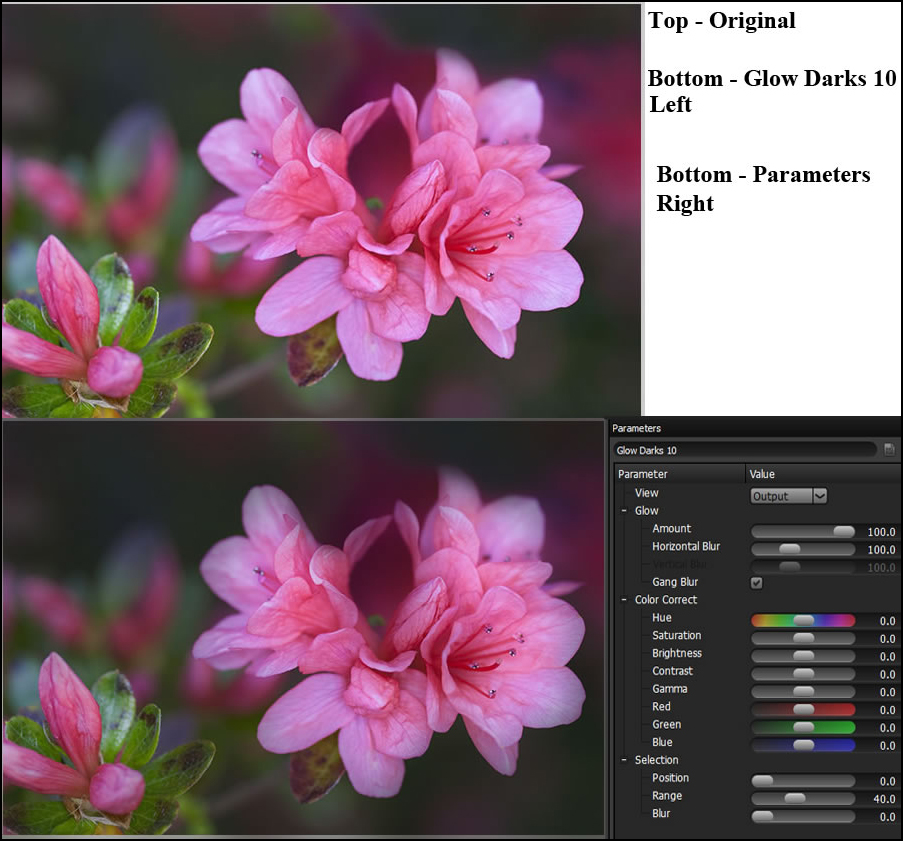
Glow Darks adds a soft darker glow to the image. There are 10 presets and many parameters for customizing the look. It can be used to relight a scene without computing any scene geometry.
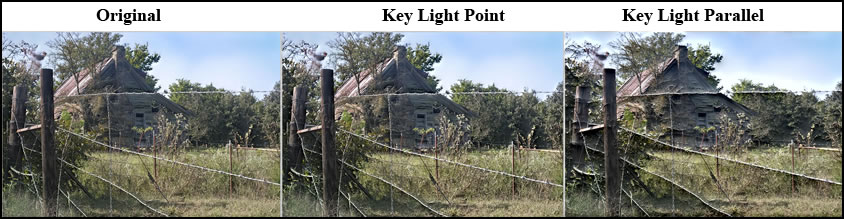
Key Light is used to relight a scene using either a point or directional light. It, also, is used without computing any scene geometry.
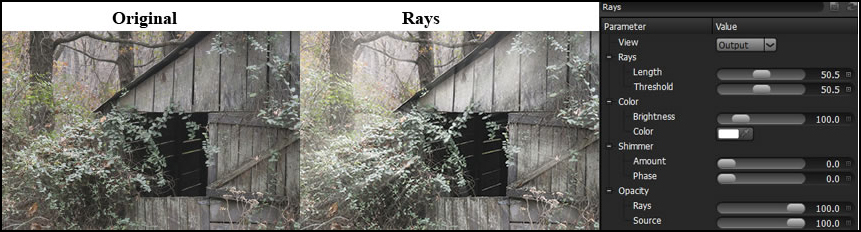
Rays creates realistic light rays that can be customized for interesting effects.
With Match you can match the color, detail, grain, and tone of one image and apply it to another. I really love this new filter and see many uses for it even though I don't like to play "favorites".

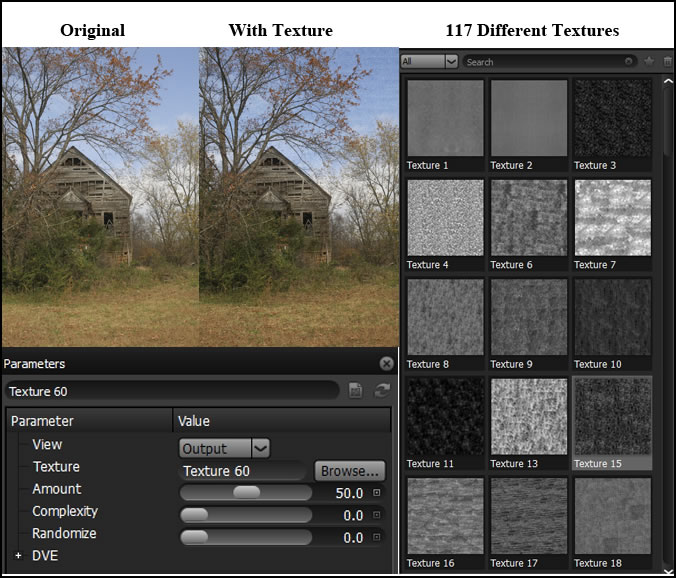
Now add Texture to an image or to a layer of an image. You can vary this so that different textures or variations of the same are added to different parts of an image. You can customize the effect using the Masks feature as well.
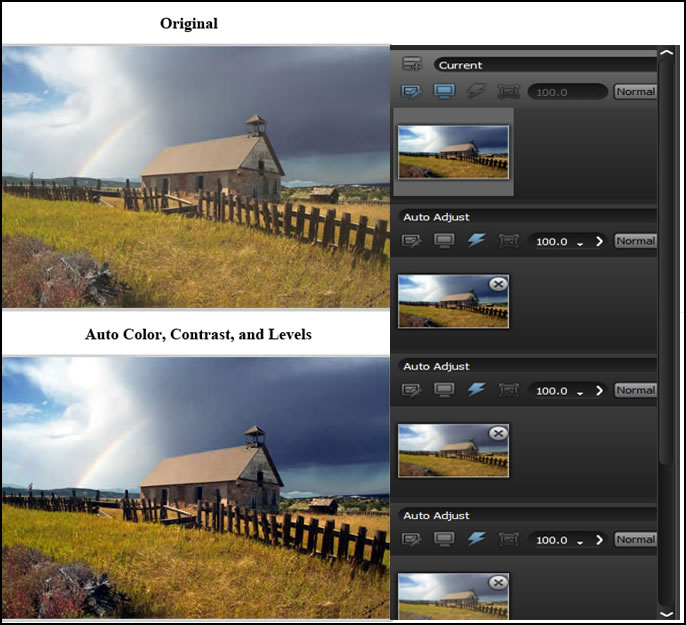
The Auto Adjust, Paint, and Sharpen filters have been added from the standalone version to the Plug-in version. With these you can automatically adjust for auto contrast, color, and levels and vary the opacity from 0-100%. When I used the Auto Adjust filters, they seemed to accentuate the blue or green in an image. At least this is what happened to the images I tried. I didn't find this occurring with other filters that I used.
With Paint you have tools to be able to: change your image to Black/White; do Blurring, Cloning, Coloring, and Erasing; create a Mosaic; correct Red- Eye and do Repairs; and create Scatter brushes.
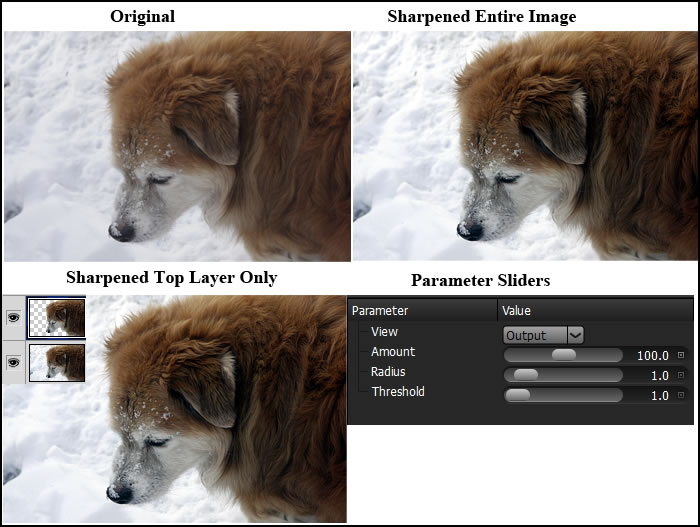
With Sharpen you have 10 presets or a number of parameters.
Use Levels to move and stretch the brightness levels of an image using a histogram. This set of tools looks very similar to the levels in Photoshop.

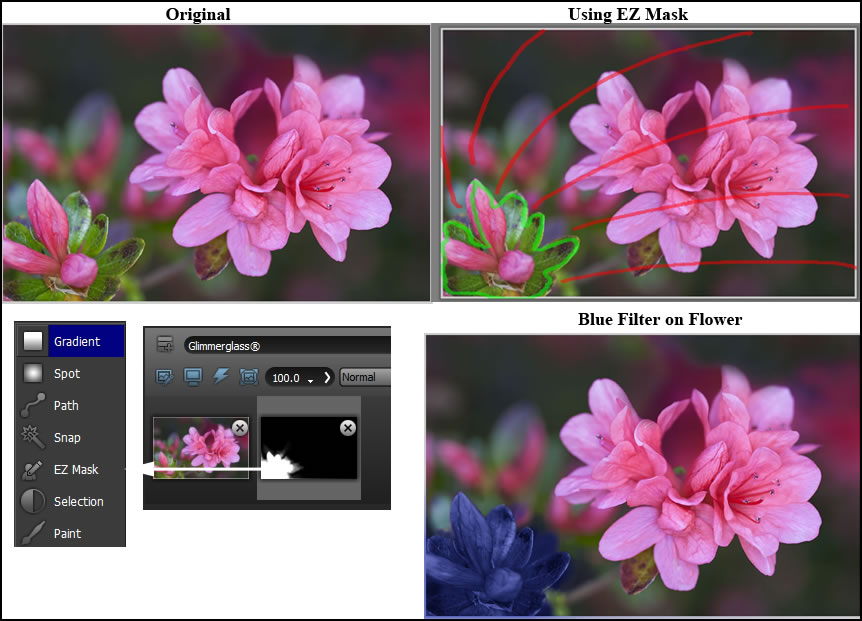
There are so many ways to create masks in Dfx version 3, that you can accomplish almost any effect you can imagine. Below, I used the EZ mask and it was very easy. In addition, the help menu contains a lot of good information and easy to understand tutorials on the different processes.
Tech Specs / Requirements
Adobe Photoshop CS3 and up
Adobe Photoshop Elements 6 and up
Adobe Photoshop Lightroom 3 and up
Apple Aperture 3 and up
Windows:
• Windows XP, Windows Vista, Windows 7
• 1.0 GHz processor or faster
• Intel or AMD processor
• 1GB RAM (2 GB+ recommended)
• 1GB available disk space for caching and temporary files
• Open-GL capable graphics card
• Display with 1280 x 1024 resolution or higher
• Three-button mouse
• Wacom Intous 3 and 4 support
Macintosh:
• Mac® OS X 10.6.x - 10.7.x
• Macintosh Multicore Intel® processor
• 1GB RAM (2 GB+ recommended)
• 1GB available disk space for caching and temporary files
• Display with 1280 x 1024 resolution or higher
• Three-button mouse
• Wacom Intous 3 and 4 support
* Tiffen DFX must be installed on the same machine
The more I used Tiffen Dfx v3, the more I found how flexible it was and the vast possibilities available for creating unique effects. There is a lot of depth to this program. Many of the filters in earlier versions have been combined in version 3 which makes it easier to find them. The ability to add effects by stacking filters on top of each other is a great feature. Adding to this the fact that you can choose blending modes extends your ability to be creative. Applying filters to parts of an image is easy to do using the many masking features.
As a note: Accessing the Tiffen Dfx v3 plug-in from Lightroom was different than in either Photoshop CS5 or Photoshop Elements 10. To accomplish this, one right clicks on the image and then chooses Edit In > Dfx v3. This will open the Tiffen Plug-in.
Aside from the Plug-in version, you can purchase the Standalone version, and a Plug-in for video and film. The regular price of the Photo Plug-in is $229.95 with an introductory price of $199.95. More about Tiffen products can be found at http://www.tiffen.com.