Photoshop - How to Add Light to an Area Using Overlay Blend Mode |
|
|---|---|
| Finished Image - This image was created in E-on Software's Vue 6 Infinite. I added the lightning in post work in Photoshop CS2 using Alien Skin's Xenofex 1.0. After I did, I noticed that some areas around the lightning should be lighter. I lightened the sky around the image and, then, decided to lighten other areas such as the rock face that is nearest to the lightning. Here is the finished image. | 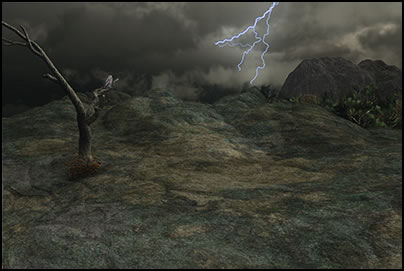 |
| This is what the original rock face looked like. It was very dark. The Blending Mode for this layer was Normal. | 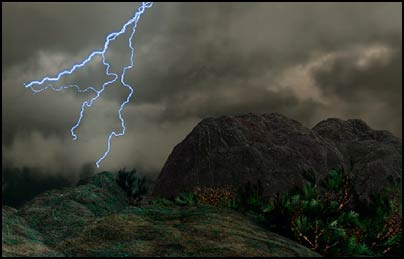 |
| Step 1 - First, I decided the area I wanted to lighten. It is the area surrounded by the white line. The white line is only in the tutorial to show the area. | 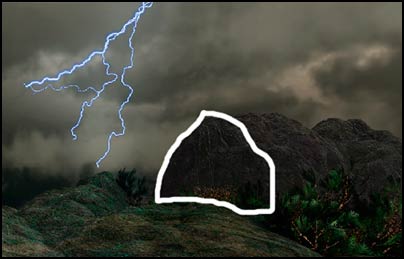 |
| Step 2 - On a new layer, I chose an off white and painted the area to be lightened. The Blend Mode is still Normal. |  |
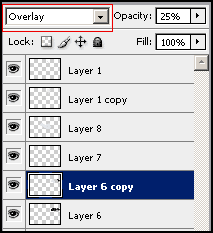
Step 3 - I changed the Blend Mode for that layer, Layer 6 copy, to Overlay. Ignore the opacity percentage for this step. Note: Layer 6 copy did not have to be a copy. I could have "painted the light" on a new layer. Also, this technique will not work if the layer beneath the "painted light"( in this example it would have been layer 6) was black. |
 |
| Step 4 - In Overlay Blend Mode, it looked like the image on the right. The layer opacity is 100%. | 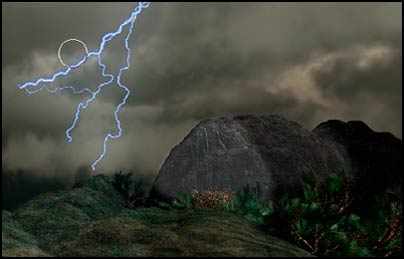 |
Step 5 - I changed the layer opacity to 25% (as seen in the screen capture, step3). I, also, did the same procedure for other parts of the image that I wanted to appear lightened by the lightning. |
 |