PhotoTools 2.5 Professional Edition is a plug-in that contains innumerable presets and effects to improve your image or photograph. As onOne Software says, "PhotoTool 2.5 is the fastest way to add a professional look to your images." With PhotoTools 2.5 you can stack multiple effects one on top of the other. This is a great feature because in many plug-ins you have to create one effect at a time and can't work with multiple effects.
This new version allows for full screen preview which is a great help. Also, there are two new powerful and excellent features: A MaskingBug and a MaskingBrush. I'll demonstrate these in the review. PhotoTools 2.5 also supports 64-bit CS4 on Windows and has an onOne panel for easy access to all the tools. I am reviewing the Professional Edition that is contained in Plug-in Suite 5. Below is a sample list of some of the effects from the onOne website:
- Image Optimize: Color and tone corrections, improve shadow and highlight detail.
- Landscape Enhance: Enhance color and contrast, add sunlight, rain, snow, fog and rainbows.
- Portrait Enhance: Retouch portraits by automatically smoothing skin, enhancing eyes and whitening smiles.
- Black and White Treatments: Convert your images to black and white with all the control of the darkroom.
- Photo Filters: Add traditional filters like polarizer, warming, cooling, and color enhancing.
- Camera Tricks: Recreate in-camera techniques like lens pan and flare.
- Lighting Effects: It’s like a studio in a box. Add additional lights and shadows to a flat-lit image.
- Film & Darkroom: Try out different films, toners and darkroom techniques.
- Stylized Effects: Recreate the look of popular movies and effects used by wedding and commercial photographers.
- One-Click Art: Turn your image into a comic book or impressionist masterpiece in one click.
- Overlay Effects: Add an overlay to give your image that authentic vintage or grunge look
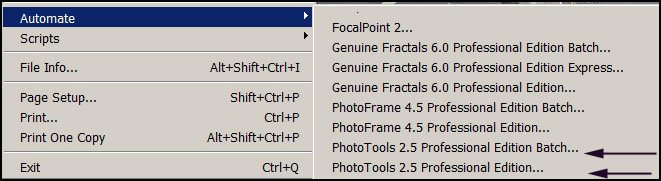
To access the plug-in, you can either use the panel or the Automate command under File in the top toolbar in Photoshop. Notice that you can use the Batch command on the plug-in as well. This is very useful if you are needing to repeat the same effect multiple times.
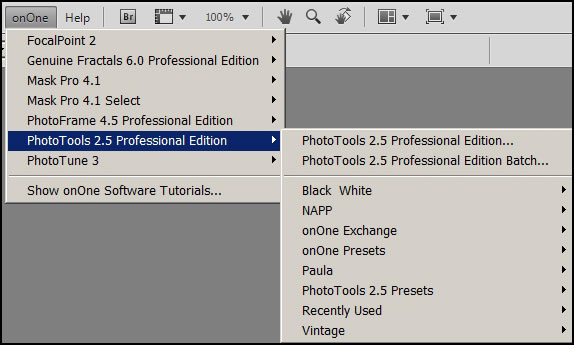
You can, also, access this plug-in from the onOne panel on the top toolbar in Photoshop.
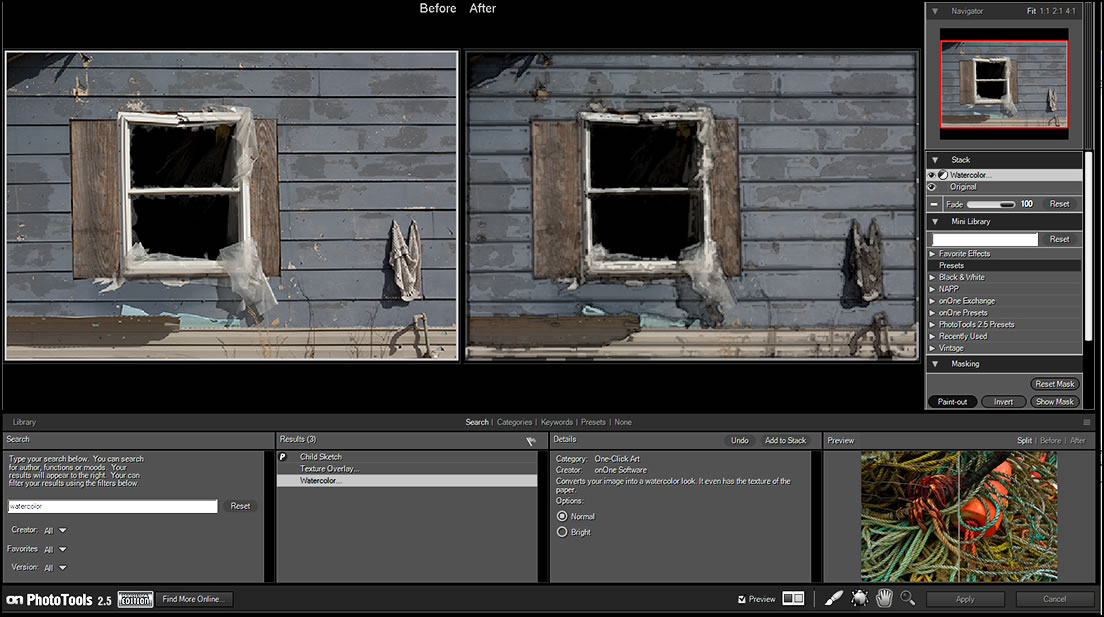
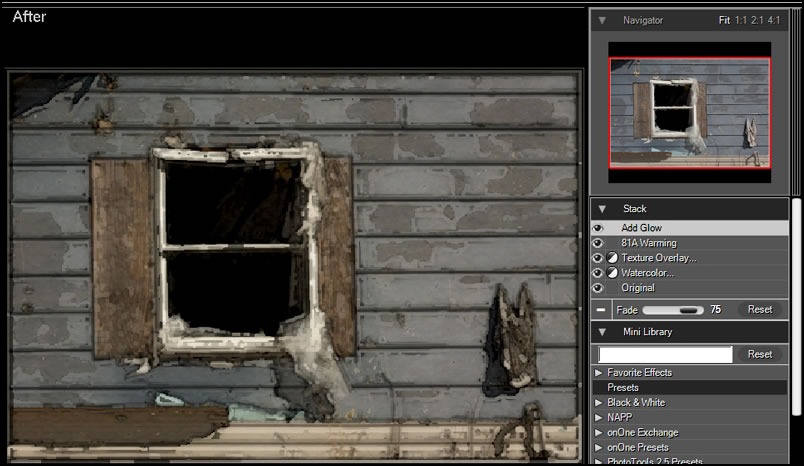
I will be discussing various parts of the interface. Below is the whole interface with a preset selected at random. On the lower right is how the preset will look. You have a choice of Split, Before, and After. Until I double click on the preset name or choose Add to Stack, I will not see a change in my image.
On the far lower left, I can search for a type of preset or effect. It will appear in the middle column with any additional modifications available in the next column. Also, on the far right panel I can select fade as well. I will discuss the other panel options later in the review. I searched for Watercolor and got 2 effects and 1 preset.
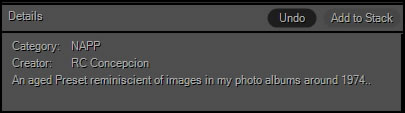
It is very easy to preview a preset. In the Detail panel, click on Add to Stack and if you are not satisfied, click on Undo. You can go back to the original image by clicking on Reset in the Stacking panel. Also, if you want to eliminate an effect or a whole preset, just close the eye to the left of the name. When you hit apply, it will not be a part of the new image.
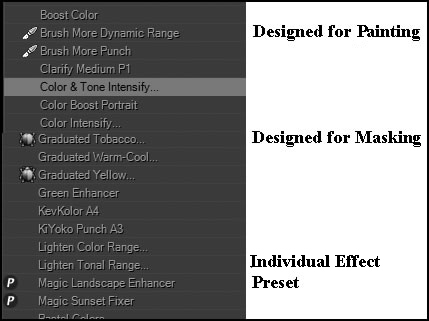
There is a difference between a preset (made up of many effects) and an individual effect such as Watercolor.When I searched for Watercolor, it shows that as a single effect. In the image below, there are four individual effects stacked. After Watercolor and Texture Overlay I searched for Soft and used 81A Warming and Add Glow effect. Notice on the right panel a black and white circle. That means that there are options available for that effect, and I can modify it accordingly.
Below is a chart showing what some of the icons mean.
When I chose a preset (Magic Sunset Fixer) from the list on the right panel, many different effects were contained in that preset.
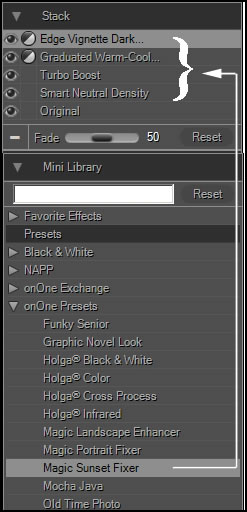
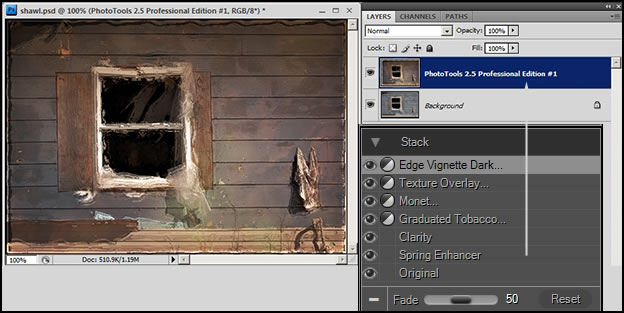
When the effects are applied, they all come together as a new layer in Photoshop. It doesn't matter how many effects are in the stack.
If I click on another preset, it removes the the old one. But if I click on an effect, it just adds it to the top of the stack. Thus, it is important to differentiate between an individual effect and a preset (made up of individual effects). You can imagine the number of options available. If I click on Reset in the Stack panel, I can remove all but the original image.
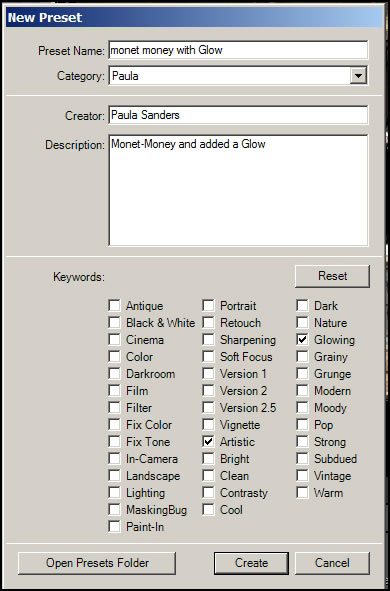
I created a new preset by adding a glow on top of the effects that comprised Monet-Money and called it Monet-Money with Glow.
Since there are so many presets and individual effects, it is a good idea to create your own category or favorites so that you can access them easily.
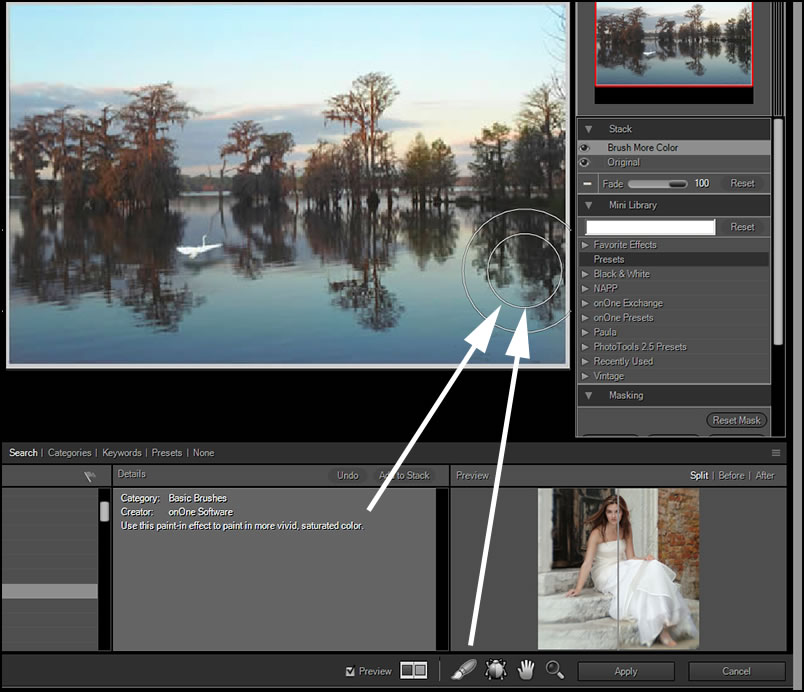
Using presets globally is not the only way to create an effect. You can work with masks and brushes. Below is an example where the preset stated that it needed to be brushed on.
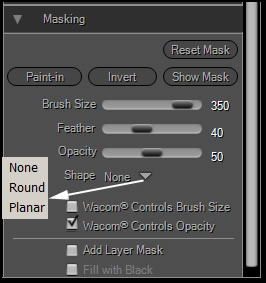
Below is another example of all the possibilities available with masking using a brush. If you click on the oval under the words Paint-in, you will find Paint-out and Erase.
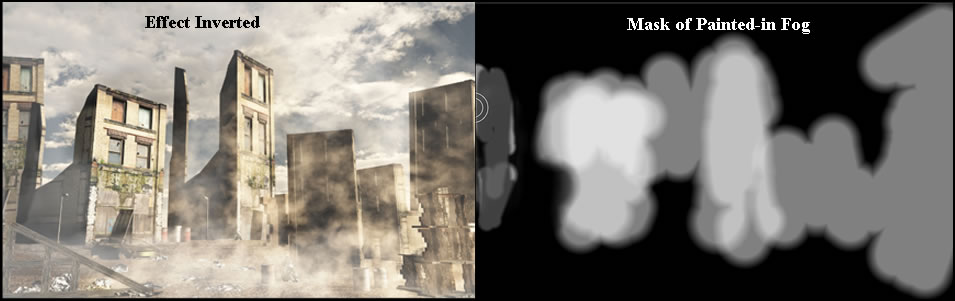
The original image was created in Vue 8 Infinite and brought into Photoshop CS4. I used PhotoTools 2.5 to increase the feeling of fog.

These two images show how the fog can be inverted as well as show the mask of the painted-in fog. Notice how one can control the opacity of the fog. I used a Wacom tablet with "Wacom Controls Opacity" selected in the Masking panel.
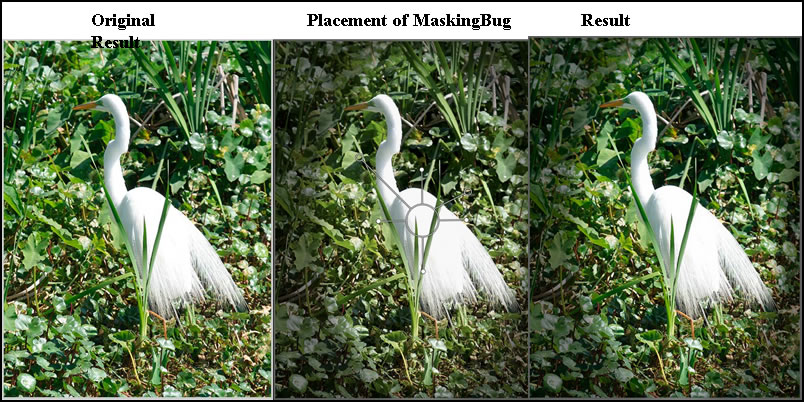
You can also use masks. The MaskingBug allows you to place certain effects. The MaskingBug is similar to the FocusBug in FocalPoint. Below is an exaggerated effect as if a spotlight were on the bird.
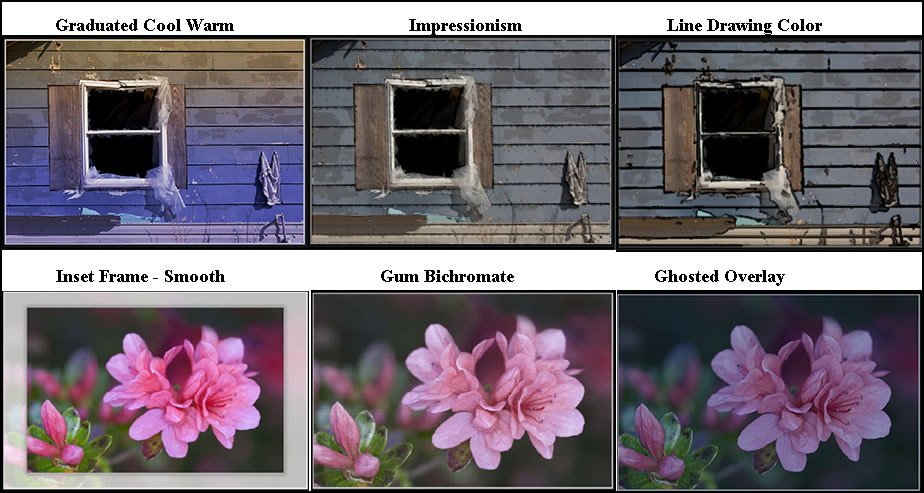
The following are a few more examples of what PhotoTools 2.5 can produce.
Requirements:
| Latest Version | Apple Mac OS X
|
Microsoft Windows
|
| Operating System |
|
|
| Computer Processor |
|
|
| Computer Memory |
|
|
| Display |
|
|
| Required Host Application |
|
|
| Optional Host Applications and Integration for Professional Editions |
|
|
| Other |
|
|
| Language |
|
|
The cost for PhotoTools 2.5 Professional Edition is $159.95 for a full version and $99.95 for the upgrade. You can try a 30 day free trial. I always recommend this option. To learn more about PhotoTools2.5, click on the name. To learn more about Plug-in Suite 5, click here. To read my review of Plug-in Suite 5, click on it.
There is, also, an onOne Exchange which "is a community website managed by onOne Software that enables users of PhotoTools 2.5 to download free presets for their own use. Presets are easily imported into PhotoTools 2.5 directly from the File menu. Users of PhotoTools 2.5 can also upload any presets that they have created to be shared with other PhotoTools 2.5 users on the onOne Exchange. Access to this is built directly into the PhotoTools 2.5 user interface." Many presets are created by those at onOne Software such as Mike Wong (VP of Marketing.)
The more you work with PhotoTools 2.5 Professional Edition, the more you will realize the flexibility of stacking and unstacking presets as well as individual effects. The reason I delineate between effects and presets is that the presets are created from individual effects. When you have a preset which is composed of many effects, you can turn off the individual effects to change the preset. You can, also, modify many of the effects themselves. All of this allows you to create a toolbox of your favorite effects. This plug-in has many layers of depth. The more I used it, the more I found what it was capable of doing. The addition of the MaskingBug and MaskingBrush are dynamite additions to version 2.5 This is another example of an excellent plug-in from onOne Software.