For the past number of years I have been reviewing Adobe Photoshop Elements and Premiere Elements. This year I am reviewing only Photoshop Elements 12 and listing the new features of Premiere Elements 12 as well. I will be discussing the new and enhanced features and sometimes comparing those in Photoshop Elements 12 to those in Photoshop Elements 11. If you are not familiar with Photoshop Elements 12, it can be called a light version of Photoshop with an organizer, tools for sharing and easy ways to create projects. It is geared toward hobbyists, both new and skilled. For that reason you have different levels for editing. The Quick level is for quick fixes or for the very newcomer. The Guided level lets you learn by doing as well as allows you to create effects easily. The Expert level has many of the tools contained in its big brother, Adobe Photoshop. Adobe Elements is not a subscription only product, but can be purchased so that once you pay for it, you can use it indefinitely. A full version of Adobe Photoshop Elements 12 costs $99.99 with upgrades starting at $79.99. You can, also, purchase both Photoshop Elements 12 and Premiere Elements 12 for $149.99 with upgrades from $119.99.
You can look at a comparison of past versions of Photoshop Elements and Photoshop Elements 12, by clicking on "comparison."
Before we discuss the new features of Photoshop Elements 12 (PSE 12), I will list the new and enhanced features for both Photoshop Elements 12 and Premiere Elements 12 from Adobe's literature and comment on some of them. For more information on Adobe Photoshop Elements 12, click on the link.
ORGANIZATION
- (NEW) You can now take your videos wherever you go. You can share them on your Smartphone or tablet and then put them back on your home Elements' album. (Internet access required.)
- (ENHANCED) The interfaces have been enhanced to be more user friendly and intuitive. I personally didn't see a noticeable difference although there were changes made.
EDITING AND ADDING TO PHOTOS AND VIDEOS
- (NEW) Move objects around and easily fill in the background.
- (ENHANCED) There have been addition to Guided Edits for adding effects and streamlining work.
- (NEW) you can now correct pet eye discolorations.
- (NEW) When using video and guided edits, you can use built in video tutorials.
- (ENHANCED) You can spotlight your subject using Motion tracking
- (NEW) You can get intelligent photo and video correction as you work using Smart Tone.
- (NEW) You can personalize your work through adding one-touch frames, effects, and textures.
- (ENHANCED) addition of more film looks in Premiere Elements 12.
- (ENHANCED) 50 musical scores and 250 sound effects will add more dimension to your videos.
- (NEW) Add effects to multiple clips.
SHARING VIRTUALLY ANYWHERE
- (ENHANCED) you can now share with others on a smartphone and tablet.
- (NEW) A new sharing button has been added to the Editor. It can also be found in its old location on the Organizer.
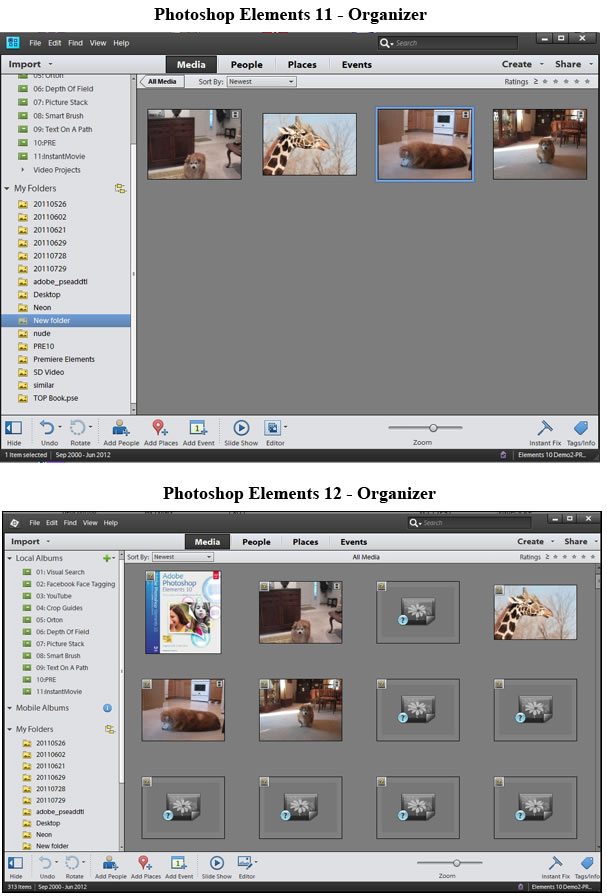
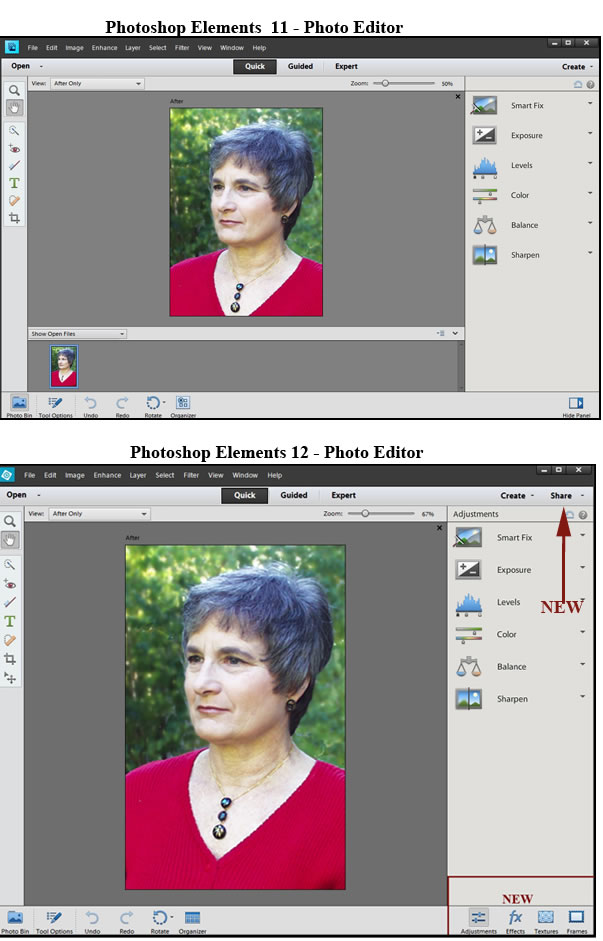
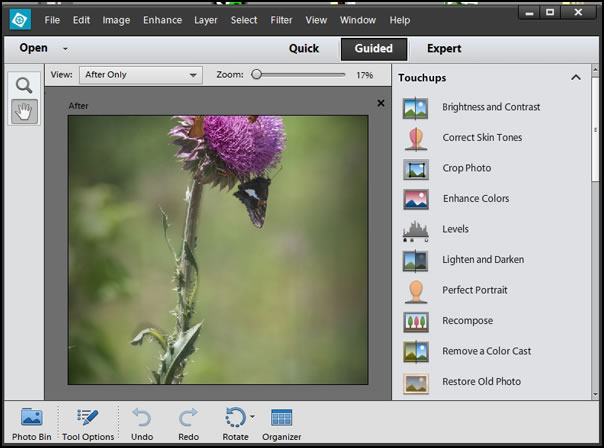
Let's start by looking at the interfaces for the Organizer and the Photo Editor. These are the two major components Of Adobe Photoshop Elements. The Organizer is also an integral part of Premiere Elements. The UI (User Interface) of versions Elements 11 and 12 look very similar. On some occasions the new features are just a matter of a different icon such as for the Editor icon on the bottom left of the Organizer module and the Organizer icon on the bottom of the Photo Editing screen.
The UI of the Photo Editor shows some additions. Now you do not have to go to the Organizer to share an image. Later I will show the menus for the CREATE and SHARE functions. Notice at the bottom right of the screen, you have four areas. This screen shot shows Adjustments. You can also choose Effects, Textures, and Frames. In the Expert Photo Edit screen there are even more choices. Obviously, each type of Edit offers different functions
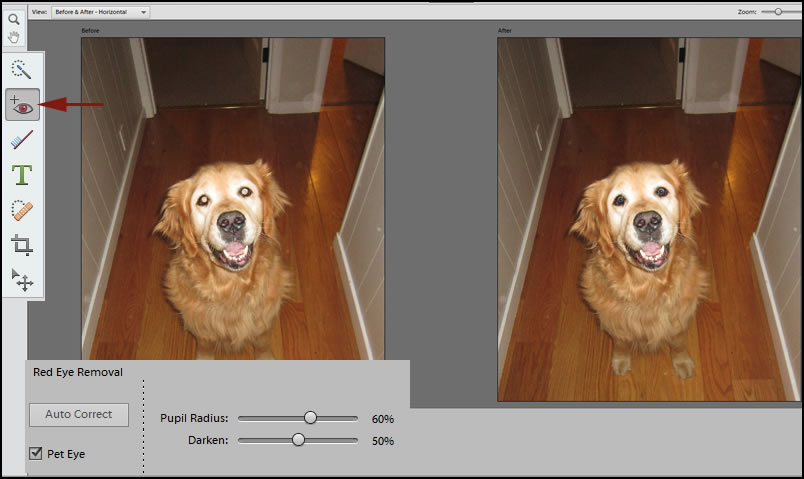
On the left of the screen, notice the Red Eye Removal tool. Now you can remove the strange casts often found in an animal's eyes by using the Pet Eye Removal tool. It makes a noticeable difference and can salvage many images. (Left image courtesy of Adobe.)
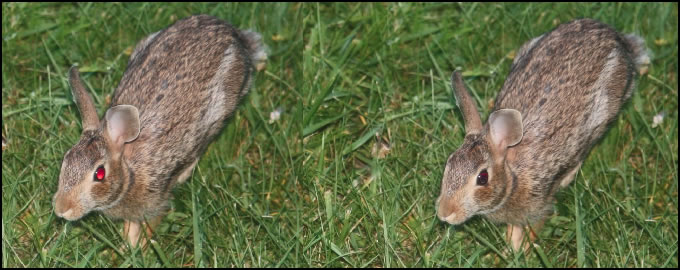
I found I had an image of a rabbit that I took in our back yard. I decided to see how the Pet Red Eye Removal worked on the rabbit. It worked perfectly.
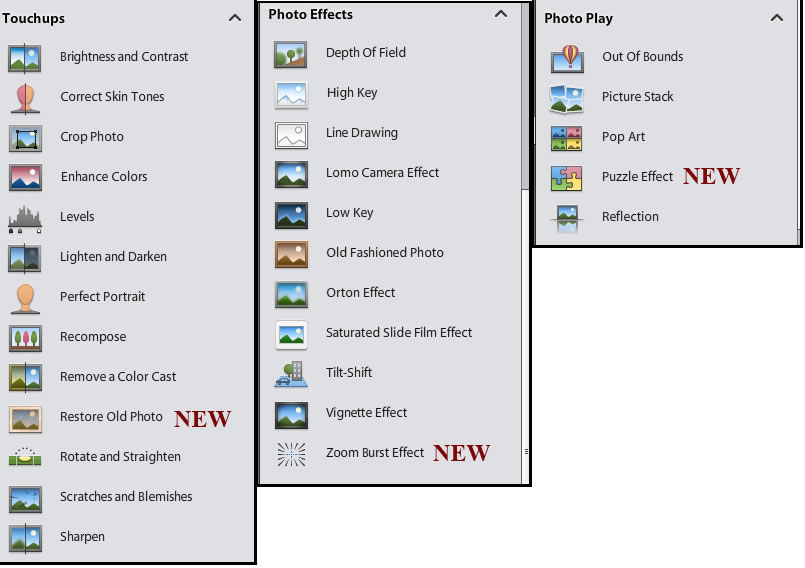
The Guided Edit offers 3 new choices which I will demonstrate.
Below are all the screens showing all the choices.
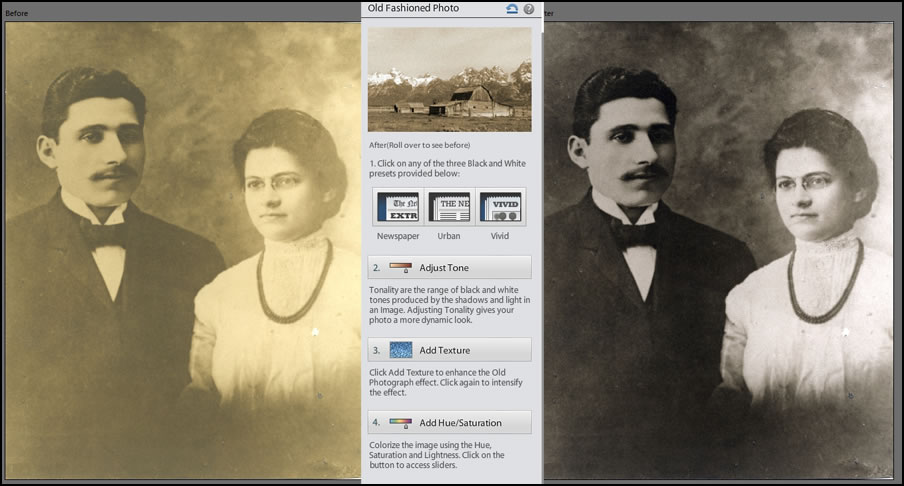
I will first demonstrate how easy the controls are to clean up or Restore Old Photos. I did not have any that were severely damaged. (This is a photo of my grandparents taken circa 1900.) The Add Texture adds noise which you can control by the number of times you click it. The Add Hue/Saturation can be used to colorize the image as well. You can click on the presets to choose a variety of black and white settings. I did not choose any of the "newspaper" settings but used Hue/Saturation instead.
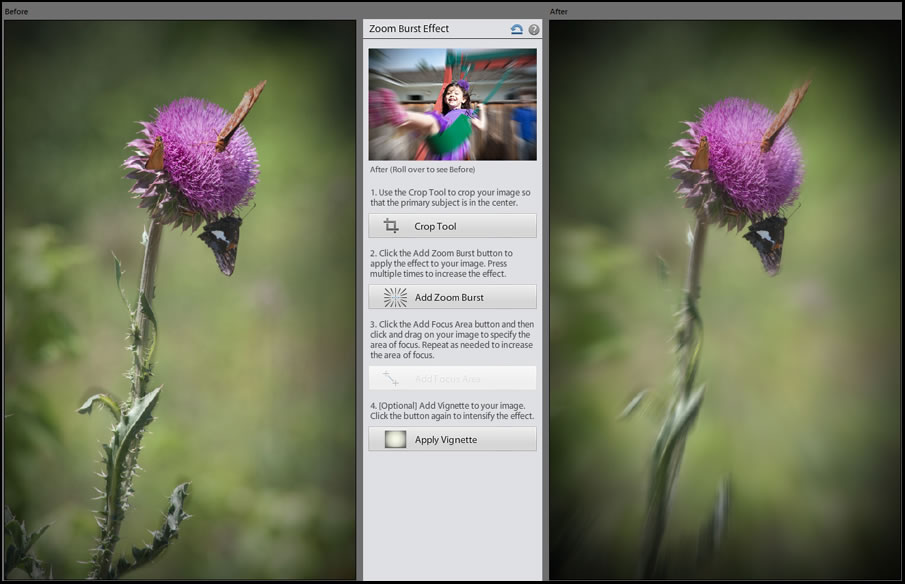
The Zoom Effect uses a radial blur. What I liked the most about it is that once "blurred," I could bring back areas that were in focus anywhere on the image.
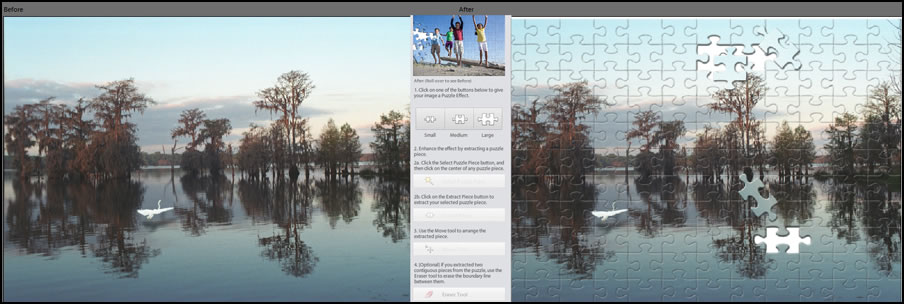
I have seen images with puzzle pieces overlayed over them for sale on websites. Now you can make your own Puzzle Effects.
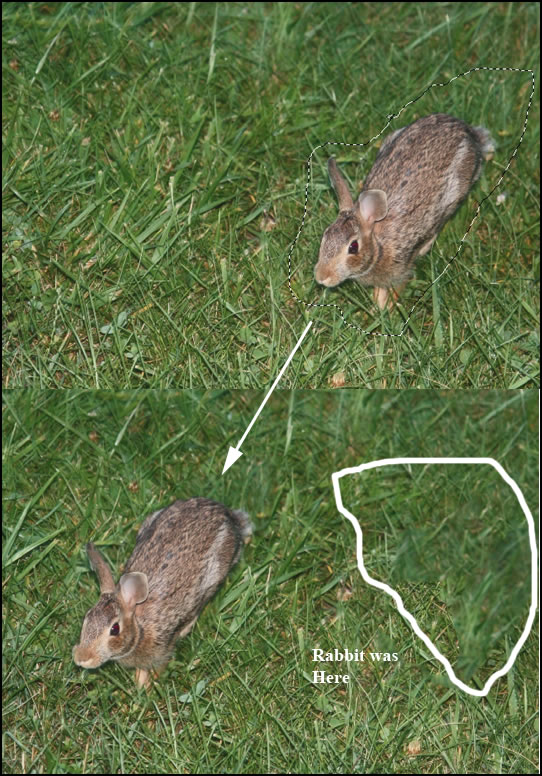
This tool can be found in the Quick Edit part of the Photo Editor. It is the Content Aware tool and can be used for moving objects from one place to another. I decided to see how it would work in two difficult situations where you would normally not move objects. the first involved moving a baby goose. For the complicated area, I think it worked very well. It would need some touch up, but it involved moving an object with similar colors to other adjacent objects in the background. The next trial involved moving a rabbit (ignore the poor composition that resulted). I wanted to see how the sharp blades of grass would be reproduced. Again, while it would involve a little work, the result I believe was quite good.
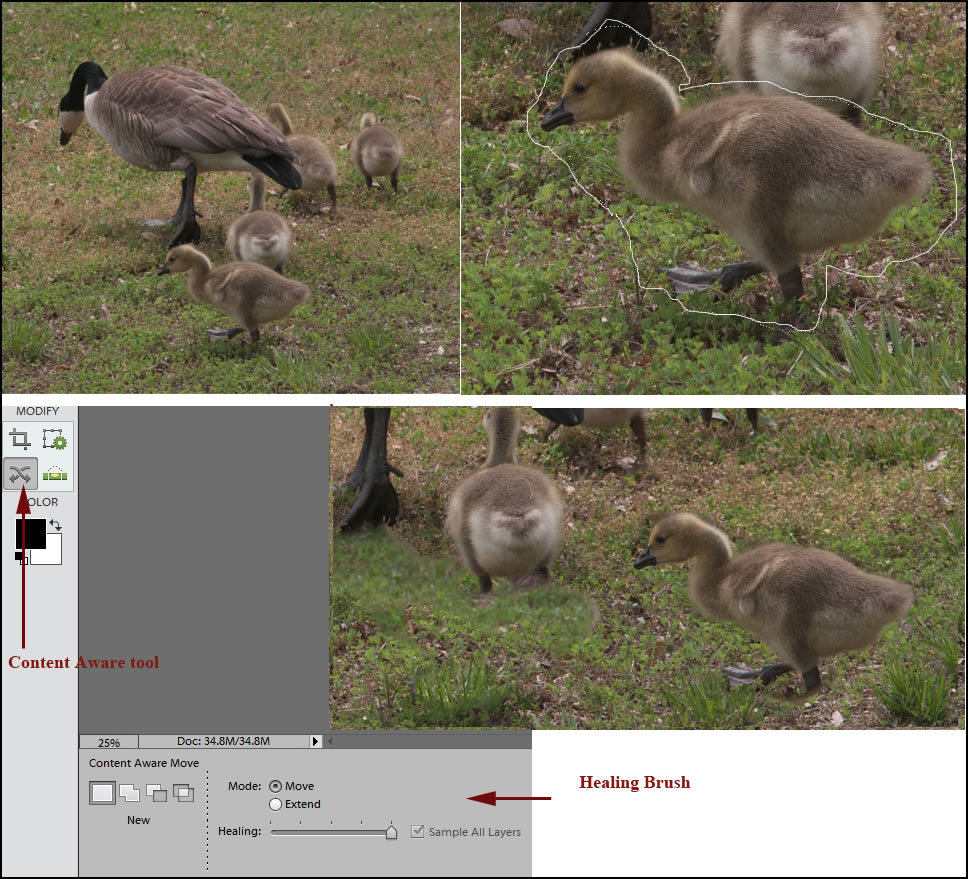
If you look at the first image of the rabbit. The grass right above the rabbit is slightly soft. Thus, when it filled in the area where the rabbit had been, the result was also slightly soft.
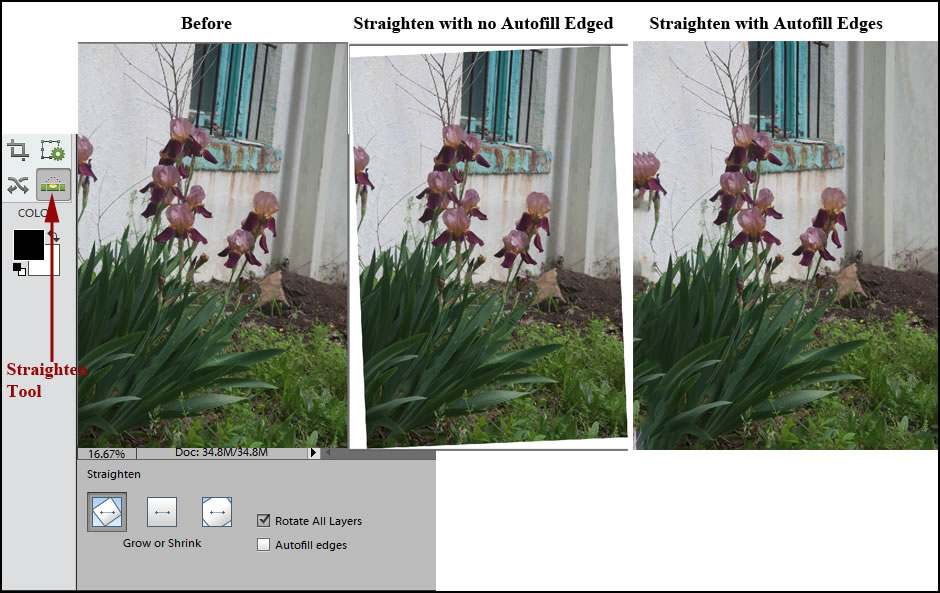
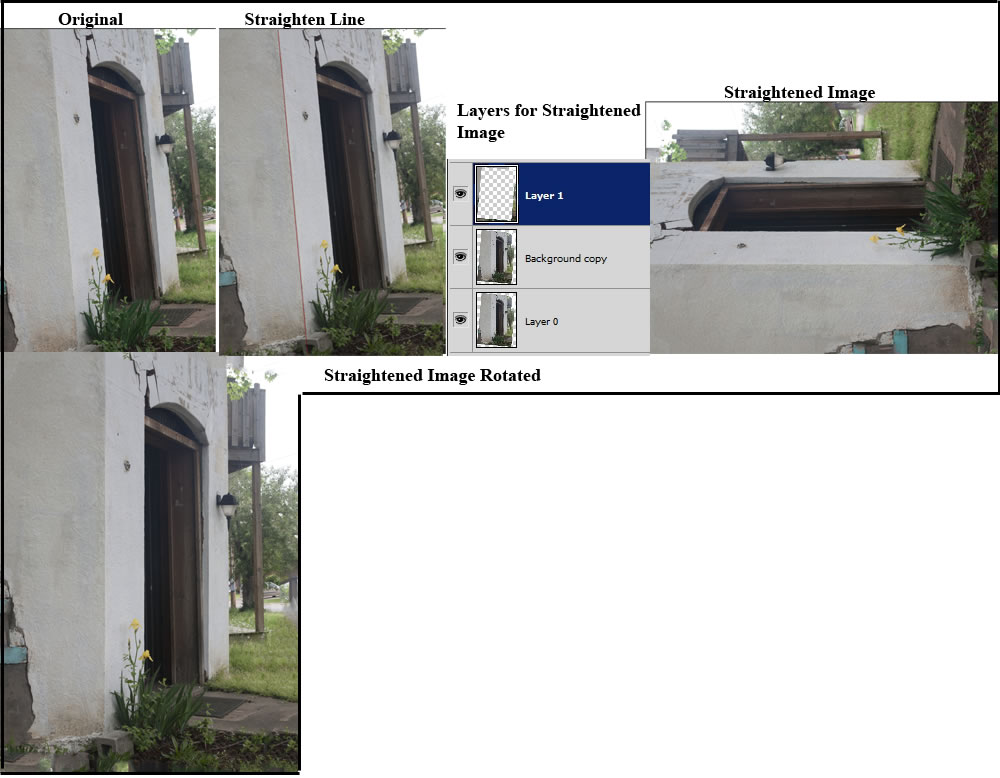
If you have a tilted horizon or an image where there is a noticeable tilt, you can straighten it automatically. I didn't realize how much versatility the Straighten tool, found in the Expert Edit mode, had until I began to play with it. You can use it with Autofill Edge checked or unchecked. In the image below, the second top image has the Autofill unchecked while the last on top has it checked. Autofill Edge automatically fills in where the image was rotated.
The next example consisted of a very tilted building. I photographed this image to test in the new Photoshop CC and decided to try it here. What I found was that where you place the "straighten line" controls the resulting image. I discovered that on this image when the line was drawn vertically, the image rotated 90 degrees, but it straightened out the building. This gives this tool a lot of versatility. The result was great.
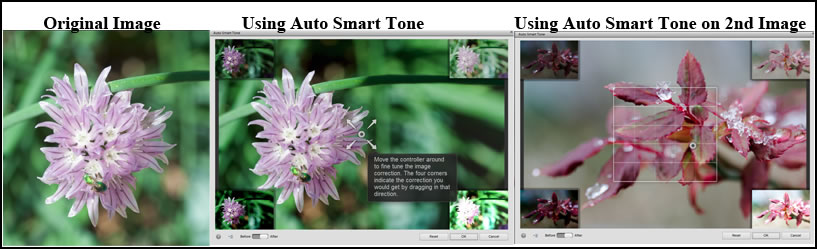
While you can learn as you work from Quick Edit, to Guided Edit, to Expert Edit, you can also learn though doing using Auto Smart Tone which makes use of how you work through your past decisions. The examples it offers are a response to what you have done in the past. It is found in the Expert mode screen under Top Tool Bar - Enhance>Auto Smart Tone. Each time you use it, its suggestions will become refined.
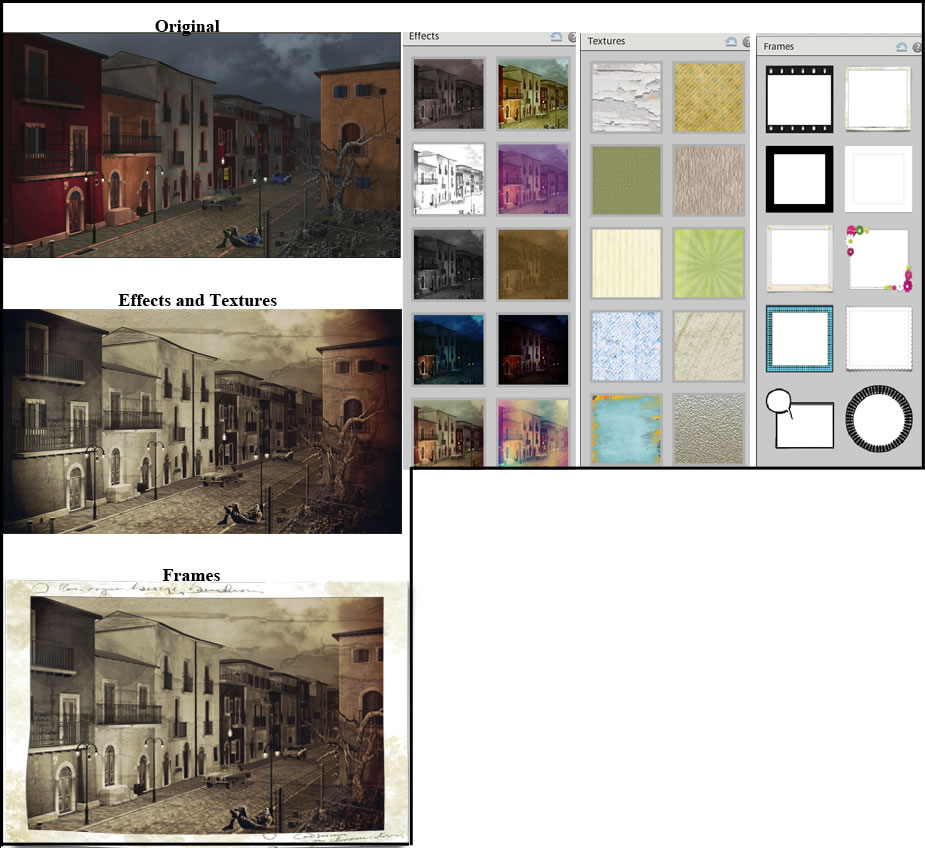
Another new feature involves personalizing your work. You can personalize your work through adding One-Touch Frames, Textures, and Special Effects. Now let's look at some of these. These can be found in the Quick mode section of the Photo Editing module. This area, in my opinion, was the least impressive of the new features. There were 10 choices in each category. I could not get the frames to fit to the image. As far as I could tell the image had to fit in the frame. If there is a way to make the frame fit the image, I couldn't find it. So if your image is non-standard, you have to make a choice on what part you will keep.
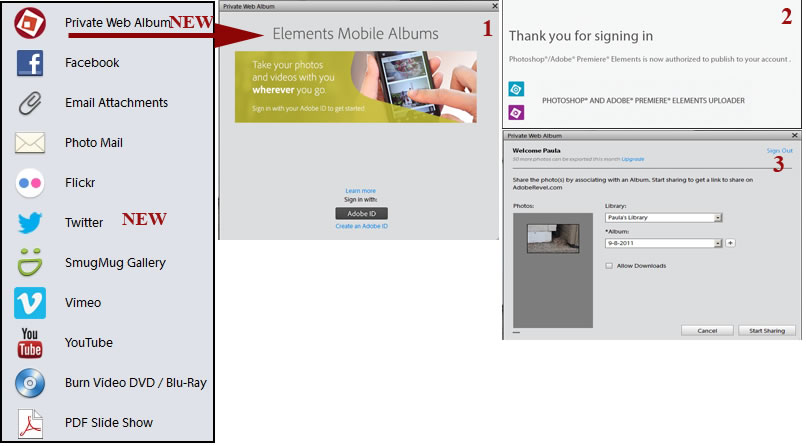
Sharing can now be accomplished right from the Edit screen. You do not have to go into the Organizer although you can still access the SHARE module from the Organizer screen. If it looks as if some of the mobile sharing options that were available in Photoshop Elements 11 are not in Photoshop Elements 12, they have just been incorporated into the Private Web Album. To access it, follow the steps depicted in the screen capture below.
There are many projects you can create using Photoshop Elements 12. They are listed when you open the CREATE module.

System Requirements
Windows
- 1.6GHz or faster processor (including single-core support)
- Microsoft® Windows® XP with Service Pack 3, Windows Vista® with Service Pack 2, Windows 7, or Windows 8 (Note: Limited Camera Raw functionality on Windows XP)
- 1GB of RAM (2GB for HD video functions)
- 4GB of available hard-disk space (additional free space required during installation)
- Color monitor with 16-bit color video card
- 1024x768 display resolution
- Microsoft DirectX 9 compatible display driver
- DVD-ROM drive
- Internet connection required for product activation*
Mac OS
- 64-bit multicore Intel® processor
- Mac OS X v10.7 through v10.8
- 2GB of RAM
- 4GB of available hard-disk space (additional free space required during installation)
- 1024x768 display resolution
- DVD-ROM drive
- QuickTime 7 software required for multimedia features
- Internet connection required for product activation*
You can download a trial here. I always recommend doing this. I have always felt that Adobe Photoshop Elements was the best inexpensive software combination for photo imaging and cataloging available whether you are a new hobbyist or a seasoned one.
In the Adobe Photoshop family, you have three choices: Adobe Photoshop Elements which can be purchased for a one time charge; Adobe Photoshop Lightroom which is available for one fee outright or as part of the subscription plans; and Adobe Photoshop which is only available upon subscription.
More information on Adobe products can be found on their website.