Review of Spiral Graphics Genetica 3 Studio
When Genetica 2.5 Pro was released, I reviewed the Beta version. If you would like to see it to compare it with the new features of Genetica 3 Studio, click on Genetica 2.5 Pro. There are three versions of Genetica 3. I will be reviewing Genetica 3 Studio. To start with, I will present a chart showing the differences between the three versions of Genetica 3.
Features |
Basic |
Pro |
Studio |
|---|---|---|---|
| Node Based | X | X | X |
| Professional Drawing Tools | X | X | X |
| Visual Styles | X | X | X |
| Powerful Lab System | X | X | X |
| Advanced Lighting | X | X | X |
| Thousands of Presets | X | X | X |
| Effects Map | X | X | X |
| Edit HDRI Environments | X | X | |
| Render and Export HDRI | X | X | |
| Normal Maps | X | X | |
| Hair and Fiber | X | X | |
| Batch Processor | X | X | |
| Lab Conversion | X | X | |
| HDRI and 32-bit Output | X | X | |
| Create Animations | X | ||
| Animation Presets | X | ||
| Maximum Render Size | 3000x3000 | 6000x6000 | 6000x6000 |
| Prices for Full new versions. Upgrading prices are also available | US $ 149 | US $399 | US $899 |
Spiral Graphics has an excellent demonstration video as well as some fantastic tutorials to demonstrate how to use all three versions of Genetica 3.
What can you do with Genetica 3? Depending on the version, you can create simple or complex textures, effect maps such as bump and specular, animations, HDRI and 32-bit output, shaders, and more.
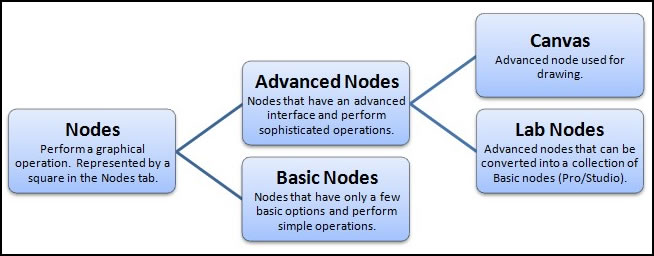
Genetica 3 is a node based texture or material generating program. It is made up of Basic Nodes and Advanced Nodes. The Basic Nodes perform straightforward tasks such as blurring; while the Advanced Nodes perform complex and high level operations. The diagram below is taken from the Genetica 3 Manual which you can access from the Spiral Graphics' website.
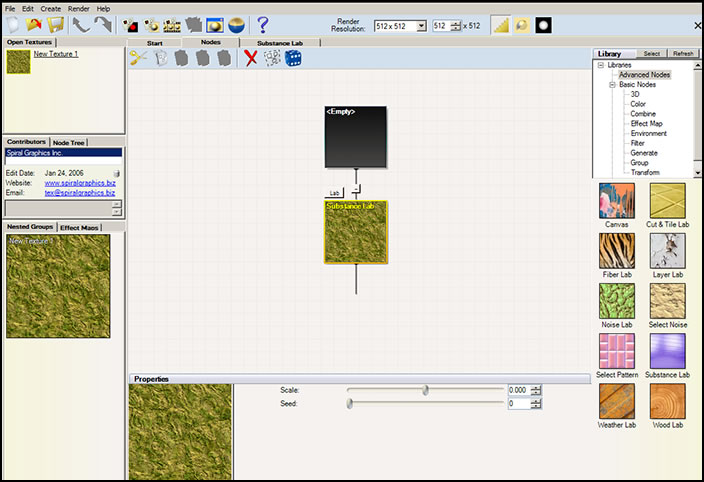
Below is the interface of Genetica 3 Studio.
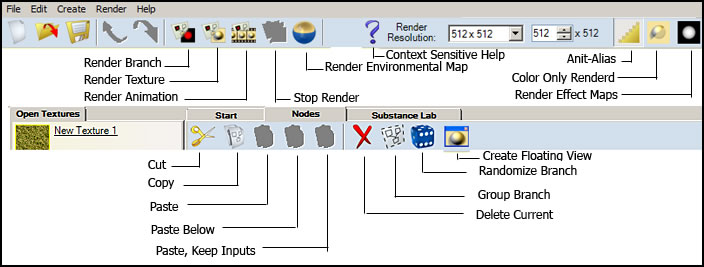
The toolbars are very important. These are the commands.
Before I progress with the review, I want to explain nodes a little further using the screen capture below.
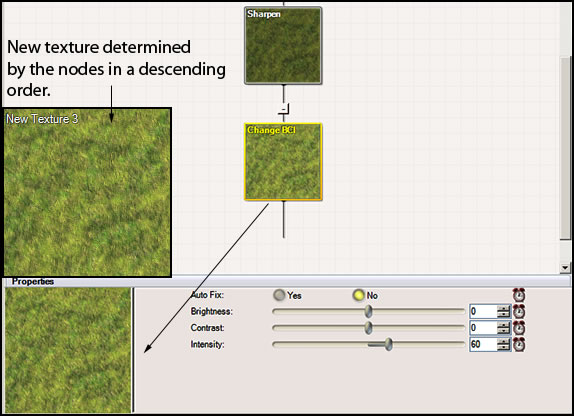
As you change the properties of BCI, you change how the final texture will look.
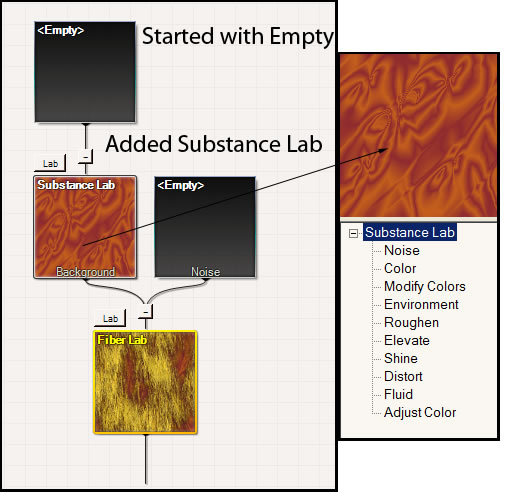
One can either start with one of the very many preset textures provided in Genetica 3 and modify them or create your own. Below I created my own just by using a few options in The Substance Lab. This shows how you can start with absolute basics.
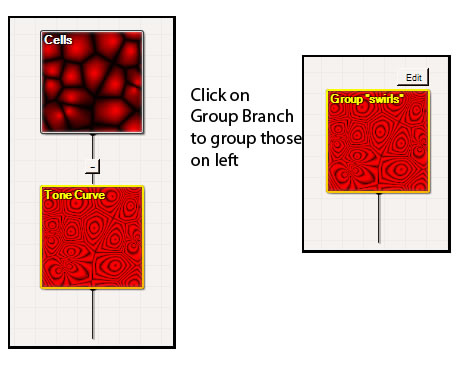
You can group various nodes. Below is a simple example. All of this is very easy to do because there are excellent tutorials describing these processes.
Drawing is another great way to create a material. Here is an example of how you can make curved as well as straight lines.

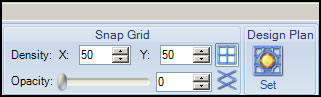
Further, you can use this method to trace shapes for later inclusion in a material by clicking on the Design Plan which will let you access designs that you might have on the computer or have scanned in.
I have only touched on the bare basics of the capabilities of this program and what is basic to the core of the program. There is a lot one can learn. One of the best ways is to dissect the presets and look at what others have made to share. Some of these can be found on the Genetica Forum of the Spiralforums.biz
Once you have rendered the texture, you can export it as a jpg, png, tga, tif, bmp, pfm, or hdr.
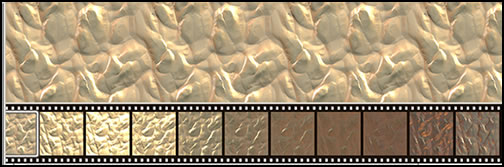
This description of creating animations pertains only to the Studio version. Below is a screen capture showing some of the individual frames.
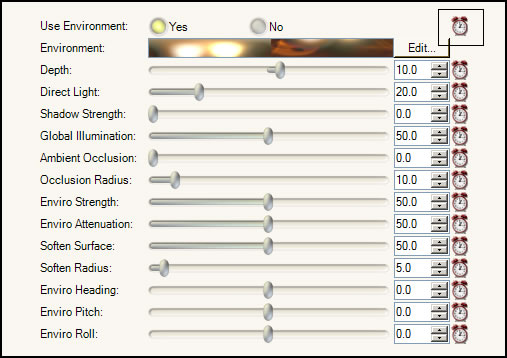
To create an animation you click on the clock symbol. That will open up one of the many screens available. Each category will allow you to edit for certain effects. The number of variables is truly amazing. The excellent tutorials, either written or video, lead you through the processes.
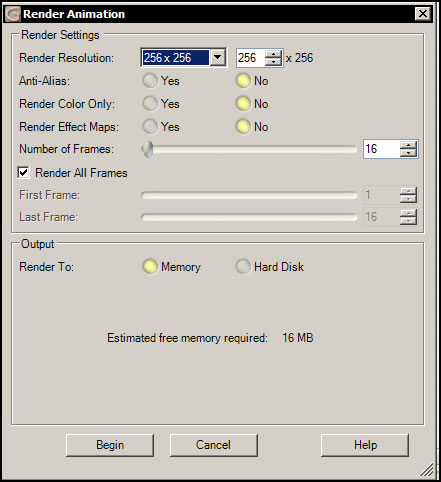
There are many Render Options available for creating various image maps and full animations.
There are also options on size of render, number of frames, etc.
And, lastly, there are options on how to export the animation.
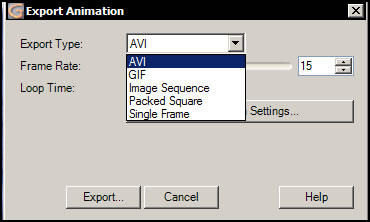
I found this very impressive as well as easy to do once I understood how to manipulate the numerous variables.
Animations can be created specifically for use within the Second Life Community. This Second Life Tutorial shows how to create textures specifically for Second Life and how to export them as well as how to import them into Second Life.
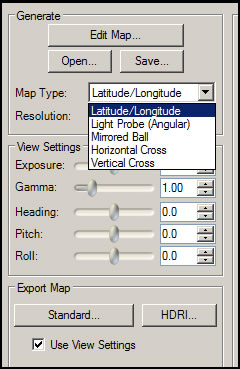
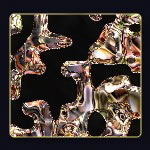
You can create Environment Maps for shaders in the Pro and Studio versions. You start by clicking on the Render Environment Map button on the toolbar.

You can, then, proceed to select a map to use and edit. Sometimes, you will have to download additional material from Genetica. That is easy to do by just following the prompts.
For different types of functions you will want to work with different types of maps. Genetica offers a selection for art images, gaming, etc.
Lastly, I will discuss Making Thumbnail images for the web. This is taken from a tutorial of that name and is possible with the Pro and Studio versions only. To test this feature, I followed the tutorial and created thumbnails from some of Genetic 3's own presents.
- Windows 2000/XP/Vista
- 1 GB of memory (2 GB if you render textures larger than 3000 x 3000)
- 100 MB hard disk space
My review just gives some of the basics of Genetica 3 Studio. To include all I experiemented with would have made this review much too long. All the functions that I tried in Genetica 3 Studio worked perfectly. To get started there are static (word and text) tutorials and video tutorials. These are all very easy to follow. Once you understand how Genetica 3 is setup and works, it is very easy to create your own textures or use the presets as a base. In addition, members of the forum share some of the ones that they have created. This is an excellent program for creating both still and animated textures and various maps of many varieties depending on the version of the program you have.
The best way to decide on what version is most applicable to your needs is to look at the chart in the beginning of the review and try out the demos. Demos of all the versions can be downloaded from the Spiral Graphics' website.