Using the Material Editor to Create Water Textures #8
The Material Editor in Vue 5 Easel can create an infinite number of textures. While I have shown how to use it in various tutorials, I will show how it can be used to create motion and textures in materials, in this case water. Also, we will look at the difference between simple and mixed materials.
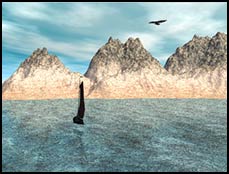
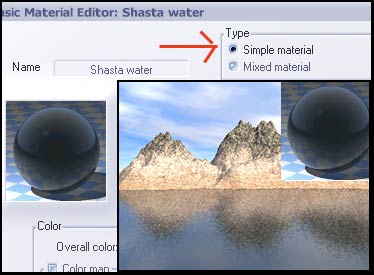
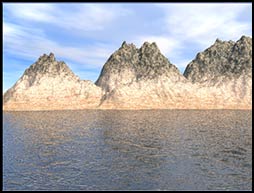
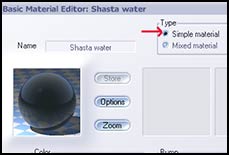
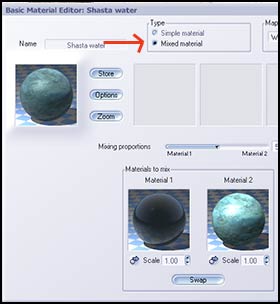
First, let's look at water without an apparent texture or with a smooth texture. "Shasta water" is a Simple material. This means that it is made up of one material only. Notice, the water also is smooth.
It does not contain a bump map. There is a little bump gain, but no bump map.
I created an Effects map in Spiral Graphics Genetica 2.5 and brought it in as a bump map.
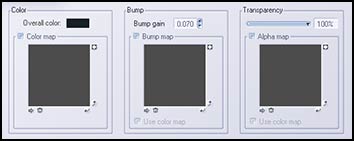
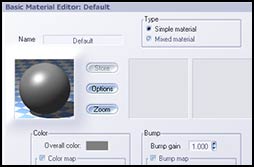
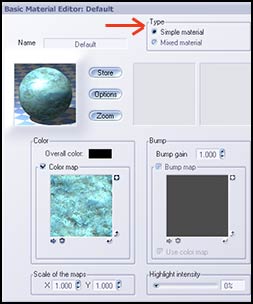
Go to the section that says Bump. Click on the box next to Bump map. Click on the arrow in the lower left and maneuver to where the bump map image is stored.
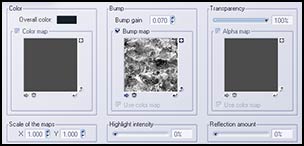
Click OK. That is all there is to it. Play with the Bump Gain if you like. The image below left shows the Bump Gain in its default position of 0.070. Remember, the material is still "Shasta water." The color is the same. Only the texture has changed.
"Shasta water"is a Simple material. One can create a Mixed material in a few ways.
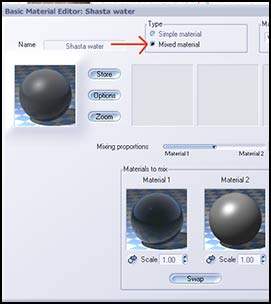
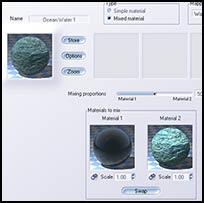
Step 1 - Take the Simple material such as "Shasta water," for example, and select Mixed Materials. That will bring up the following screen.
Step 2 - Double click on Material 2 which is the gray material. The next screen will show that the material is a Simple one again.
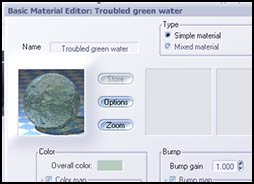
Step 3 - Double click on it and choose another material. This will be the one for mixing with "Shasta water." I chose "Troubled Green water." Click OK to close the screen with the "Troubled Green water."
Step 4 - The resultant screen will be the screen that can mix the "Shasta water" with the "Troubled Green water."
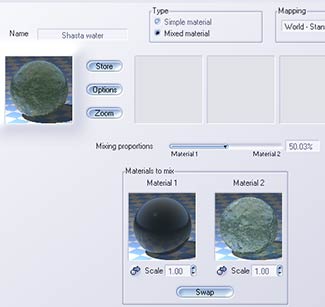
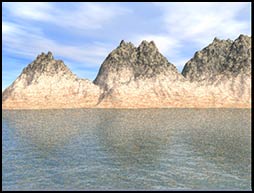
Step 5 - Move the Mixing proportions slider until you are satisfied with the mix. You can also manipulate the scale under each material. Using the proportions above, the water looks like the image below.
Another way to mix materials is to use a colored map.
Step 1 - Start with "Shasta water" and select Mixed material.
Step 2 - Double click on material 2 to bring up the following screen. Instead of double clicking on the gray material,
look beneath it and add a color map in the same manner as you did the bump map. I created this color map in Genetica 2.5. Notice how the Color map replaces the gray material. Click OK as you did before with the" Troubled Green water."
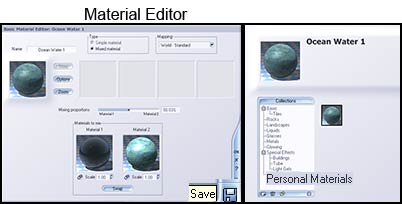
The next screen will give you the ability to mix the "Shasta water" with the Color map to form a new material.
There are the same number of steps as in the previous example, but having done it once, I have condensed some of the steps. Previously we did not save the material. But all materials can be saved. You can re-name the material from Shasta to Ocean Water 1 or any name you choose.
Step 3 - To save the material, click on the floppy disk icon near where I have put the word save. You can save it to any place you like. One place to keep these materials is under a category called "personal materials." You can then load this new material as you would any material.
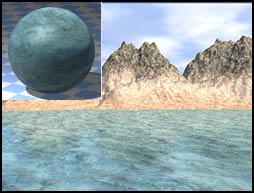
The image below shows how this material looked.
One can use color maps as bump maps, combine bump maps with color maps, etc. to keep changing both color and texture. As you can see, the changes available are endless.
Below is a Color map and the same map used as a Bump map.
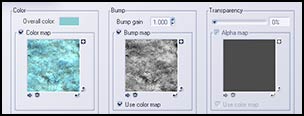
Notice how the texture of the Mixed material is rougher than it was without the Bump map.
Below is an example of the rougher water. Compare it to the softer water above.