Creating Landscapes - Background Mountains - Tutorial # 2
This is a very basic tutorial on creating mountains for a landscape and moving them to the back of the scene. It is the second in the series on using Vue 5 Easel easily. It is written using Vue 5 Easel but can be used with the other Vue 5 products so long as the user realizes that with the other products he or she has additional tools and choices. However, Easel is an excellent program to start working with landscapes and allows for a lot of creativity.
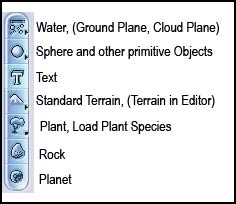
Step 1 - Click on the terrain sign on the left of the screen.
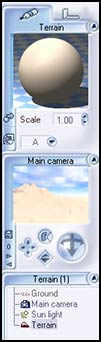
Step 2 - Double click on the sphere that is the default material of the terrain to open the Material Editor.
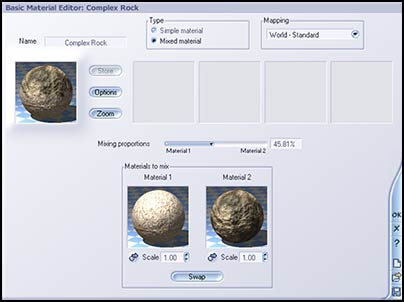
Double click on it again in the Basic Material Editor. In the Collections, choose from Rocks or Landscapes. I will choose one of my favorite called Complex Rock, which is third from the last in the Rocks Collection. Double click on it and double click on it again when you see the screen below. Notice the two rocks side by side. They show the default mix that comprises the Complex Rock. You can change the balance and the scale to form a new rock. One reason I change the material of the rock so early in the work is to differentiate it from the ground and make its placement easier. The ground defaults to the same material color as the mountains do.
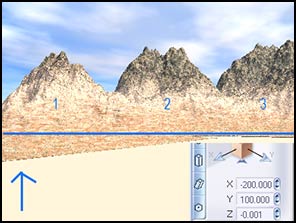
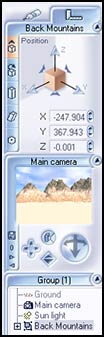
Step 3 - The default position of the rock is X=0, Y=0, Z= -0.001. See the right panel. The left panel shows the material of the terrain. Both show terrain properties and both cannot be open at the same time.
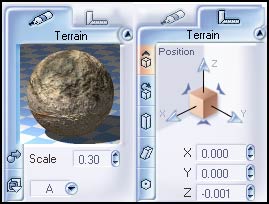
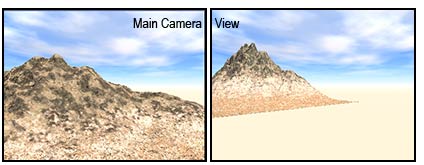
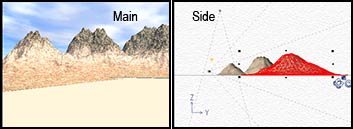
I want to have this rock become a mountain range at the back of the picture so I will move it toward the back. Knowing how the axes work in any of the Vue 5 line of software will save you a lot of time. If you have Vue 5 Easel open, notice the axes diagram on the bottom left of the Main Camera Screen. It will basically be the same as the one pictured below.

Since I wanted to move the mountain back, I started with a rough idea. I knew I had to move it to a place where Y was positive and X was negative.
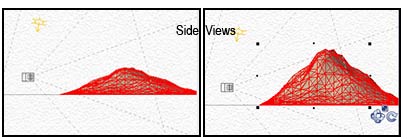
Once I was roughly there, I could fine tune the coordinates. For this I use the Side view a lot. The first step was to make the mountain taller.
Step 4 - Select the terrain and click on Edit>Copy>Edit>Paste. If any of the view ports seem too large or too small, use the magnifying tools on the top tool bar. They will affect all but the Main Camera View.
Move the new terrain beside the older one and call it Terrain 2.
With the Terrain 2 selected, go to the Top View and move the "C"- like icon just to give the mountain a different shape.
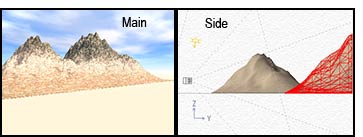
Step 5 - Select the Original Terrain or Terrain 2 and click on Edit>Copy>Edit>Paste for a third mountain.
If at any time, a terrain or object look as if it is not touching the ground and you want it to be touching the ground, click on the Vertical Drop button.

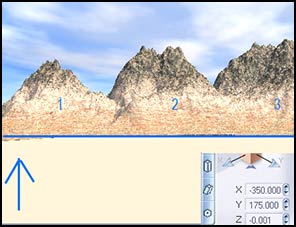
I wanted my mountains to be straighter across the Main Camera View screen without manipulating the camera. To do this, I had to move the first mountain's position (mt.1). Notice the blue line I drew. It serves to show the angle of the first mountain in relation to that view port. Also look at the X and Y positions. Refer to the axes diagram above if necessary.
To accomplish the move, I had to change the position of the mountain on the X and Y axes. I could have just moved it back until I was satisfied or I could start by using numerics and placing it roughly where I wanted it. Notice the new positions on the X and Y axes. Once I was roughly satisfied, I could make any adjustments necessary.
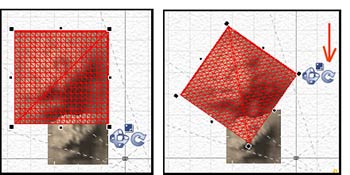
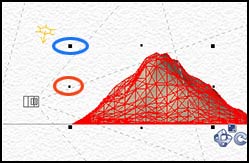
I find it easier to make scale changes in the side view while seeing how they look in the Main Camera view before and after doing a preview render. The larger black squares selected by the blue ellipses are used to make smaller or larger the whole terrain. The smaller black squares, encircled in red are used to change the dimensions of the individual "sides" of the terrain.
Since we have three mountains that are to be used as a unit, it is best to group them. Shift click on the three terrains. Go up to the top toolbar, click on Objects>Group Objects. The result will look like the screen below. I clicked on the word group in the bottom panel and renamed it "Back Mountains."
Since the mountains are in place, the next tutorial will deal with putting in a grass foreground and some foreground objects.