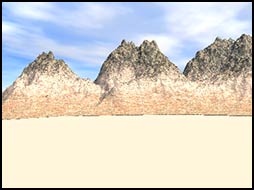
Creating Easy Landscapes - Foreground - Tutorial # 3
First familiarize yourself with the mountain tutorial. If you created one, open it here and name it foreground 1 since we will make a few different foregrounds.
Step 1 - click on the terrain icon.
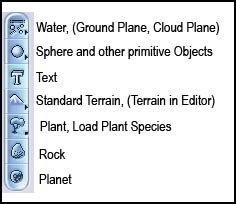
A terrain will appear that looks small.
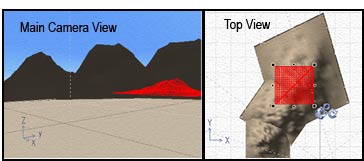
Step 2 - Expand the terrain so it fills the view port. Use the top view port. It is the easiest way to do it.
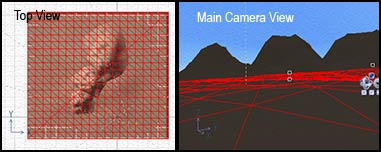
Step 3 - Double click on the terrain to open the Terrain Editor. Using the right hand button on the mouse, move it so the terrain appears on its side.
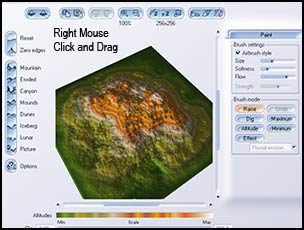
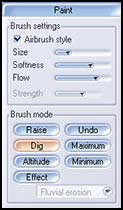
Click on the Dig command and set the dials either to airbrush and softness or non airbrush and low strength .
You want to smooth out the terrain to use it as a foreground.
Step 3 - Place the Z of the terrain slightly above the ground plain and above the base of the mountains. You can also delete the ground plane if you wish.
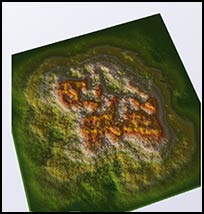
Step 4 - Choose a temporary material for the terrain which you will rename as foreground. Choose it in the same manner as you did the Mountains' materials. Play with it until you are satisfied with how it looks, You can use the Dig command or you can angle it. Look at Step #2 to see the original angle of the terrain. I turned The "Open C-like" icon to straighten the terrain. The diagram shows how I finally angled it.
Notice how the use of a terrain added movement to the foreground.
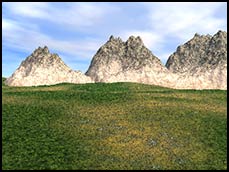
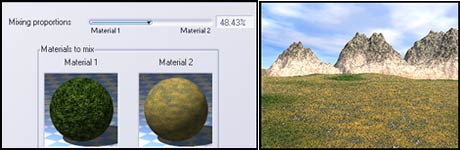
Step 5 - Now decide on the material you will use for the foreground. I decided to keep the grass but make it browner by moving the material setting to 48% toward Material 2.
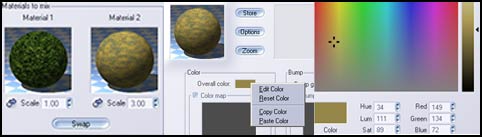
You can also make more changes in the color if you desire. You can, for example, double click on Material 2 which will bring up the color of that material. Notice overall color. You can double click on overall color or right click on it to edit it and access the Select Color.
In the next tutorial, we will add objects to the foreground.