Creating Easy Landscapes - Adding Objects to the foreground- Tutorial # 4
In this tutorial we will add two separate objects to the foreground - A lake and some rocks
Step 1 - Delete the Ground and add a new terrain as the foregound. Assign it a material. You will only have to add aforeground if you are doing this tutorial out of sequence. Otherwise you will already have a foreground.
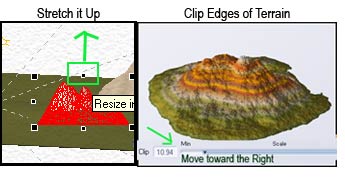
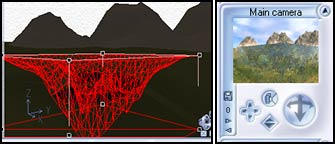
Step 2 - Create a terrain the is conically shaped. Resize it as needed so it is small and yet tall. Also, on the bottom of the Terrain Editor is a movable line used to Clip around the terrain. As you move it from zero upwards, you will notice that the "squareness" of the terrain becomes "roundish". You are clipping the edges.
Step 3 - Assign a water material to the terrain.

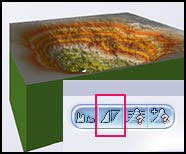
Step 4 - Double click on the terrain so it brings up the Terrain Editor. Click on the Invert Icon.
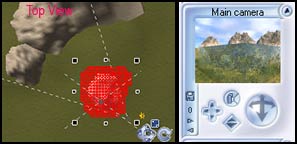
Step 5 - Move the terrain to the front of the foreground or anywhere you want the lake to be. Notice the shape of the terrain. The shape is a result of the terrain being clipped.
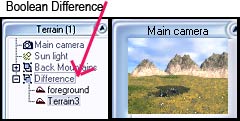
Step 6 - Now is the tricky part. You are going to use the inverted terrain as a "cookie cutter". Its called a Boolean Difference. Initially, you select the object that will have the shape removed from it. It is the host object.
Then, holding the shift key, select the "cookie cutter" piece, in this case the water terrain. Go to Objects>Make Objects Boolean>Boolean Difference.
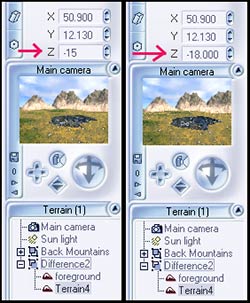
Step 7 - Next, you will use the Numerics tab in the right hand panel to work on how the lake will look (its surface area). While the difference in the lakes is not very visible in the thumbnails, it was in the main window. The -15 and -18 reflect the changes of Terrain3 (see the arrow pointing at terrain 3 in the image above.) You are not selecting the foreground or difference.
Step 8 - This step is optional, but it is important to know the capabilities of Vue 5 Easel. One can manipulate the material more than is first apparent. First, you can change the overall color of the material. Then you can change Highlights, Reflectivity, and Transparency as well as utilize various maps. The maps will be dealt with in later tutorials.
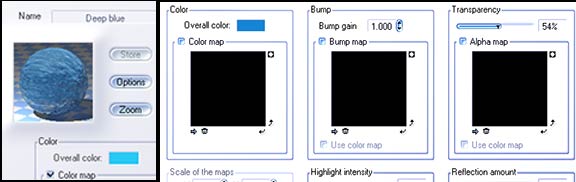
The images below show some of the changes I made in the color of the lakes.
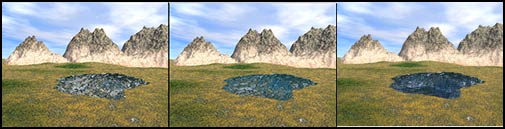
This lake should not be the center of an image because if it is too big; it tends to look empty.
Step 9 - It is easy to add more points of interest to the scene. Rocks can add interest very easily. The material for the rock can be manipulated and controlled in the same manner as it was for the water. When you place a rock, it needs to be on the ground or in the ground. To make sure it is at least on the ground, use the Drop to Ground command.

However, sometimes the rock will appear as if it is not present. That will be when the Numerics tab becomes important again. The rock will appear to be within the camera boundaries, but will not be visible in the thumbnail. Start raising the level of the Z parameter. If the rock is within the camera boundaries, it should bring it into view. It is also useful for having a portion of the rock below the surface.

The next tutorial will show you how you can even modify plants and trees in Vue 5 Easel.