Printing Isn't an Island Part 4 - Printing on Various Substrates
This article follows the one on archival printing for a reason. I wanted to eliminate the discussion of the "archivability" of an image. Basically my feeling is that the artist should do all that is reasonable to insure a long life for their work whether the work is an oil painting, a pastel, a digital print, or a montage using various substrates and various glues. Varnishes can crack, glues can deteriorate over time, sprays can interact negatively with each other, etc........... Need I say more?
I have rewritten this article at least four times as my information has changed. I will be discussing basically three different types of substrates as well as third party pigment ink along with traditional Epson ink. These are: Rabbit Skin Glue, inkAID™ Pre-coaters, and PVA (Polyvinyl Acetate) coatings.
I had been trying for a long time to combine media - basically acrylics with digital printing on various hued papers. However, I had reached a stumbling block because I could never find the right substrate to act as a ink receiver. When I went to Siggraph this summer, I met an excellent artist/teacher, Lyn Bishop who was demonstrating just that. The magic ingredient was Rabbit Skin glue. This was formerly used to size (pre-coat) oil painting canvases. She recommended purchasing Rabbit Skin glue at Daniel Smith Art Supplies. I have now purchased a few items from them. Lyn taught two basic techniques. The first involved coating a piece of artist paper about 100-140 LB stock with molding paste to give it a rough surface and the other involved painting on the paper with a pearlized paint. Once this was dry, the paper was coated with the Rabbit Skin glue. Lyn used Epson printers as I do, and they will handle paper that has a raised surface. One needs to set the printing lever so that it is in the upper most position. On my printers it can be found under the front lid and to the right. Once I found out about this glue, I was able to take all of the work I had started and finish it as well as to continue experimenting.
The basic instructions are:
1 - Choose a paper that is not too stiff. One that does not have some flexibility will have problems feeding properly into the printer because it will buckle. I use a paper I get at Hobby Lobby for $2.49 a 30" x 22" sheet. Its number is 706-16. I am sure there are many good papers available, but there are very few art stores where I live. This paper has a flexibility to it and does not buckle in the printer. Coat this paper with molding paste. I prefer the brand put out by Golden. One can find it in most hobby stores like Michael's or Hobby Lobby or one can order it over the net. The different types of molding paste, from heavy to light, all give different surfaces. You can thin them for a creamier texture. Just make sure that you do not put them on the paper to such a height that they will ruin the printer. You can get an idea of how much clearance you have by opening the front cover of your printer and looking at it as you move the lever that I described above, to adjust the clearance for the weight of your paper. You will see a bar move up and down. You can judge from how far the bar moves when you select the largest opening. If you are still confused, look in your manual under envelopes. It is that lever, I am referring to. It is helpful to have a pass through printer. One that takes the paper from a lower tray and feeds it around the roller will bend it too much. Printer such as the Epson 1520 and 3000 have trays. But you can load the paper manually through the back. Using the printer for printing paper with raised textures will most probably void your printer's warrantee should the paper get caught, etc., and it can ruin a printer. I found some extremely good hints on loading paper and printing at: www.inkjetart.com/thick.html
2 - You can also coat your paper with a pearlescent paint and then seal the paper with Rabbit Skin glue. When you print on it, you can vary the amount of pearlescene that comes through by using a lower dpi setting for the printer, such as 720 instead of 1440.
3 - Now coat the paper with Rabbit Skin glue. It comes in crystallized form. The mixing direction are on the container. While doing research for this article, I was lucky to speak to a very well known artist, Bonny Lhotka of the Digital Atelier. She, Dorothy Simpson Krause, and Karin Schminke teach a comprehensive workshop on creating custom substrates. She told me that if anyone is interested they should sign the guest book on the Digital Atelier website and they will be notified about the workshop. I sure wish I had known about this so I didn't have to recreate the "wheel" as the saying goes although I admit I thrive on experimentation. She told me that to use the Rabbit Skin glue correctly, I should heat it to 160 degrees Fahrenheit and no hotter. This should last for 5 minutes. Them it should cool to room temperature. I mix it in the top half of a double boiler and usually mix only 1/3 to 2/3 cups at a time. Then, I Coat the paper with the glue and let it dry. It can take from a few hours to half a day. Then, I suggest recoating it so as not to miss any spots. Let this dry thoroughly. It will distort the paper. I flatten the paper in a cool old dry mounting press. If it is buckled, it will not go into the printer properly. This does not hurt the texturing. I cover the paper with wax paper and sandwich both between two pieces of matte board. Bonny told me about using Pelon which is a material interfacing used in creating clothes. It can be purchased wherever fabrics are sold. Unfortunately, I didn't speak to Bonny until this article was almost finished, so I didn't get a chance to try coating Pelon. I will, however, at some point, and describe it more fully.
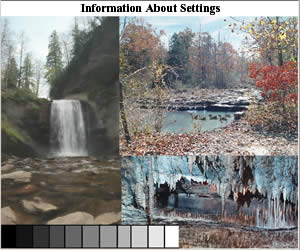
Rabbit Skin glue will add depth to your paper, make the image slightly darker, and give it a blue cast so you want to change the setting in your printer. Even a yellow based paper will appear slightly bluer. I made a calibration test strip of a few images and a gray scale.
I first did a test on the Heavyweight Matte paper to get a base for comparison. I am using two printers for this project but I am not comparing them. It is just easier to have one with Epson ink and the other with archival ink. The Epson 1280 has Epson ink and the Epson 1270 has archival ink which I will discuss shortly. Notice that with the Epson 1280, the setting for Heavyweight Matte paper and no Rabbit Skin glue is Cyan +10.
4 - Once this is done, I first make a print on the new substrate, in this instance the watercolor paper coated with Rabbit Skin glue without any color correction. I, then experiment until I am satisfied with the print. Using regular Epson ink in my Epson 1280, I use the following setting.
As it turned out, I could leave all my settings at zero. Since my setting for Cyan was initially +10, by setting it at 0, I am actually lessening the saturation of the Cyan. Any other changes I make are to the image that I will print because these can differ from image to image. I will basically lighten the image from 10%-25% and since some of the molding pastes leave a magenta cast, I might have to compensate for it depending upon what color I will be printing over it. These five steps are the basic steps.
However, my experimentation did not stop here. My next test was to use a pigment based ink. I chose MediaStreet.com's Enhanced Generations ink. I did a lot of research and it seemed to me that the longevity of this ink was good and its color was supposed to be good. When I tried it, I found its color was almost exactly the same as that produced by my Epson 1270 and Epson ink. Thus, I did not buy (I wasn't going to anyway) an ICC profile. Since this was a pigment ink, I felt its longevity should be greater than that of a dye based ink. The difference in price for a pair of cartridges was about $16.00. Since I am only going to use this ink on multimedia projects, I felt it was a better investment than purchasing an Epson 2000 or 2200 and possibly ruining it. The more I printed with the Enhanced Generation Inks, the more I liked them. It is a brilliant, vibrant ink, yet seems to have an excellent tonal range and color fidelity.
Remember, the Rabbit Skin glue not only gives a bluish tone once printed, but it also darkens the image; so that needs to be taken into account when preparing an image. I followed the same procedure for testing the MediaStreet Enhanced Generation ink in the Epson 1270 printer as I did when testing the Epson ink in the Epson 1280 printer.
On the Epson 1270 with regular Epson Heavyweight Matte paper and Epson ink, I found that using the following settings work best for me Cyan +2 and Magenta -8. But, that is not necessarily true for anyone else. I am only including my settings to give a range and magnitude of the changes I made. Also, and this is important for the tests when I use the Epson Matte Heavyweight paper, I use the corresponding setting for the media type of Matte Paper-Heavyweight. When I coat the paper, I use the Plain Paper settings. For regular Epson Heavyweight Matte paper and Enhanced Generations ink, the settings were: Magenta -3 and yellow +5. However, on the Epson Heavyweight paper, the colors looked washed out when printed with the Enhanced Generations ink compared to what they looked like when printed over Rabbit Skin Glue and inkAID™ Precoat Matte Semi-Gloss, or Gloss, which I will discuss in the next section.
I, then put in one of my Rabbit Skin glue covered papers, I switched the paper setting to plain paper, and found that the following settings worked the best: Cyan -5 and Yellow +5.
Please assume that for all the precoating tests the controls are set as the screen capture above except for the Cyan, Magenta, and Yellow settings. That is - Media Type: Plain Paper; Color Management: Color Controls; Mode: Photo-realistic; Print Quality: 1440. High Speed should not have been checked.
After the Rabbit Skin glue, I coated my papers with various precoatings from inkAID™.com. inkAid™ specializes in different precoating materials for porous and non porous surfaces. There are three precoatings: White matte, clear semi-gloss, and gloss. These can be used with inkAID™ adhesive. I will be discussing all of these in the article. Even though these precoatings are for pigmented inks such as the Enhanced Generations Inks, they worked very well with the Epson ink for the 1280 which is a dye based ink. The first precoating I used was the white Matte Precoating. This coating turns a bright white when dry. It is easy to use and water soluble. I put it on the same watercolor paper I have been using steadily. It is useful to size the paper with the Matte Precoating before doing anything else with the paper. This goes into the fibers and acts as a sealant. For the Epson 1280 with Epson Ink I found the setting was almost the same for the paper when it was coated with Rabbit Skin Glue which is interesting because Rabbit Skin Glue goes on clear. The only setting I changed was the Cyan to +3. With the Epson 1270 and the Enhanced Generations inks, the setting was Yellow +5. The prints were as dark as with the Rabbit Skin glue, but they did not add any discernible cast to the image.
The next step was to test the Semi-Gloss Precoat from inkAID™. This dries clear. The settings on both printers with everything remaining constant was the same as for the matte precoating. On the Epson 1270, the print, however, was not as dark as the one with the matte coating.
Lastly, for this part of the test, I used the Gloss Precoat in two ways. First I applied it once and it appeared similar to the semi-gloss. Then I applied it with inkAID™'s precoat adhesive. One must take extreme care when applying any finish to make a paper glossy for any bubble, missed spot, drip, etc. will show. Since one does not normally use a textured surface for a glossy finish, I changed papers and chose a smooth vellum. In the information that is on the inkAid™ website they state that on semi-porous surfaces, two coats might be necessary. That was the case. Also, to get more of a glossy finish, I tried the adhesive and gloss on this smoother vellum. Bonny told me that these precoats can be used on any substrate that will go through the printer.
The bounds of the parameters of the settings on the chart below have to be understood. Sometimes all that seemed different were the tonalities of the gray scale on the bottom of the test image. I looked at them under daylight plus tungsten, and even with a slight cast, if the colors of the image looked good, I accepted it. I was not concerned with getting an exact match from the monitor to the printer because I know these inks and/or coatings are capable of doing that with more detailed work with the settings. I have proven that. So look at the settings as generalities. Also, this is just a base for getting ready to add multimedia "ingredients" to the paper. After I printed pieces other than samples, I found that I needed to change some of the settings. This is normal. That is why I use these settings as starting points and make notes as I continue to use them.
| Paper, Coating, and/or Ink | 1270 | 1280 | Comments |
| Epson heavy Weight Paper and Epson Ink | Cyan +2 Magenta -8 | Cyan +10 | |
| Epson Heavy Weight Paper | Enhanced Generations Ink (GE) Magenta -3 Yellow +5 | Epson Ink same as above | |
| Watercolor paper and Rabbit Skin Glue | GE Ink Cyan -5 Yellow +5 | Epson Ink Cyan 0, Magenta 0, Yellow 0 | Rabbit Skin Glue darkens any image |
| Watercolor paper and Inkaid matte precoat | GE Yellow +5 | Epson Ink Cyan +3 | Epson Ink print is Darker than GE ink print |
| Watercolor paper and Inkaid Semi-Gloss | Yellow +5 | Same comments and settings as directly above (Cyan +3) | GE Inkaid semi-gloss print is lighter than the GE matte print |
| Watercolor paper and Inkaid Gloss alone | Yellow + 5 | Magenta -5, Cyan +5 | With one coat similar to the semi-gloss |
| Bristol Vellum and Inkaid Gloss with Adhesive | The prints worked better with the Epson inks than with the Enhanced Generations inks probably because of the extreme glossy surface. | Magenta -3, Yellow +5 | |
| Watercolor paper and Inkaid Gloss with adhesive | I didn't like this combination with the watercolor paper. The roughness of this paper was not suited for a very glossy finish. |
The third material I tested goes by the initials PVA. I received e-mail from a Renderosity member, raymo45, telling me about PVA. PVA stands for two chemical names, and both seem to have a role in precoatings. They are Polyvinyl Acetate and Polyvinyl Alcohol. As an aside, I found a very interesting article about commercial paper coatings that I want to pass on. The irony of this type of coating is that it is extremely inexpensive as well as extremely easy to get. Another name for PVA is White Glue also known as Elmer's Glue-all. I poured some in a cup and diluted it with water just enough so it would spread easily. It took a few hours to dry, and, even then, I added a few more hours so I knew it was dry. After the second coat of any of these materials, I always let it dry overnight and sometimes for 24 hours. PVA was not part of the chart above because I found out about it after all the tests were done. Basically, it does not add a cast to the paper. I started out with the same settings I used for inkAID™ Semi-Gloss with Enhanced Generations ink.
This finishes this part of the tests. For the next part, I will describe how one can use the above information to add texture and luminescence to a picture. Firstly, one needs to experiment as I did above with their own printer, ink, and paper to get an idea of how these different materials work together. Once one gets a feel for how these "ingredients" work together, then one can start combining.
To add texture to a paper, use light weight or regular Golden molding paste and just paint it on the paper. You can add water to it or add Gesso to make it thinner. You can paint a pattern or just add texture. Once it is dry, you can even sand it. Just make sure that the texture isn't too high to cause a problem with the printer. You can leave it white or paint over it with acrylic pearlized paints. When all is dry, coat it with any of the precoaters described above. Remember, the precoat will cause your image to appear darker; so you will have to compensate either in your image editing program or in the printing aspect. Also, I always use two coats of any precoating material because I want to ensure that all the surface is covered. If there are bare spots, they will not take ink properly or at all. However, one needs to be careful so that the first coat doesn't dissolve and "glop". Another important consideration is that, once again, all paper will distort once a coating is applied, so one must flatten it before printing on it. Since the ink I was using was archival, Enhanced Generations, and does not run in water, I initially did not seal the paper. I found that all the inks dried better when the paper was first sealed to eliminate the porosity. So, I sealed it before painting on it or adding texture. I used a clear Acrylic coating. This step is optional. I use Patricia Nimrocks Clear Acrylic Sealer (matte). I, also could have used, as stated above, the inkAID™ Matte Precoat which gives the background a nice, bright white surface.
To add luminescence to a picture, just paint with pearlized or luminescent acrylic paints and then coat it as you did above and treat it the same way.
In conclusion, I found that the Enhanced Generation inks and the Epson inks behaved in a similar manner with the different coatings. I did not try the latter using the Elmer's glue. How long each will last, only time will tell and "air pollution." Even though the inks are archival, because pigment inks remain on the surface if the substrate is smooth, it was suggested that I spray the final product with a sealer. I have used Krylon UV Protectant for many years. However, another sealer is the Krylon non-yellowing sealer.
Rabbit Skin glue is much less expensive than the inkAID™ Pre-coaters. A 1 LB bag of crystals will last forever and it only costs about $11 plus shipping, but it is a nuisance to work with. It is a gelatin based glue so that it has to be combined with water and heated in a double boiler. It then has to be cooled, but not so much that it becomes gelatinous. Since all the paper needs to be coated and any area missed will not take the ink, one should coat it twice. By the time the first coat is dry which takes a few hours, the Rabbit Skin glue has already become gelatinous, so the process has to be started over again. Bonny Lhotka also told me that through her experience, the Rabbit Skin glue can crack over a period of time. Rabbit Skin glue is hygroscopic; this means that it reacts to changes in the atmosphere (temperature, humidity), etc. by shrinking and swelling. It is, also, not waterproof. The inkAID™ pre-coatings are much easier to work with. They dry quickly and are waterproof. One uses them straight out of the bottle. They can be used anywhere and one doesn't have to depend on a mechanism to heat the Rabbit Skin glue and then cool it, etc. One difference between the Rabbit Skin glue and the inkAID™ coatings is that the Rabbit Skin glue seems to build up more on the surface than the inkAID™ coatings and acts more like a binder than just a precoating. Other nice properties of the inkAID™ precoatings is the variety, their ease of use, and the ability to section your paper off and apply a gloss precoat to part of it and a semi-gloss to another, for example. Thus, I can have a low lustre finish or a high gloss finish or a combination. One, has to be careful in how it is brushed on because if it goes on unevenly, the part of the surface that has a heavier coating will be glossier than the rest although the final coating of a clear Krylon will eradicate the difference. Rabbit Skin glue creates a low gloss finish. The Elmer's glue also acted as a binder encapsulating the raised texture. Initially, I felt that Rabbit Skin glue was better if one wanted to use a lot of raised texture in the print because of its encapsulating properties. The reason for this was that the molding paste immediately after printing felt harder under the Rabbit Skin glue and the inked surface felt "dryer" ie:, less "tacky" than it did using the inkAID™ Semi-Gloss. But as the days progressed with these tests, the inks cured, the molding paste cured and everything began to dry more thoroughly. In a few days, I could not tell the difference between the finishes as far as how "sturdy" or "dry" they appeared and felt.
The inkAID™ Precoatings cost $21 for a liter and $12 for shipping or $59 for a gallon and $12 for shipping. For more information, go to inkaid.com. The Enhanced Generations inks are made by Media Street and can be purchased from their website. Go to mediastreet.com The difference in price for a black and color cartridge of Epson ink for the 1270 or 1280 and the Enhanced Generations cartridge is about $16. The first time one uses it, one must buy a flusher to flush out the heads. Jet Jrano is recommended so the first time purchase of inks is nearer to $100.00. But the flusher is used only when changing types of ink and the Jet Jrano cartridge can be reused.
The different coatings all produce a different surface. On paper which is porous especially water color paper, although I did use velum as well, the finishes were as follows in my estimation: Rabbit Skin glue - semi gloss; inkAID™ Matte - matte; inkAID™ Semi-Gloss more of a lustre or less glossy than the Rabbit Skin Glue; 2 coats of inkAID™ Gloss - Semi-Gloss; inkAID™ Gloss over Adhesive - Gloss; Elmer's glue - matte to lustre.
I am looking forward to coating many different types of papers, especially papers I would never have used before. I already have done some of that, but now with these different precoatings, I can do so much more. As an aside and after thought, I just want to mention do not be discouraged if the first few coatings don't look good. I went through a few prints where a hair from the brush stuck in the precoating and I didn't notice it or I thought the first precoat was completely dry and when I went to do the second coat, I found the first coat sort of "glopped" up and I had to throw away the paper. To avoid these problems let the coating dry even longer than you might feel necessary, keep the coating thin but make sure it covers the paper, and experiment with different brushes to apply the various precoatings.
I, also, plan to try other PVA coatings in the near future and will do updates periodically. However, with all of these, one cannot tell what the test of time will actually do. To see the update go to Update.
![]()