|
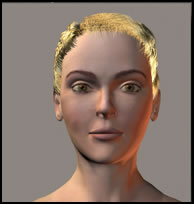
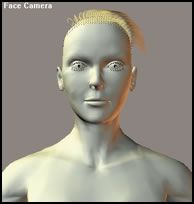
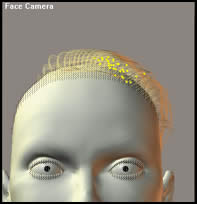
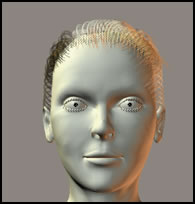
This hair style is totally different than the others I have
created. I will give an example of the final product first,
and then show how to create it. Again, I render it directly
without any change in materials or lighting from the default
settling in Poser. All I do is click on Render>Render.
Hint #11 For this hair style, I created 11 Hair
Groups. Aside from keeping track of the Hair Groups
which you can by renaming them, it isn't harder to deal with
more. In fact, it is easier because you can vary the lengths
and the direction of the hairs from the start. This is important
for a short hair style.
The hair in the two front groups and the side group nearest
to the face (2, 1 on each side of the head), will be very
short and turn toward the face. The length of the Guide
Hairs in all Hair Growth sections was 0.1500.
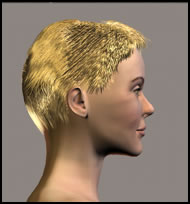
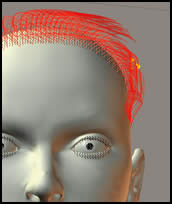
Hint #12 This is the first time I used the Scale
Hairs Tool to create hair styles. If you look at the middle
picture above, you will notice the tail of hair hanging over
her shoulder. For this style, that tail was divided into small
sections and bent . To blend it, I used the Scale Hairs
Tool, shown in the first picture below, because it would
shorten some of the strand in one section as I bent it. I
alternated between using the Scale Hairs Tool and the
Translate Hairs Tool. But it is important to Constrain
the length and only work from the tip of the strand.
This method insures that the hair will not be pulled flat
on top.
Hint #13 The trick to selecting a few hairs is to
first zoom in on the image. Then to using the Selection
Tool select a few hairs. Then, using the Remove
Hairs Tool, remove all the rest. It is not hard to select
1 Guide Hair.
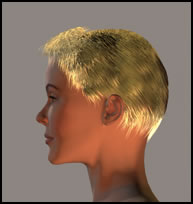
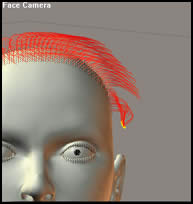
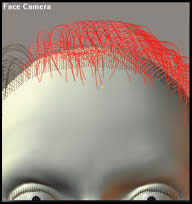
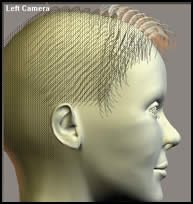
Work from the lowest part of the hair toward the top. Next
add the hair on the sides closest to the face. The length
of the Guide Hairs should be 0.1500. The hair should
look like the pictures below.
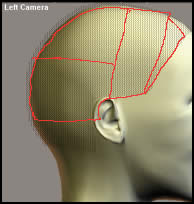
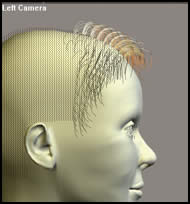
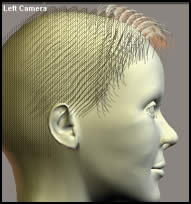
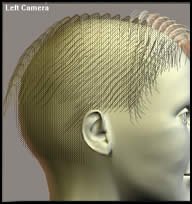
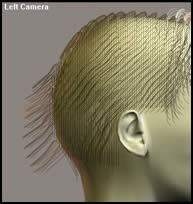
The positioning of the hair above the ear is illustrated
by the pictures below. Before using any of the styling tools,
I set the Growth Controls as illustrated. To shorten
the hair in front of the ear, I selected it, and used the
shortening/lengthening dial on the Styling Tools menu.
As it turned out, I later lengthened them and blended them
with the front section.
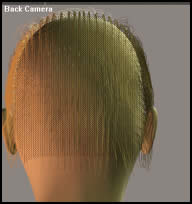
The next section I added was the one on the same level but
abutting the back of the head (7). To correct the tail, I
used the Translate Hairs Hairs Tool as described many
times previously. I worked in small sections with a few hairs
at a time. The ragged appearance of the bottom of this hair
line is not critical because the lower level will blend into
it. Theoretically, I should have worked from the lower to
the higher level as I did with the front of the hair, but,
there is another way to smooth out the back if necessary and
I will address this at the end of this discussion. Notice
that the settings are the same for both side Growth Hair
sections.
The bottom section of hair (8) behaved in the same manner
as did section 7. The settings were the same and the manner
of working with them were the same. The major difference was
that the Guide Hairs at the nape of the neck had often
to be isolated and straightened and made the same length.
Hint #14 To straighten a hair, I used the Translate
Hairs Tool with Constrain Length on. Then, I would
remove the Constrain Length and with the Translate
Hairs Tool push it back a little. If I had a number of
hairs or I didn't want to change how the hair was positioned
(flat or puffy), I changed the length with the Lengthen/Shorten
Slider. I, also, of course, could shorten or lengthen
a group of hairs with the Translate Hairs Tool.
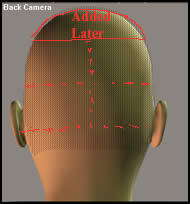
When I finished the hair style, I did not like the way the
back looked, so I added another section of hair in the back.
You will see it identified in the beginning of this tutorial
as "added later." I let the hair extend in the back
to just below the ears and blended it in with the Translate
Hairs Tool.
Hint #15 The number of hairs per section is very important
when rendering, especially for a short hair style. I tried
a number of combinations, and I found, the fewer the better.
This makes sense because if one has short thick hair, it is
often thinned when it is cut so it will lie flat. Counting
both sides of the head there are 11 sections in all.
|
Section Name
|
Number of Hairs Per Section
|
| 2 Front Sections |
200 |
| 2 Side Sections Abutting Face |
300 |
| Back Top Section "Added
Last" |
500 |
| Rest of Sections |
800 |
For more Poser 5 tutorials, click the Articles button below. |