|
I do not claim to be an expert in creating hair in Poser
5. Having made many wigs for miniature figures, I am aware
how hair needs to fall to be styled. I have been trying to
take some of this knowledge with me as I work in the Poser
5 Hair Room. I basically am sharing my experience with you
in the hopes that it might speed up the process for you. Each
of these mini tutorials will consist of one or more hints.
They are more or less diaries of my relatively successful
experiments.
I will assume you might have read my first tutorial. If,
not, you might want to read it, for I will be referring to
it in the first hint. Poser
5 Hair Tutorial # 1.
Hint # 1- If you look at Step 6 in the first
tutorial, it instructs you to close the Group Editor
before assigning a new Hair Group or changing the Camera
Position of the figure. I did that in the first tutorial
for a reason. I felt that if the steps were clearly delineated,
there would be less confusion in executing them. However,
all these steps can be done at the same time without having
to close any palettes or menus.
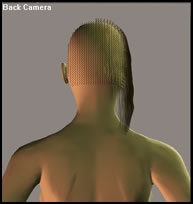
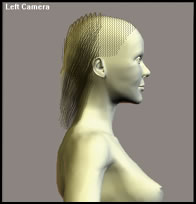
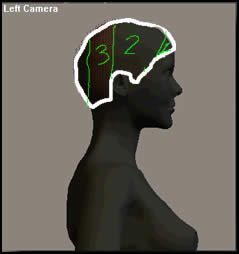
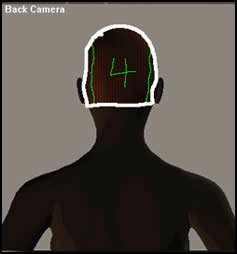
Hint # 2 - I have been playing around with the placement
of Hair Groups on the skull caps. While I know that
some people have used just a few, I have found that I have
used 7 successfully. The pictures show the placement and I
will explain why and for what types of hair styles they work
well.
 |
 |
The first two sections are in the front. These are pictured
here by the area marked #1 and its counter part which would
be on the other side. These would be created from the front
as in the first tutorial. I create two bangs so I have flexibility
in styling. The next two sections are section #2 and its counterpart.
These two I found to be straight forward and easy to style.
Section #3 and its counterpart were the ones that I found
added a lot to the hair piece. I found that part of the hair
never would lie properly and I could not always blend it to
my satisfaction. By setting the Pull Down control to
0.00600 and the Pull Back control to 0.00500, I could
get it to lay in a fashion more similar to regular hair, so
I had less styling to do to make it behave like regular hair.
Then the back piece could be used to smooth out and cover
any imperfections.
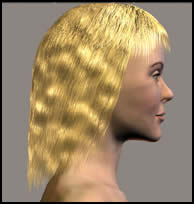
Illustrations are most easily understood than word. These
show the basic setup for the straight hair template I was
fashioning.
|
|
|
|
|
|
|
Bangs Setting
|
Long Hair Setting
|
|
|
|
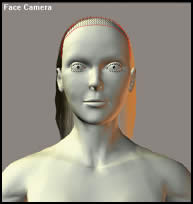
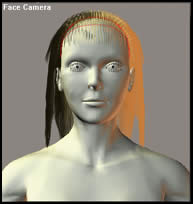
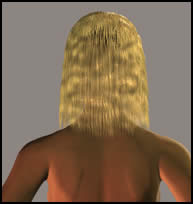
The hair lies smoothly on the neck. It is not puffing out
to the side which it wanted to do previously. The Pull Back
and Pull Down setting took care of that.
The spaces between groups of hair visible in the bottom set
of pictures are not a problem. I will be able to easily manipulate
the hairs with the styling tools to spread them out. I'll
describe how later in this tutorial and show the styling tools
I have found the most helpful for this type of manipulation.
The bangs are straight forward. The settings are shown above.
Again, later, I will blend them into the rest of the hair.
It is important to continually look at the hair from all
camera angles. What looks good in one, might look terrible
in another. It is easier to fix problems as they occur. I
work symmetrically around the head.
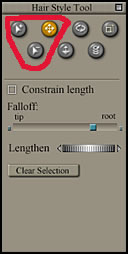
Once I had established a basic hair setting, I started to
use the Hair Styling Tools. I found that there were
three I used the most for just arranging the hair in
place. This did not involve any curling. The three tools were:
the Selection Tool, Translate Hairs Tool, and
Remove Hairs from Selection Tool. Three other settings
that are important at this stage of the process are 1) to
NOT check the Constrain Length, 2) to be aware of the
Falloff Tool and to adjust the Falloff Tool Slider
as you use it, and 3) to clear each selection after you have
finished with it so you won't access it by mistake. All you
need to do is hit the Clear Selection Tab.
|
Hair Style Tools
|
Selection
|
Translate
|
Remove
|
|
|
|
|
|
The illustrations below will describe as well as possible
without a video how I use these tools together to manipulate
the hair for a very basic style. This basic style I call a
template because I can then develop a lot of styles from it
later on.
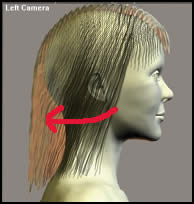
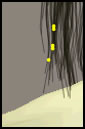
If you look at the first illustration, you will see that
the hair is going toward the back. Before the dark hair in
back of her ear was hanging as seen in the picture, it overlapped
the hair in front of the ear. To move it in the direction
of the arrow, I first had to select it. But there is no way
to know whether I have selected the correct strands or not
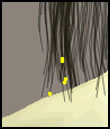
from a side view. So I selected the hair with the Selection
Tool in a side view and then changed the view to a front
view as seen in the second illustration. Now the nodes (yellow
dots) show. I returned to the side view and with the Translate
Tool dragged the strands back as I wanted them.
Now this same Translate Tool is great for lengthening
individual strands of hair. However, what if the Selection
Tool selects too many strands? The Remove Tool will
remove one or more strands as depicted by nodes. Once again,
it helps to be in the front camera angle. It helps to zoom
up closely. If you are working with hair lengths, it is especially
important to have the Constrain Length Box unchecked.
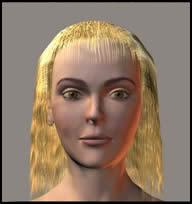
This hairstyle now has been finished in the
sense that I call it a template. I will use it for creating
many different hair styles.
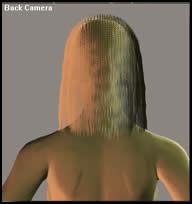
|
Guide Hairs for Straight Hair Template
|
|
|
|
|
|
Simple Render with Hair Strands
Added
|
|
|
|
|
I added hair strands to the bottom row before I rendered
it in draft mode to see what it would look like. I did not take it to the material room. If you look at
how the skull cap was segmented, the number of strands added
are shown in the box below. These are only an example to see
if the number should be increased or decreased.
| Bangs (2) |
300 |
| Above Ear (2) |
1000 |
| Lengthwise Behind Ear (2) |
800 |
| Back of Head (1) |
1000 |
To Hints
on Creating Hair in Poser 5 #2
For more Poser 5 tutorials, click the Articles button below. |