|
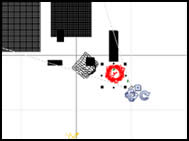
Placement of objects in a 3D world can be very hard to visualize.
I have found that using the Top View and the Main
Camera View together work very well. If you look at the
red areas in both the first window shots, you will see the
relative placement of the objects. In this case, the red is
a small hill. If you move a terrain in the top view toward
You, you will notice it gets bigger in the Main Camera
Window. See the illustration of the tree further down in this
tutorial.
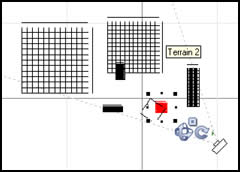
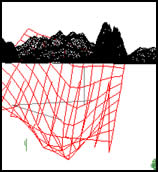
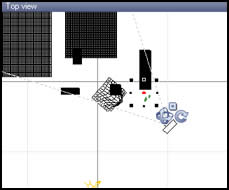
If I decided I wanted a tree to be placed in front of the
mountain in the middle of the scene, I would first place it
using the Top View window. This is what I did in the
illustration below. I placed a default tree- the large
red circle in the Top View window - in front of the mountain
which is represented by the long, thin rectangle. As can be
seen, the red circle is large.
|
Top View #1
|
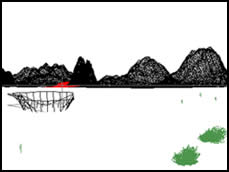
Corresponding MC Window #1
|
Corresponding MC Window #1
|
 |
 |
 |
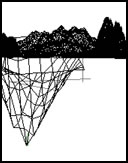
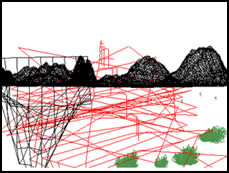
I, then, moved the tree in the Main Camera window (MC)
until it was the correct size. You can see how small the circle
is now in the Top View window. However, I have to move
it very little in the Top View window. Basically, and this
is a very basic and rough statement , placement is done
in the Top View window and sizing is done in the Main Camera
View window. This is not exact by any means but is a good
place to start. I, also, use the Front View window
for placing objects along the horizon or relative to it. But
I use it in conjunction with the Main View.
|
Main Camera Window #2
|
Corresponding Top View #2
|
Rendered MC Window #2
|
 |
 |
 |
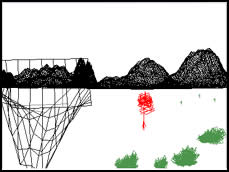
Now that, I hope, the concept is clear, I will return to
the placement of the lake.
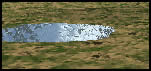
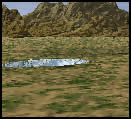
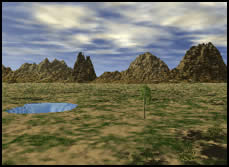
1 - Bring your terrain that you will use for the lake into
the scene. I have brought in my terrain and changed it into
a lake. Now I need to position it.
2 - Position it using the two windows I mentioned. When it
is in a relatively satisfactory position, begin working on
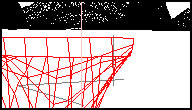
the angle of the opening of the terrain. Go from the rendered
to the wireframe view often until the opening is of a pleasing
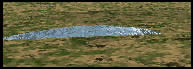
size and angle. That is all there is to it. Place rocks, greenery,
etc. around it. The following lakes all appear to be slightly
different. This is because the angle of the opening is different
in each. The following windows illustrate these differences.
The key is to experiment once you begin to understand what
the basic movements of the objects do and how they exist in
space relative to each other.
|