|
This tutorial will focus on using layers in Right Hemisphere's
Deep Paint as a stand-alone program and then saving the Deep
Paint file in its (1) native dp2 file format and then (2)
as a PSD file. Saving it as a PSD file rather than a TIFF,
JPG, or BMP will ensure that it retains its layers. I will
initially show how I create the file in Deep Paint using layers
and then, once it is created, how I then manipulate the layers
for effect in both Deep Paint and in Photoshop 7. I could
have just as easily used an earlier version of Photoshop,
but I wanted to demonstrate Deep Paint's compatibility with
Photoshop 7.
 Even
though I normally do not recommend resampling a picture; i.e.
changing its size, for example, from 4" x 6" to
8" x 12" at 300 dpi when it is done in Photoshop
and with a file from Deep Paint, its detail and color are
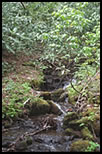
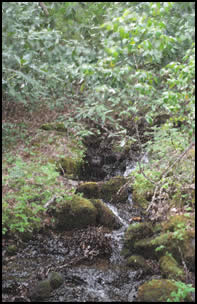
not diminished. For this scenic, I started with a file of
3.887" x 6" at 300 dpi. To see a larger rendition
of the initial scene, click on the image on the left. Even
though I normally do not recommend resampling a picture; i.e.
changing its size, for example, from 4" x 6" to
8" x 12" at 300 dpi when it is done in Photoshop
and with a file from Deep Paint, its detail and color are
not diminished. For this scenic, I started with a file of
3.887" x 6" at 300 dpi. To see a larger rendition
of the initial scene, click on the image on the left.
As I stated earlier, I like to work with Deep Paint as a
stand-alone program. It could be out of habit from when I
first started to use Deep Paint and I didn't have a lot of
memory. But I have found that I still prefer this method of
working.
There are two files that accompany this tutorial that can
be downloaded. One is a file of the brushes I used for the
tutorial. The file is called Brushes.
The brushes' file is a zipped file. The other is a slightly
smaller version of the original picture. The file is called
Water Laurels.
I am giving people permission to use it for this tutorial.
Please be aware that it will take a few minutes to download
depending on your speed.
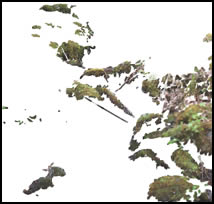
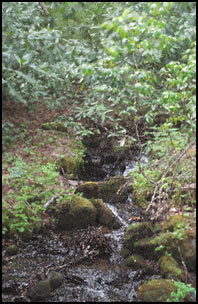
Step 1 - I set up my clone source and my layers.
This gives my work a structure. I have found that a good opacity
for a cloning source layer is about 54%. I will vary the percentage
from about 45% to 60%.
|
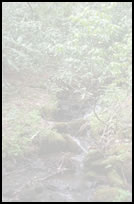
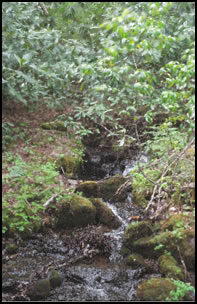
Background Image at 54%
|
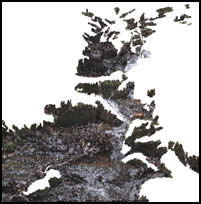
Command Panel Showing Background
as Clone Source and Other Layers
|
 |
 |
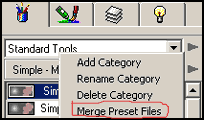
Step 2 - To add the brushes to your other brushes,
select the brushes icon click the top right arrow in the Command
Panel and select "merge preset files." The brushes
will appear under the heading Layer's Tutorial. You
can change the name if you like. The file on the right shows
the brushes in the file brushes.zip.
Step 3 - I then clone the bottom most
layer. In this case it is the water. I used the water
sparkling brush and the water no sparkling brush.
To clone, select the cloning tool and select the brush. If
you cannot remember how, see the Deep Paint manual or some
of my previous tutorials which explain the basic methods of
cloning. I always vary the size of the brushes as I work.
The sparkling water brush gives the water a bubbling
effect while the water no sparkling brush gives it
a smoother effect. When the brush is not a round brush, always
follow the direction of the lines in the picture unless you
make a decision not to do that.
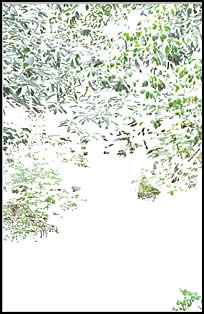
Step 4 - Since the water does not spill over into
the rest of the background, I did not make that layer invisible
when I added the background leaves. I divided this layer roughly
into two parts. If you look at the top third of the image,
the texture is smoother than the texture at the bottom two
thirds. I used the smooth round small brush for the
top third of the background leaves and the bubbles tiny
closer together at a larger size, about 20 instead of
14 for the bottom third. I varied the size of both brushes..
Step 5 - For the moss layer, I once again
made invisible all the layers but the moss layer and the background
source layer. I used the smooth round small brush
because I wanted the smoothness of the moss to contrast with
the roughness of the water even though I did use a rough
round 12 brush for variation when I cloned the moss. From
time to time, I made visible the water layer and the background
leaves layer to make sure I was cloning the moss layer correctly.
I wanted to make sure I was varying the textures of the moss
layer to complement the textures of the water and the background
leaves.
Step 6 - The next to the last layer I
needed to clone was the leaves layer. For this I used three
different smooth brushes. These were the smooth round small,
smooth square 22, and the smooth squashed round 14.
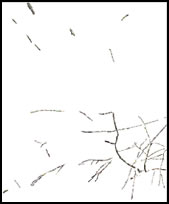
Step 7 - The very last layer was the
stem layer. For that I used the toothpaste CBS brush
which gives a raised three dimensional effect.
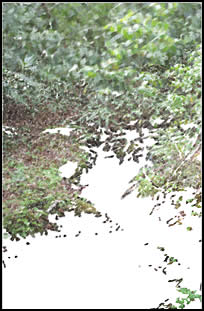
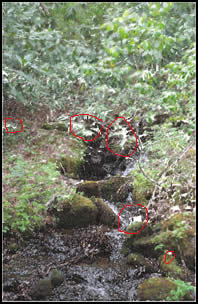
Step 8 - After all the layers had been
completed, I made the cloning source layer invisible to see
if I had cloned in all the details. I then went back and filled
in any holes that I found. Some of the holes are circled in
red.
|
Before
|
After
|
 |
 |
As anyone who has used Deep Paint will know,
the native format is the only one that will retain completely
the lighting and depth elements. Below are two screen captures
of this scenic with all layers including the background at
100%. One is the native Deep Paint format of dp2 and the other
is the Saved As psd format. As you can see, it is hard to
tell the difference. However, the difference is discernible
when looking at the image in Deep Paint
|
dp2
|
psd
|
 |
 |
 At
this stage of the process, I can leave this picture in Deep
Paint and print it from Deep Paint or I can save it as a psd
and work with it in Photoshop. In either case, I will definitely
manipulate the opacity of the layers as well as work with
some of the different elements on the layers. This is a thumbnail
of the final version with only the opacities of the layers
changed. In this case, I only changed the opacity of the source
layer. I left it as it was originally when I was working on
the file in Deep Paint (54%). Click on it to see a larger
version along with a comparison to the original image. At
this stage of the process, I can leave this picture in Deep
Paint and print it from Deep Paint or I can save it as a psd
and work with it in Photoshop. In either case, I will definitely
manipulate the opacity of the layers as well as work with
some of the different elements on the layers. This is a thumbnail
of the final version with only the opacities of the layers
changed. In this case, I only changed the opacity of the source
layer. I left it as it was originally when I was working on
the file in Deep Paint (54%). Click on it to see a larger
version along with a comparison to the original image.
When you save an image as a psd file in Deep Paint and then
open it in Photoshop 7, for example, the opacity of all the
layers defaults to 100%. If you want the layers to appear
as they did in Deep Paint before they were flattened in Deep
Paint because their opacities will not remain the same when
flattened in Deep Paint, even though the file is still in
a dp2 format, as they were when in layers, you must make note
of the opacities and then transfer those to to their respective
layers in Photoshop. However, flattening dp2 files is another
issue altogether. For example. If the stem layer was set at
60 % in Deep Paint, when the psd file was brought into Photoshop,
it would appear to be 100% so it must be reduced to 60%.
I hope this is just a starting point because
so much more can be done using Deep Paint alone or in conjunction
with other programs. For example, areas can be eliminated
or added either through cloning or through using the brushes
in Deep Paint. Also, in Photoshop, various filters can be
applied to the (Deep Paint) layers that now comprise the Photoshop
image. WaterLaurels version
1 is the one pictured in this tutorial. WaterLaurels
version 2 is an example of the same original
pictrue worked with different brushes in Deep Paint.
|
