|
I have written a number of tutorials on Deep Paint. It is
one of my favorite programs. I use it as a stand-alone and
import into it a bitmap file either in PSD, BMP, or TIF format.
Sometimes I have discovered that a certain file in a certain
format will have parts that cannot be opened in Deep Paint.
If I just save the file in another format, one of the three
mentioned above will work, it will import properly into Deep
Paint. I use Deep Paint as a separate program because it is
easier on memory. Deep Paint is memory intensive. Right Hemisphere
states that in their manual by showing a chart of how much
memory is needed according to the file size opened in Deep
Paint. I have 1 gig of memory because in Photoshop I create
very large files, and I, also, do animation. I generally use
a file size of about 6 MB. With that size I never have to
wait to complete a command. I have, also, found that I can
reduce the dpi of a file from 300 to 150 and, upon completion
of my project, resample it back to 300 dpi without any noticeable
degredation in quality when I print on a home printer. I have
not tried this using service bureau imagesetters.
Since I have written other tutorials on using Deep Paint
that are available on my web site as well as on that of Right
Hemisphere detailing beginning cloning and other rudimentary
steps, I will not present basic steps for using Deep Paint
here. Instead, please look at the other tutorials or refer
to DeepPaint's manual on how to use basic tools.
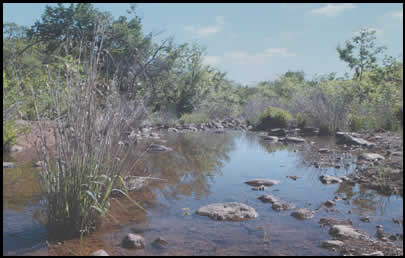
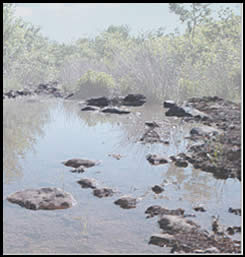
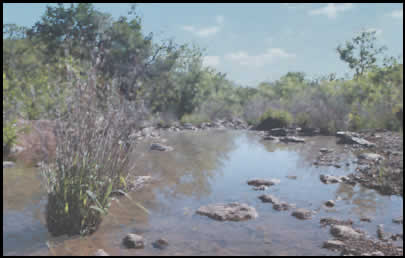
This tutorial will show you the steps I used to create the
Deep Paint Weeds and Water picture. I used the picture
I created in "Image Manipulation Part 1."
 I
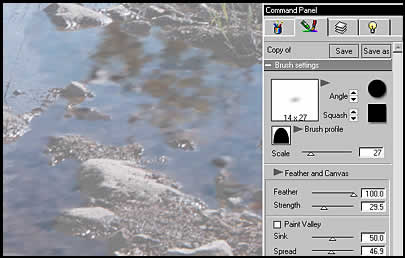
have included with this tutorial a zipped file of brushes
that I have created. Click on the brush image to download
the zipped file and then open it as you would any zipped file.
The tool I used throughout was the "Deep Paint Cloning
Tool," found on the "Tool Bar," unless otherwise
noted. These brushes for cloning are to be used on any image
of your choice. This tutorial outlines the steps I used to
create this particular picture. Some of the sizes of the brushes
are different than in the tutorial. Just change the size to
match the tutorial or use the brush as it is. I
have included with this tutorial a zipped file of brushes
that I have created. Click on the brush image to download
the zipped file and then open it as you would any zipped file.
The tool I used throughout was the "Deep Paint Cloning
Tool," found on the "Tool Bar," unless otherwise
noted. These brushes for cloning are to be used on any image
of your choice. This tutorial outlines the steps I used to
create this particular picture. Some of the sizes of the brushes
are different than in the tutorial. Just change the size to
match the tutorial or use the brush as it is.
I have included a view of each layer as I created it. To
be more visible, the layer will appear on a white background
instead of over the "Cloning Source" layer. To see
the picture of the layers, move your mouse over the red button
next to the different layers. To close the layer, click your
mouse anywhere on that layer.
Step 1 I opened a BMP file from Photoshop of about
6 MB. I set it as my clone source with the opacity at about
50%. This is individualistic. I vary the opacity from about
40-65%.
The following illustration is a print screen
of all the layers used to create the final image. When I finished
the picture I changed the opacity of the "The Base Layer
Clone Source" to 100%.
 Step 2 - The Water Layer
The first layer I created was the water layer. This initially
appeared immediately above the cloning layer. However, I moved
it later so that the foliage layer was in back of the water
layer and immediately above the cloning layer.
I created this layer with the WaterColor
Squashed brush. I cloned over the small rocks and overlapped
the edges of the other rocks. I made sure the entire area
was covered. To do this, I reduced the opacity of the cloning
layer to zero opacity. I could, also, have just clicked on
the "eye" to the left of the name of the layer to
make it invisible.
Step 3 - The Rock Layer
I created the rocks using the Smooth Round brush.
I varied the size of it from size 14 to 20. I, also, used
the Smooth Round Squashed Soft brush and varied it
from size 12 to18. I angled it to follow the different parts
of the rock. For example, when I did the top of the rock,
I had the brush in a perpendicular position; when I did the
front, for example, it was either in a vertical or diagonal
position. For the large rocks in the background of the picture
on the extreme left, after I cloned them, I took the Blur
brush and using the "Paint Tool," I softened the
rocks. I did split the rocks into two layers - the rock layer
and the background rock layer. However, this was not necessary.
 |
 |
| Rocks |
Rocks
on Far Left |
Step 4 - The Upper Water Layer
The purpose of this layer was to make sure that the water
appeared to be surrounding the rocks. I used the Watercolor
brush at "15 x 15" to go over the edges of the rocks.

Step 5 - The Sky Layer
I used the Sky brush and varied the size
from size15 to 30. Also, so it would appear relatively smooth,
I stroked in all directions.
Step 6 - Cloud Layer
I used the Cloud brush and lightly went over the
clouds that I wanted to have texture.
Step 7 - Background Foliage Layer
I used the Smooth Round brush set at a size
of 25. I, then, moved the layer to directly above the "Base
Clone Source Layer."
Step 8 - Foliage Details Layer
Once the background was worked in, I added the
details that would protrude into the sky using the Smooth
Squashed brush at size "10-15" and smaller
and moved the sky layer in back of this layer.
Step 9 - Background Weeds Layer
I used Smooth Round Squashed brush in a vertical-diagonal
position and made short strokes.
Step 10 - Weeds Details Layer
I used the Smooth Squashed brush to create a texture
variation for the weeds.
 Step
11 In this step, I cleaned up the picture. To do this,
I lowered the opacity of the background layer and turned on
and off other layers as necessary to see how well I had covered
each layer. I used the Smooth Squashed brush to add
cloning around rock areas, for example, that I had missed. Step
11 In this step, I cleaned up the picture. To do this,
I lowered the opacity of the background layer and turned on
and off other layers as necessary to see how well I had covered
each layer. I used the Smooth Squashed brush to add
cloning around rock areas, for example, that I had missed.
I, also, raised the opacity of the base layer
to 100%. I could make any changes necessary when I exported
it into Photoshop. I wanted the base layer depth of color
to show through the other layers. In this picture, it didn't
matter, but changing the opacity of the base layer can change
how a final image will look, especially if the layers are
merged in Deep Paint. They were not merged in this example.
Once in Photoshop, I resampled the image to
a dpi of 300.
After I was satisfied with how the layers looked,
I exported the file to Photoshop 5.5. As can be seen by the
screen shot on the right, all the layers remained as they
were in Deep Paint. I decided, for this tutorial, not to make
any changes. However, since the layers are in place, I can
make any changes I like.
If the changes from the first image to the last
are not apparent, it is because of the small size and screen
resolution setting. The changes made were somewhat subtle.
If you click on the image below, a larger one can be seen,
but it will take a little time to download.
|