|
I have had a few inquiries as to how I was able to create
pictures that had either a watercolor or impressionistic effect.
I have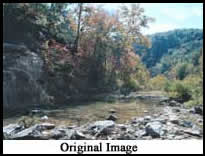 found that tutorials can encourage creativity as well as stifle
it. I believe that a tutorial should show the users the basic
steps by pointing them in a general direction.
found that tutorials can encourage creativity as well as stifle
it. I believe that a tutorial should show the users the basic
steps by pointing them in a general direction.
The following is a short tutorial on how to create "Impressionistic"
Effects using Deep Paint. If after using it, you have any
question, please e-mail me at paulajane@cox.net
1 - I compose a picture in an image editing package using
Adobe Photoshop 5.5. The picture should not have a tremendous
amount of small details but should have areas of bright colors.
Photographs containing fall foliage work very well.
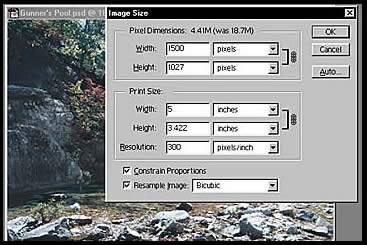
2 - I normally work at a resolution of 300 dpi. The smaller
the file size, the easier it is to work with Deep Paint. While
I usually stay away from drastic resampling, I do use resampling
when working with Deep Paint. I have found that a file size
of under 5MB works very well. I select from the My machine
is a Pentium III 500, with 500MB of Ram, but this file size
will work very well on slower machines with less memory.
3 - I prefer to use Deep Paint as a stand alone program.
I imagine my methods would work if Deep Paint were used as
a plugin filter for Photoshop. Possibly, the procedure would
even be simpler. However, I found that I preferred to use
Deep Paint as a stand alone and thus, have outlined my system
accordingly. In Deep Paint, I open a PSD file and set it up
so it is a cloning source.
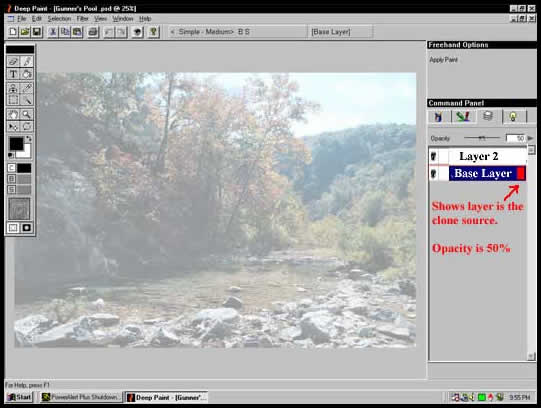
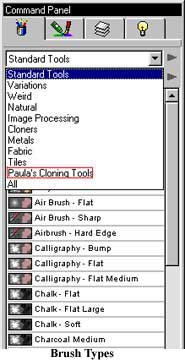
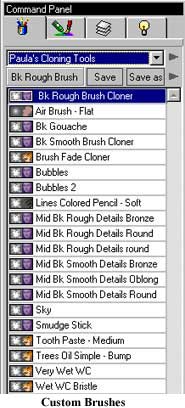
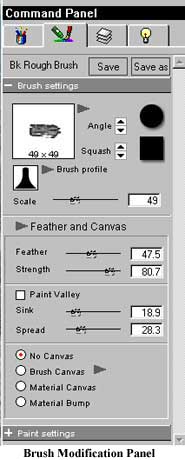
4 - I create my own set of cloning brushes to
mimic the basic texture or shape of an object.
 5
- I separate the image into components such as sky,foreground 5
- I separate the image into components such as sky,foreground
 rocks,
foreground foliage, etc. and work on each individual section.
When I am satisfied with a section, I save it without the
clone source (I delete the clone source layer) as a tif or
psd file. rocks,
foreground foliage, etc. and work on each individual section.
When I am satisfied with a section, I save it without the
clone source (I delete the clone source layer) as a tif or
psd file.
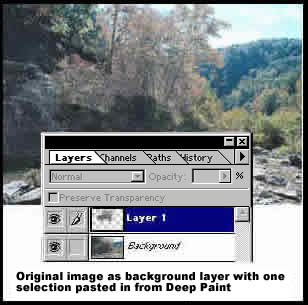
6 - In Photoshop, I delete the white background, feather
or modify the selection and cut and paste it into the original
Photoshop file of the image. It is necessary to resample the
original file so that its dimensions are the same as the file
created for Deep Paint. Because of the way Deep Paint works,
this resampling will not negatively effect the quality of
the final print.
7 - I leave this small image as a separate layer. When I
have created a 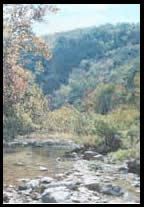 new
layer for each object in the original picture, I then use
tools from Photoshop to make any visual changes that appeal
to me. The changes I use most are opacity, sharpening, curves
or levels, and blurring. new
layer for each object in the original picture, I then use
tools from Photoshop to make any visual changes that appeal
to me. The changes I use most are opacity, sharpening, curves
or levels, and blurring.
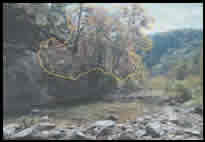
8 - Lastly, I then merge all the layers together and evaluate
the whole file. As can be seen, I only used a portion of the
original image. Click on the picture to see more created using
Photoshop and Deep Paint.
|