|
It is easy to make spheres using the new 3D Effects, but
there are some hints that will help a lot. One such is knowing
how to make a sphere with the least number of sides. If you
are not going to map the object, it is not too important,
but if you are going to map artwork on to it, having the fewest
sides helps. Notice that selecting a fill only will generate
the fewest sides.
|
15 Sides
|
12 Sides
|
3 Sides
|
|
|
|
|
The following steps will show you how to create a sphere
using Illustrator CS's 3D Effects.
|
Step 1
|
Step 2
|
Step 3
|
Step 4
|
|
|
|
|
|
|
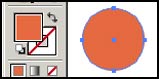
1- Create a circle with a fill only and the stroke
having no color.
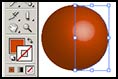
2 - Select the knife tool and cut the circle in half.
3 - Select half of the circle and pull it apart.
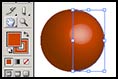
4 - Select a half circle.
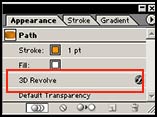
5 - With the half circle selected, click on Effects>3D>Revolve.
You must click on the Preview button. It will always
be off when you open the menu. Keep all setting Default. Then,
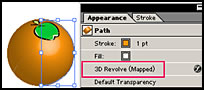
click OK. Notice the Appearance Menu. To make changes
to the object, click on the highlighted area in the Appearance
menu. The sphere can be moved around in different directions
by reactivating the 3D effects Revolve Menu through clicking
on the appropriate step in the Appearance menu.
|
3D Effects Revolve
|
Appearance Menu
|
 |
 |
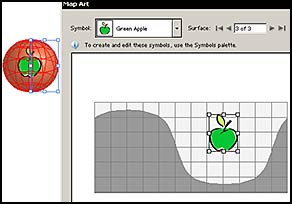
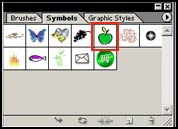
6 - In order to map a picture onto the sphere,
the picture needs to be a symbol. See the tutorial on creating
animation in order to learn how to create a symbol. For this
exercise, use a ready made symbol from the symbol library.
Once a symbol is in the symbol palette, it will appear in
the drop down menu on the Map Art section of the 3D
Effects Revolve Menu. At least I have found on a PC under
Windows 2000, I can only map a piece of art to an object if
it first resides in the Symbol Palette because it must
be available from the drop down menu on the Map Art
part of 3D Effects.
|
Symbol Palette
|
Map Art
|
 |
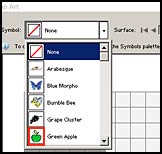 |
7 - Pull the symbol over from the drop down menu and place
it on the grid and click OK.
8 - If you want to change the position of the
symbol after you have finished it, click on the appropriate
line in the Appearance Palette, and reposition it
from the Revolve menu which will come up automatically.
Always remember to click on the Preview button.
|
Two Examples
|
Appearance Palette
|
|
|
|
|
|