|
Cinema 4 DX L version 7 is exactly what the
name implies. It is a motion picture creation program with
very sophisticated animation capabilities. However it also
has innumerable modeling capabilities to build 3D models and
the capability to create custom textures for them by using
another Maxon product, Body Paint 3D. Cinema 4D XL
7 can be broken down into five parts. The tutorial book that
comes with the program is set up in such a manner, and this
division makes a lot of sense. These parts consist of: Modeling,
Materials, Lights, Animation, and Rendering. Each section
can be thought of as a module of the program. The program
is very complex and full, yet structured, so that it can be
learnt in a systematic manner.
There are a few version of Cinema 4D; these are described
in some detail on their web site.
- The beginning version is Cinema 4D Go. It is basically
an introduction to creating 3D models and animation. Its
requirements are: Windows 95/98/NT/2000 or Mac OS 7.71+,
any Pentium or Power PC, 32 MB RAM, CD-ROM drive/hard disk,
and either a floppy or internet connections for updates.
Its cost is $195.
- The next package is Cinema 4D ART/Body Paint 3D bundle.
This version according to Maxon's web site is geared toward
the print, publishing and design professional who wants
to add 3D elements to their work. The bundle costs $995.
However, according to the web site, a version of just Cinema
4D ART will be available in April at $695.00
- Maxon's high end version is Cinema 4D XL release 7.3.
This is the program I will be reviewing. Its minimum requirements
are: 64 MByte RAM, CD ROM drive, hard disk, Mac OS of 7.6.1
or OS X PowerPC, Windows 95/98/ME/NT 4 SP3/2000, and a Pentium.
The full price of this program is $1695.
More information about all these products can be found on
the Maxon web
site. Demo versions are also available at the Maxon web site.
Also, there are quite a few forums on the net. Two are the
Plugin Cafe at: http://www.plugincafe.com
and the Cinema 4D forum on the Renderosity
website.
As stated earlier, Cinema 4D XL also works with its partner,
Maxon Body Paint 3D. Cinema 4D XL has many freeware plug-ins
(as well as commercial and shareware) at the Plugin Cafe and
on other sites and can integrate with Poser Pro Pack, Lightwave,
and other major 3D programs.
Cinema 4D XL comes with a massive reference book and a very
long tutorial book as well. I also recommend two third party
books. Both have different approaches from each other and
from the tutorial that accompanies the program: The first
is entitled: The Cinema 4D XL Handbook and is by
Adam Watkins. It is published by Charles River Media, Inc.
The other is: Maxon Cinema 4D 7 by Arndt von Koenigsmarck
and is a Peachpit press Publication. (I like to collect and
use for reference 3rd party books.)
The tutorial book that comes with Cinema 4D XL 7 is comprised
of various types of projects. These you can use separately,
find all those having to do with modeling, for example, or
do a series starting from modeling and ending with rendering.
These series are set up to emulate a real work flow situation.
Also, each section of the tutorial book has excellent discussions
of the important terms and concepts that need to be understood
in order to know how to tackle the various projects. The tutorials
are clearly written, however the results do not exactly follow
the examples in the book nor do the black and white illustrations
follow the ones on the CD-ROM. However, this does not impact
the amount of learning that can be gotten from the tutorials.
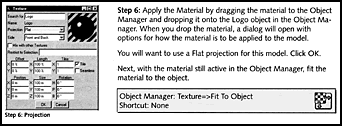
The tutorials are set up in an easy to learn fashion. I find
that this is a very important part of any program. If you
cannot learn it, you cannot use it. It is quite simple. The
tutorial will express each new step in three ways. This is
best illustrated by the visual example below.
The choice of projects, a Logo, an Interior Scene, a SciFi
Scene, and a Scene in Preparation for Radiosity demonstrate
well the elements used in Cinema 4D XL. The tutorials have
chosen varied projects that make use of a number of different
effects. These effects often involve repetitive elements,
thus cementing in concepts and methods.
The reference manual also contains introductory as well as
more sophisticated and advanced material. Due to circumstances,
I spent quite a bit of time reading the various books without
being in front of the computer. This method turned out to
be very beneficial. In addition, the Maxon site has a tremendous
number of tutorials, tips, and tricks available. See
http://www.maxon-computer.com/usa/index.html
 At
this point in the review, I want to share with new perspective
users what the product actually does and with older users
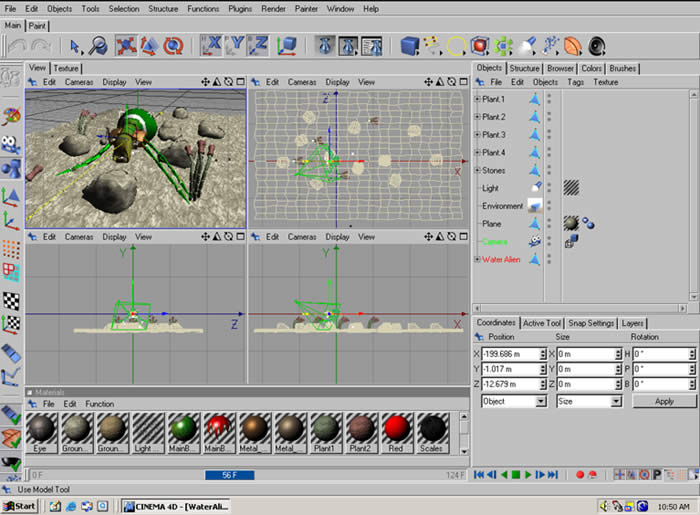
what new features version 7 has. Firstly, a look at the interface
is always useful. If you click on the screen at the left,
it should bring you to a large screen shot of the interface.
The interface is set up in the default position. This will
be discussed later in the review. The screen, in my opinion,
is well laid out. The tools are easy to identify, especially
since they have fly out labels. There are many configurations
available in order to model, light, and animate your figures
and scenes. You can continually switch from one view to the
other as you work depending on which part of the scene you
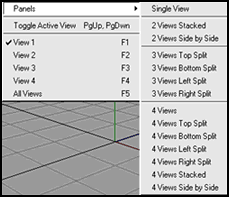
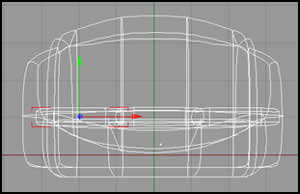
are working on at the moment. The various views are from various
positions along the axes. The view shown below is view 4 which
is looking at an aerial view of a couch under construction. At
this point in the review, I want to share with new perspective
users what the product actually does and with older users
what new features version 7 has. Firstly, a look at the interface
is always useful. If you click on the screen at the left,
it should bring you to a large screen shot of the interface.
The interface is set up in the default position. This will
be discussed later in the review. The screen, in my opinion,
is well laid out. The tools are easy to identify, especially
since they have fly out labels. There are many configurations
available in order to model, light, and animate your figures
and scenes. You can continually switch from one view to the
other as you work depending on which part of the scene you
are working on at the moment. The various views are from various
positions along the axes. The view shown below is view 4 which
is looking at an aerial view of a couch under construction.
 |
 |
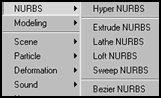
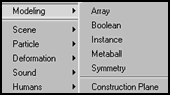
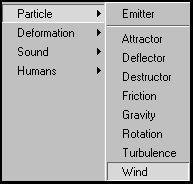
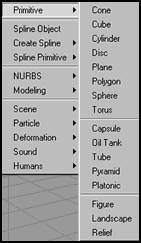
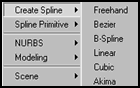
As stated before, the product is used firstly to create an
object. Below are the menus and sub menus of the types of
objects it it has available for the creation of models.
|
Main Object Menu
|
Sub Menu
|
Sub Menu
|
Sub Menu
|
 |
 |
 |
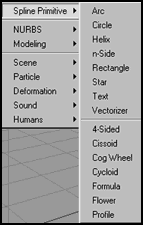 |
A glance at a few of the other sub menus, will give the experienced
user a feel for some of the straight forward options.
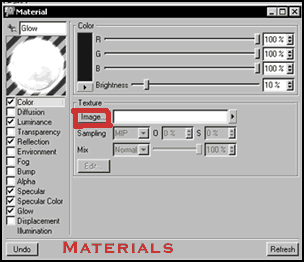
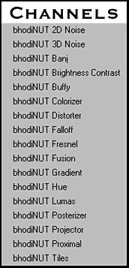
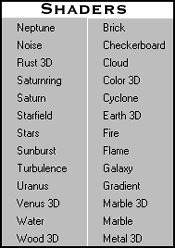
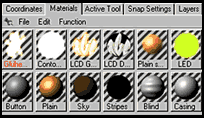
Once a model is built, it is very easy to add a material
to it. If you look at the full
screen capture, you will see the materials menu. As shown,
it can be docked and undocked. The materials menu allows for
a lot of flexibility and creativity. The Image button will
bring up the BhodNUT Channel menu and The Shaders menu. In
addition, Maxon's Body Paint
3 D can be integrated into Cinema 4D XL7. See my
review on this great program.
Especially with 3D programs, I like to see what file formats
the program supports or is contained in associated plug-ins.
This gives me one indication of the flexibility of the program.
The following formats can be imported or opened
in Cinema 4D XL 7.
- Cinema 4D scenes (.c4d), catalogs (.cat), preferences
(.prf).
- DXF to AutoCAD R12
- QuickDraw 3D (.3dm) binary only, not ASCII
- VRML V1 and V2 (.wrl)
- 3D Studio R4 (.3ds) including materials, light sources,
textures, and animation
- Wavefront (.obj)
- LightWave 3D (.lwo and .lws), lightWave [6] objects (including
textures, UV coordinates, weight maps) and scene files (including
lights, camera focal length) can be loaded
- DEM scenery files (.dem)
- Illustrator paths as polygons (.ai, .art, .eps)
The following file formats can be exported or saved
even though not all material will be saved completely.
I will not go into the various settings or characteristics
that these formats will engender.
- 3D Studio Max R4 (.3ds) although not all parts of the
format will be readable. Some might need to be reconstructed.
- Direct3D / DirectX
- DXF (.dxf)
- QuickDraw 3D (.3dm)
- VRML 1 and 2 (.wrl)
- Wavefront (.obj)
- XML Cinema 4D XL R6
If you know you are going to want to either import or export
a specific format, check in the forums for people who have
used that format.
The first time I opened the program, it got a thumbs up.
I have two monitors and wanted to save many of the palettes
on my secondary monitor. Not only could I set up this new
GUI, but I had choices whether I wanted to save it and name
it, use it as a default, etc. Both the reference manual and
the tutorial book refer to the ease and flexibility of the
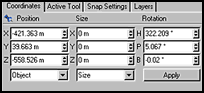
GUI for this program. Were they right! In the example below,
for this one particular scene, I decided I wanted to move
the Materials together with the Coordinates, Active Tools,
etc. Unless I saved it, which I could, when I reopened Cinema
4D, it would appear in its default location.
|
Original Docking Position
|
Customized Position
|
 |
 |
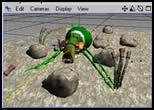
Even without animation, I believe this program can create
wonderful models. But animation is at the heart of the program.
Animation is a many fold process; for the newbe, it isn't
just moving a character, but also, moving lights, moving cameras,
changing angles, etc.
Cinema 4D XL 7 handles various types of animation such as
inverse kinematics, keyframe, bone, path animation using splines,
etc. It is difficult to describe the wide array of animation
features available. The above list demonstrates only a few
of the techniques available in version 7.
With so many options available, it is hard not to get carried
away and end up with too many exploding objects through the
use of the new deformation plug-in, Explosion FX, and too
many flying lights and camera. Even for the newbe, learning
to use the lights, camera, and timeline are not that difficult
because of the step by step process in the tutorial manual
that comes with the program.
Two factors that increase the realism of objects are the
new shaders and the new antialiasing features that take out
the jaggies. Us 2D artists have long benefited from this technique,
This program has instituted a few different forms of antialiasing
to get the best final renderings possible.
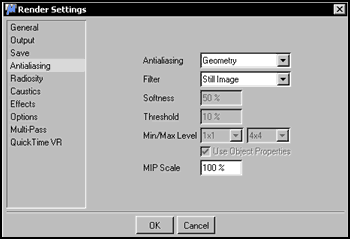
The last major section to discuss is the Rendering Module.
Since I was not familiar with an earlier version of this product,
I had to research to see that this area received the majority
of the improvements, or so I have read.
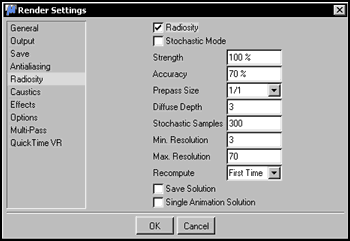
Cinema 4D XL 7 offers a number of rendering modes. These
are: Raytracing, Radiosity, Wireframe, and Comic Rendering.
The setting when using Radiosity can be cached so that future
renderings need not be recalculated. The speed of these renderings
is quite amazing.
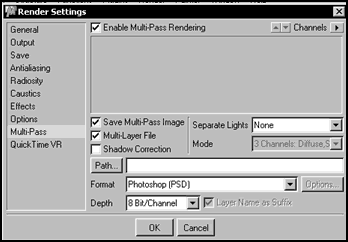
A major innovation to this program has been multi-pass rendering.
I will admit that I have not had to use this feature, but
I will describe it. It involves rendering different aspects
of the final image in separate layers so that these layers
can be altered individually.
Imagine, one can create a group of figures from scratch.
Put them in a mystical environment that you have created.
Paint that environment. Set up lights that can fluctuate with
time. Write a script that has action, movement, etc. Have
cameras that can move as well as figures and terrains, if
desired. And you have created, produced, and directed your
own animated movie! I believe this to be a really wonderful
package that can be learnt step by step even if you are a
beginner. If you are experienced in the field of animation,
then you know the potential that Cinema 4D XL 7 has to offer.
People in the Poser community are always excited about ways
to integrate Poser figures and, in this case scenes and even
animations, with other products. There is a Poser Pro Pack
plug-In for Cinema 4D that is really great. To find out more
about it, see the corollary two mini-tutorials on it: Modifying
Poser Hair in Cinema 4D XL 7 and Modifying
a Poser Figure in Cinema 4D XL 7
In addition, just a note. Often I have found it useful in
Poser to either export and then import a reworked .obj Wavefront
file. Cinema 4D XL 7 handles these files beautifully.
I really found working with this program great and believe
it to be a dynamite program.
|