e-on software has just released three modules which in addition to Mover 5 and, of course, Vue 5 Esprit will comprise Vue 5 Pro Studio. These modules are reasonably priced and depending upon what versions of Vue you already own, the prices will vary. Thus, I am putting a link to e-on's website and not quoting any prices. The three modules are Botanica, LiteTune, and DeepAccess. This review will cover Botanica.
Botanica is a solid growth plant editor. It is used to modify and create new plants through modification of their foliage, branches, and tree trunk. However, one can also create new foliage for both plants and trees as well as create new plant species by saving the plant in that fashion. Since some people who are familiar with the Vue products, might ask how it differs from the version in Vue 4 Professional, I downloaded a demo. All I could tell from a cursory glance is that it is the same minus the movement of the wind being able to affect the foliage.
Instead of describing Botanica and then creating a tutorial using similar pictures, I decided to merge them into one. I believe this will give the reader a better way to see how it functions and within what parameters.
Even though e-on has a Flash tutorial on creating plants, I decided to create one from a different angle. I wanted to demonstrate how to initially create your own leaf and proceed from there. I, also, felt that a tutorial that could be downloaded was helpful. You will notice that this is different from the Flash tutorial.
For those only wanting a review, I can say immediately that I was able to achieve what the program stated could be accomplished. Everything went smoothly and after doing a lot of experimenting, I have coalesced my work into this tutorial.
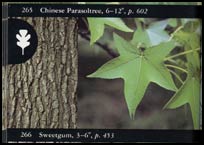
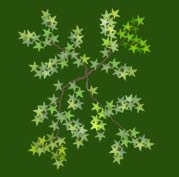
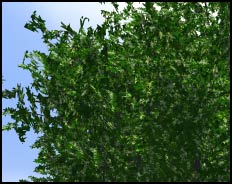
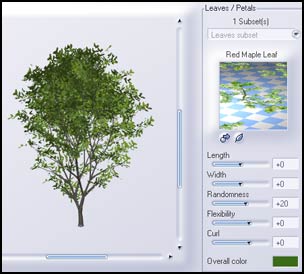
I started out wanting to make a Sweetgum tree. I chose a Maple tree as a base because of all the trees available to work on in Vue 5 Botanica, its branch structure was the most similar. However, if you look at the picture it really isn't the same. Since I am not creating a book on trees, it really was not too important to me either. The method of working with Botanica is more important.
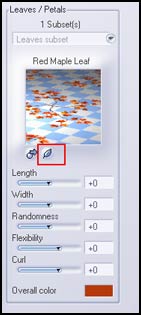
Firstly, I worked on the trunk. Notice the #1 near the red box. I kept downloading trees until I fond one that satisfied me. Each time one downloads a new tree of the same kind, it will look different. Next, look at the blue box #2 and #3. Number 2 gives the user preview options of auto render or OpenGL. Number 3 is for rendering. Below it is set for OpenGL. When I want it rendered, I will select the icon above #3.
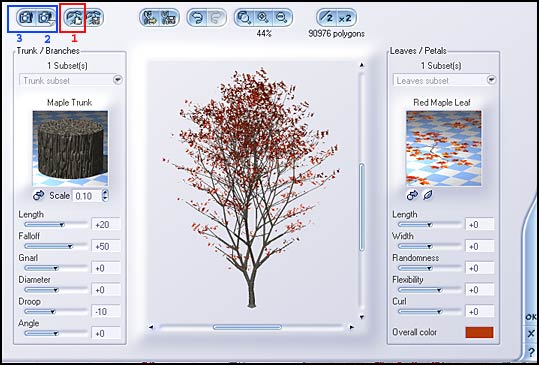
At this point I suggest reading the excellent Botanica PDF that came with the module. It is 20 pages and will describe what all the controls under Trunk/Branches do. There is no need to reproduce the manual here.
After I set the controls for Trunk/Branches, I changed the color of the trunk and made it grayer. Right click on the picture of the tree trunk to get to the Edit Materials menu . Then, right click again on the color in the Color Correction box and choose Edit Color. Lastly, I changed the bump map. I right clicked on the sphere in Color Production and then chose Edit Function. The last step was really not important for the overall look of the tree and I could have skipped it.
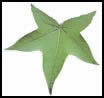
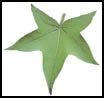
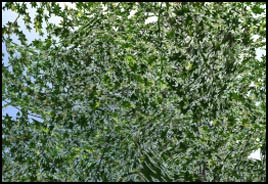
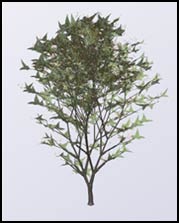
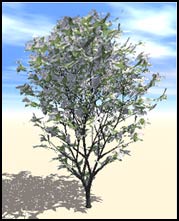
Once I was satisfied with the trunk and the branches, I had to create a leaf. Initially, I took the Sweetgum leaf in the uppermost right picture and used it and the alpha image I had made; however, I learnt for trees this did not work well. The leaves just stuck to the branches and didn't create more smaller branches which are necessary. The pictures below show two screen shots of the tree made with an individual Sweetgum leaf.
| OpenGL Preview |
Rendered Preview |
 |
 |
I examined the tree leaves in Botanica and noticed that all the tree leaves were set up the same way, so I created a template using a screen shot of one of their's. However, I changed the dimensions of the screen shot so that the file was large enough to work with comfortably.
| Screen Shot of Leaves in Vue 5 Botanica |
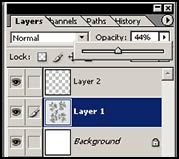
Layers in Photoshop CS |
Template in Progress |
 |
 |
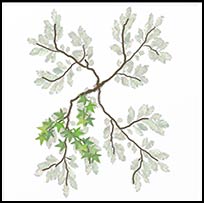 |
Once I had all the leaves placed on one branch, I merged them together and copied and rotated that branch to fill up another branch. In between, I changed the color of the individual leaves and rotated them to fit the branches. I made about 4 separate branches and then reused them by cutting and pasting.
The next step was to color the background a darker version of the leaves. I had tried white and this worked better. This is what was done in Vue 5 Botanica.
Once this was complete, I constructed my Alpha Image. Two images are necessary - a Color Image and an Alpha Image. When an Alpha Image is brought into Botanica, it cannot have any transparent pixels. The following is the best way I discovered to create an Alpha Image; however, there are many ways to do it. I am using Photoshop CS on a PC.
I took the image on the above left and did a Color Range set at 1 of the white background. I used a low number because I did not wanted to have to remove transitional pixels from both the background layer and the image. This did give me eventually a slightly larger Alpha Image than Picture Image. But it seemed to work correctly. (I could have chosen a higher number and eliminated transitional pixels from both the white background layer and the Alpha layer.) I did not delete the selection, but inversed it.
If you created your Picture Image of leaf branches or of an individual leaf, it should be on its own layer with a transparent background. Do a Select>Load Selection and you will notice some transparent pixels are selected and some are not. Next, I created a third layer, selected it, and filled it in with black with the Paint Bucket Tool. I set the Tolerance of this tool at 255. The higher the tolerance, the more the fill will cover. (The tolerance slider for the Paint Bucket is in the top tool bar.)
| Selection |
Addition of New Layer Filled |
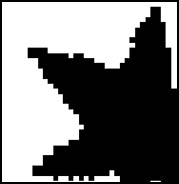
Elimination of Transparent Pixels - Bitmap |
Alpha Image - RGB |
 |
 |
 |
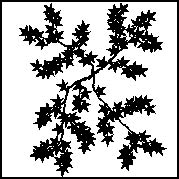 |
To get rid of any semi-transparent pixels that still remained around the black image or Alpha Image, I first unselected it and, then, changed the mode of the image to grayscale without flattening it. Once in grayscale, I changed it to a bitmap with a 50% threshold. Notice above how all the transparent pixels have been removed. I, then returned the mode to grayscale and, finally, RGB. In Vue 5 Botanica, once the Alpha Image is loaded, a screen will pop up stating that there are transparent pixels. I ignore it.
The next step I did was to change both images into jpg's and load them into Vue 5 Botanica. First, I will select the New Leaf icon.
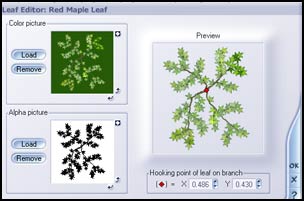
I will remove the old images before I load the new ones. The images I will load first are 500x500 pixels jpg's saved at high. In the image on the left, the little red marker in the middle of the Preview Window shows where the leaf stem meets the tree branch. It must be set correctly. I used the models as guides.
| Loaded Images |
New Image OpenGL mode |
 |
 |
I tried a number of different settings for creating the trees. For tree #1, I used a picture and an alpha image of 500 x 500. Both were jpg's at a high setting. For the second picture, I used a 400 x 400 jpg at a high setting for the picture and an alpha image in the form of a bmp of 400 x 400. There was a difference in quality. One needs to experiment.
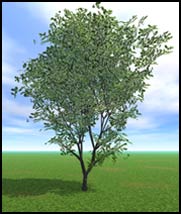
To just add a few more comments about trees. While I created my own leaf grouping (for lack of a better term) and changed the leaves, with most scenes, one can just modify a tree that has already been created in Vue 5 Botanica and get very satisfactory results. I only presented the more complicated way of creating a tree, to demonstrate how it can be done, should someone want to do it.
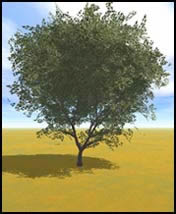
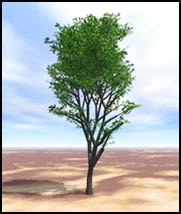
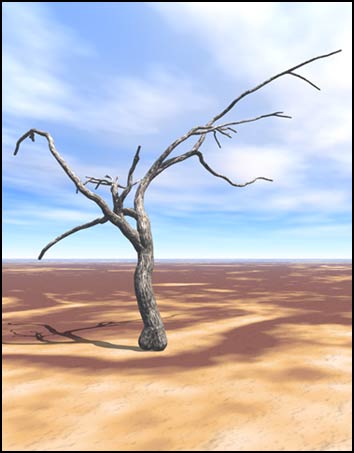
I wasn't able to tell from the trees I was creating whether the bark textures were apparent. I chose the dead tree and modified the texture of the bark mainly in the function section of the Material Editor. What I did is not relevant; I just wanted to see if the texture would show. You can see from the image that it did. However, the tree would need post work done on its base to make it an integral part of the ground. In a group of trees with other foliage, rocks or grass, this would not be noticeable.
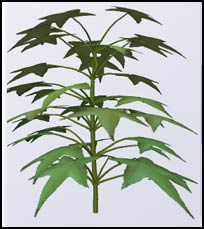
Now, on to bushes. I, used just a Sweetgum leaf, since I had it, to change this bush. The two pictures before and after are screen captures.
| Aralia |
Sweetgum Leaf |
 |
 |
I enjoyed working with Botanica and found that there were a lot of creative things I could do to plants.
© Paula Sanders 2005
|